- Home
- ...
- Data Sources
- Creating and Deleting Data Sources
- Create a data source
- Test the database connection
- View existing data sources
- Filter data sources with the search tool
- Edit data sources
- Delete data sources
Creating a new data source
To create a new data source, access the Data Sources screen and click + DATA SOURCE in the upper right corner of the screen. Then fill in the requested fields.
Creating a new data source takes place in 3 steps:
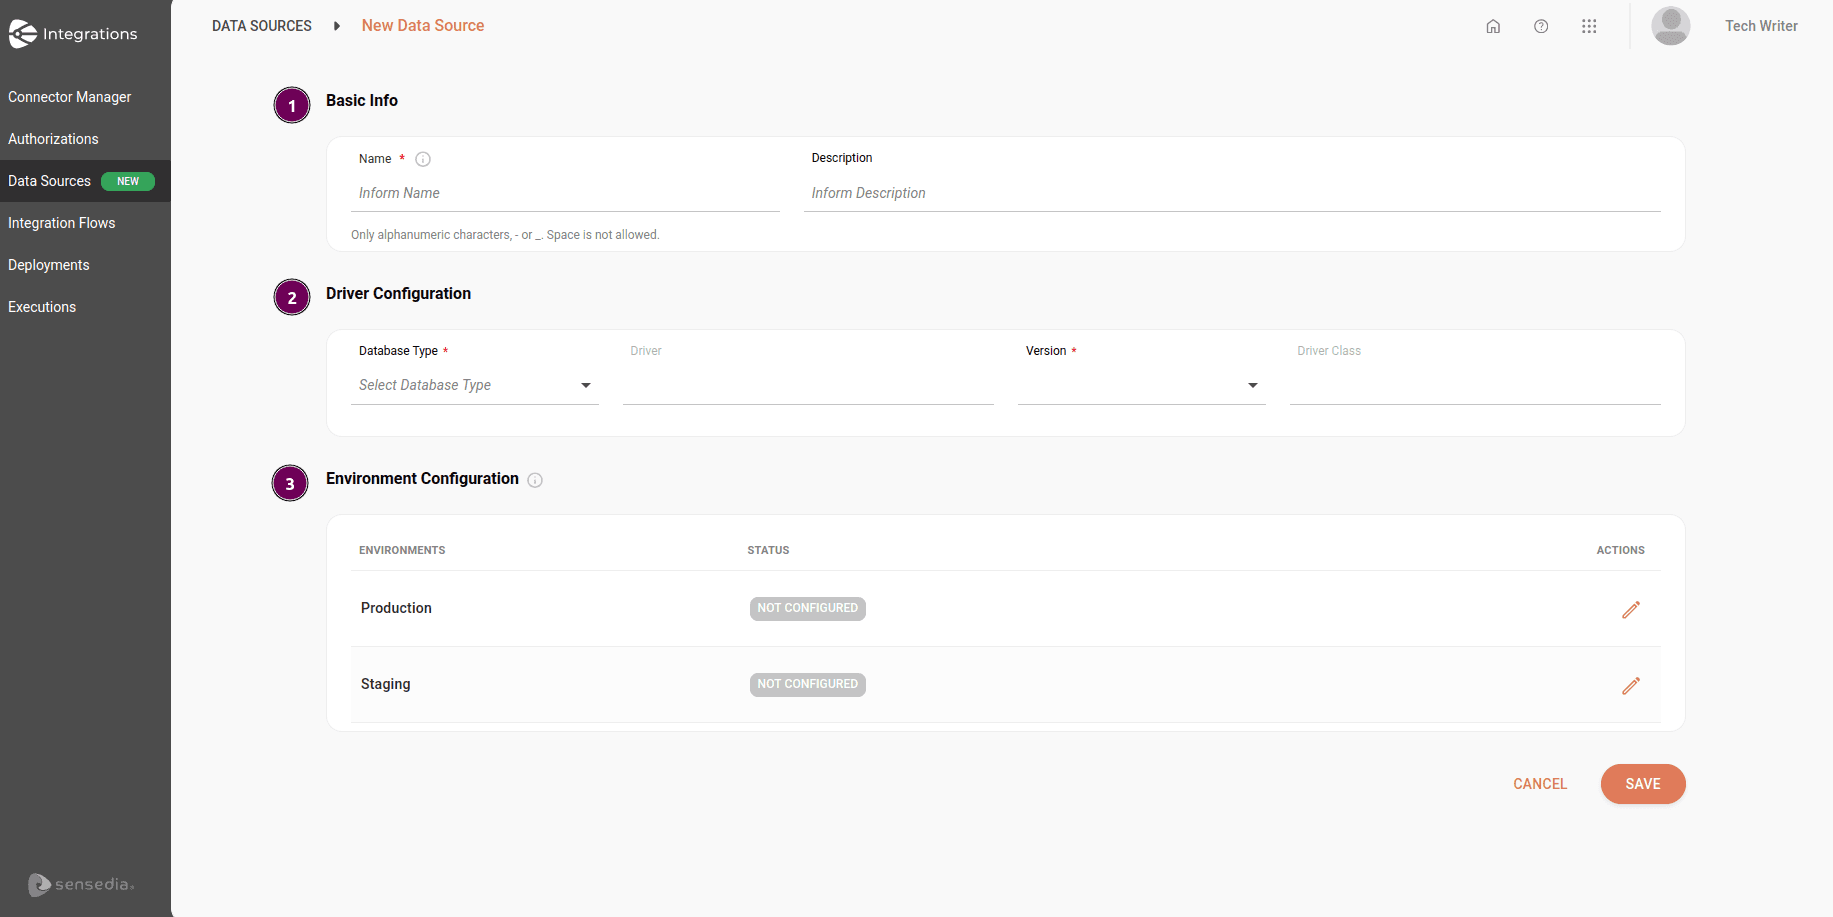
Recording basic database information
-
Name: unique name that will identify the database. This name will appear in the list of available databases when creating the integration flow.
- Limit of 100 characters.
- Only alphanumeric characters, - or _ are allowed.
- Space is not allowed.
-
Description: database description. Limit of 1024 characters.
Configuring the driver
- Database Type: select the database to be configured.
- Driver: field loaded automatically according to the database selection. It is the file that contains the JDBC implementation for a specific database. Editing this field is not allowed.
- Version: select one of the available database versions. This field is only enabled after selecting a database.
- Driver Class: field loaded automatically according to the database selection. It is the full name of the Java class within the driver that Camel uses to initialize the connection to the database. Editing this field is not allowed.
Configuring the environment
To configure the environment, click the pencil icon on the right, in the Actions column. You can configure the same database for one or both available environments.
Basic properties
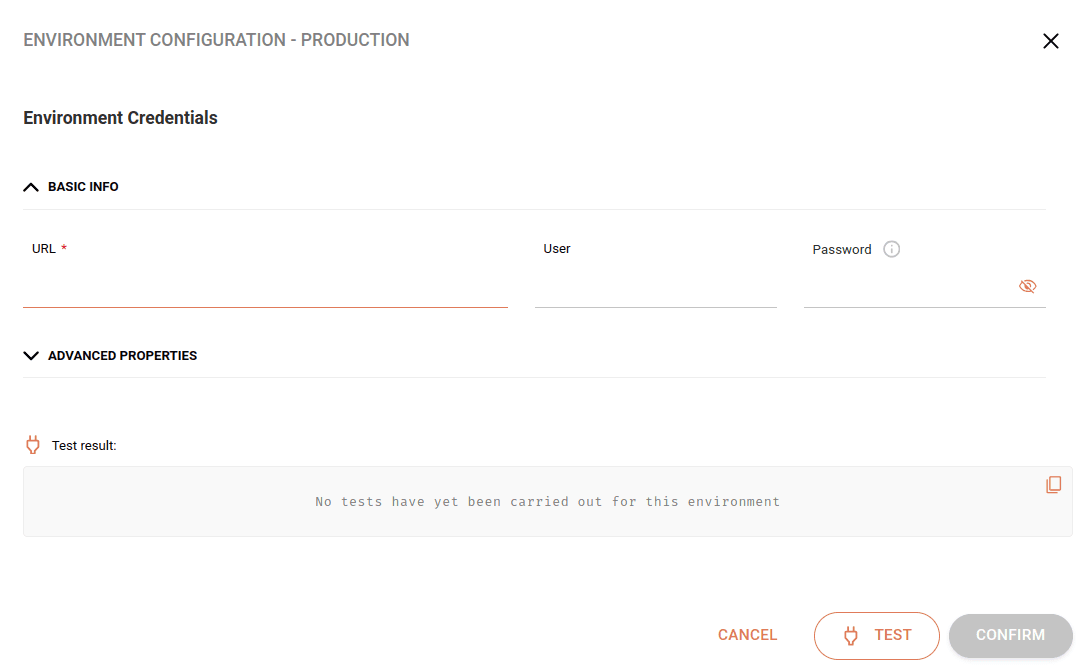
You must fill in the fields with your database access credentials. Then click CONFIRM.
- URL: connection URL
- User: username
- Password: access password
Advanced properties
The advanced properties of data sources allow more detailed control of the JDBC connection pool, as well as enabling specific adjustments to the connection behavior. This helps improve performance, increase resilience to network failures, and optimize costs.
IMPORTANTAdvanced properties are applied individually in each environment.
TIPThe advanced properties configuration fields display default values.
The table below describes the available advanced properties:
Connection Validation
NOTE
- The advanced properties configuration fields display default values.
- The maximum limit for each field is 15 numeric digits ("Initial Size", "Max Total", "Max Idle", "Min Idle", "Max Wait Millis" and "Validation Query Timeout").
- Negative values are not allowed, except in the "maxTotal", "maxWaitMillis", and "maxIdle" fields.
GOOD PRACTICEWe recommend setting the "validationQueryTimeout" field (Connection Validation)for each driver, as it allows for quick identification of connection issues and prevents unnecessary delays in the execution of integrations.
After completing this step, confirm the information.
Testing the database connection
Before saving the environment settings, you can test the database connection by clicking the TEST button at the bottom of the configuration window. The test immediately validates whether the platform can communicate with the data source, using the credentials and parameters you just entered — without running a flow.
The test considers only the values currently filled in the form, disregarding data already saved in case you changed something on the screen. Each environment (Staging and Production) is tested independently, respecting its specific network settings.
Fill in the basic properties
Enter the URL, User, and Password for the desired environment. The TEST button is enabled only when these required fields are filled in.
Click TEST
During the test, the button enters a loading (disabled) state to prevent repeated clicks. The maximum time for the connection attempt is 30 to 45 seconds.
Check the result
On success, a confirmation message is displayed. On failure, a clear error message is shown to help with diagnosis, with a copy icon next to it so you can share the log with your database or infrastructure team.
IMPORTANTA successful test does not save the configuration automatically. Click CONFIRM to save the form data.
NOTEWhen editing a data source that already has a configured environment, for security reasons you must re-enter the password to test the connection. The platform shows the message "For security reasons, enter the password to test the connection.".
Viewing existing data sources
The Data Sources screen displays all created data sources. You can choose the display format in list or card format by clicking the respective icons in the upper right.
The image below shows existing data sources in list format:
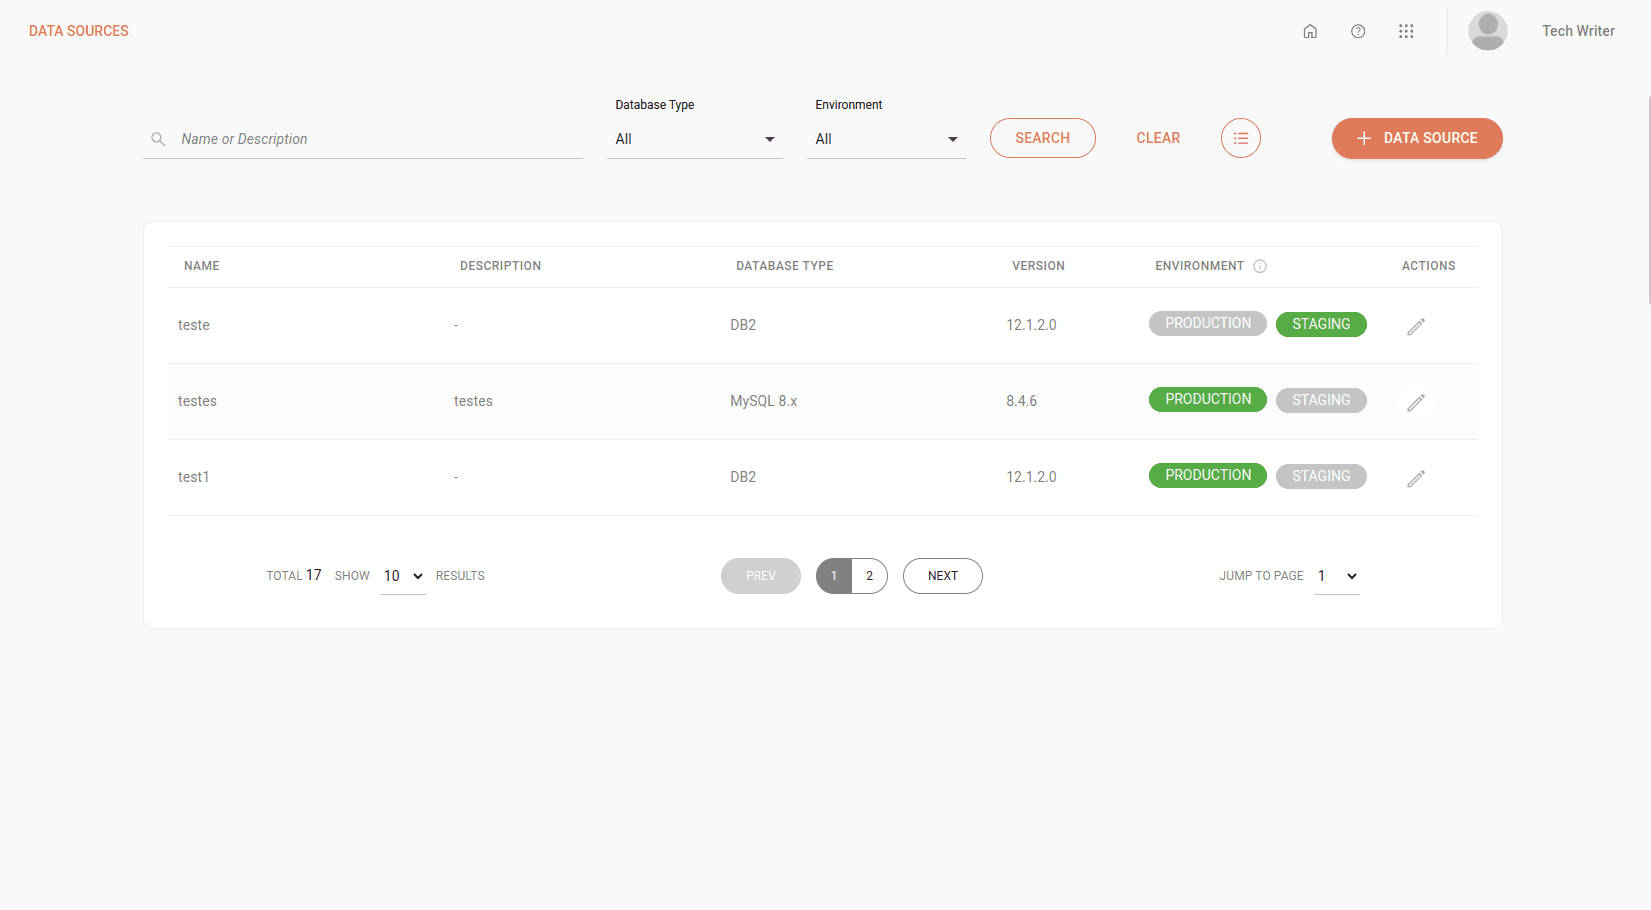
The following information is available for viewing:
- Name: name used in the database registration.
- Description: database description.
- Database Type: type of database (Azure SQL, DB2, Firebird, etc.).
- Version: database version selected during registration.
- Environment: environment in which the database is configured, indicated by green color.
- Actions: click the pencil icon to edit a data source.
Filters
At the top of the screen, you can search for data sources using the following filters:
- Database Type: type of database (Azure, DB2, Firebird, etc.).
- Environment: Production and Staging.
To search for a specific data source, type the name or a word from the flow description in the search box and click SEARCH.
Editing a data source
To edit a data source, follow these steps:
Access the Data Sources screen
Identify the data source you want to edit and click the pencil icon on the right, in the Actions column.
On the Edit Data Source screen, edit the desired information.
At the end of the editing, click SAVE.
NOTEIt is not possible to edit the database name in the Name field.
IMPORTANTIf you edit a data source linked to a deployed flow, the flow must be deployed again.
Deleting a data source
To delete a data source, follow these steps:
Access the Data Sources screen.
Identify the data source you want to delete and, in the corresponding row, click the trash icon in the Actions column.
To confirm deletion, click YES. After deletion, the data source will be permanently removed.
Alternatively, you can delete a data source by accessing its editing screen and clicking the trash icon in the upper right corner of the screen.
IMPORTANTData sources that are in use in integration flows cannot be deleted.