---
title: Workflows - Sensedia only
description: Configure workflows, stages, and exceptions for API lifecycle governance.
documentId: adaptive-governance-workflows
locale: en-US
---
-
This feature is exclusive to connections with Sensedia gateways.
**Orchestrate Your API Lifecycle with Workflows**
**Workflows** allow you to define specific requirements for each stage of an API's lifecycle. This way, you can control when and how it can advance.
Each team can create its own flow, with rules and criteria aligned with their practices and objectives. This ensures flexibility without compromising governance.
By centralizing different **Workflows** in a single location, your organization gains visibility and control over the API journey, connecting operations to strategy and making it easier to understand how each team works.
## Quick Links
On this page, you will understand how to:
- **Manage Workflows**:
- [Create](#create-workflow) new workflows.
- [Clone](#clone-workflow) existing workflows.
- [Edit](#edit-workflow) workflows.
- [Delete](#delete-workflow) workflows.
- **Manage Stages**:
- [Add](#add-stage) stages to a workflow.
- [Edit or delete](#edit-delete-stage) existing stages.
- **Configure Exceptions**:
- [Define or remove temporary exceptions](#exception-settings) to workflow rules.
## How Workflows Work and Types of Workflows
With **Workflows**, you define what should happen at each step of the API lifecycle and control the criteria for advancement between them.
We have two types of workflows:
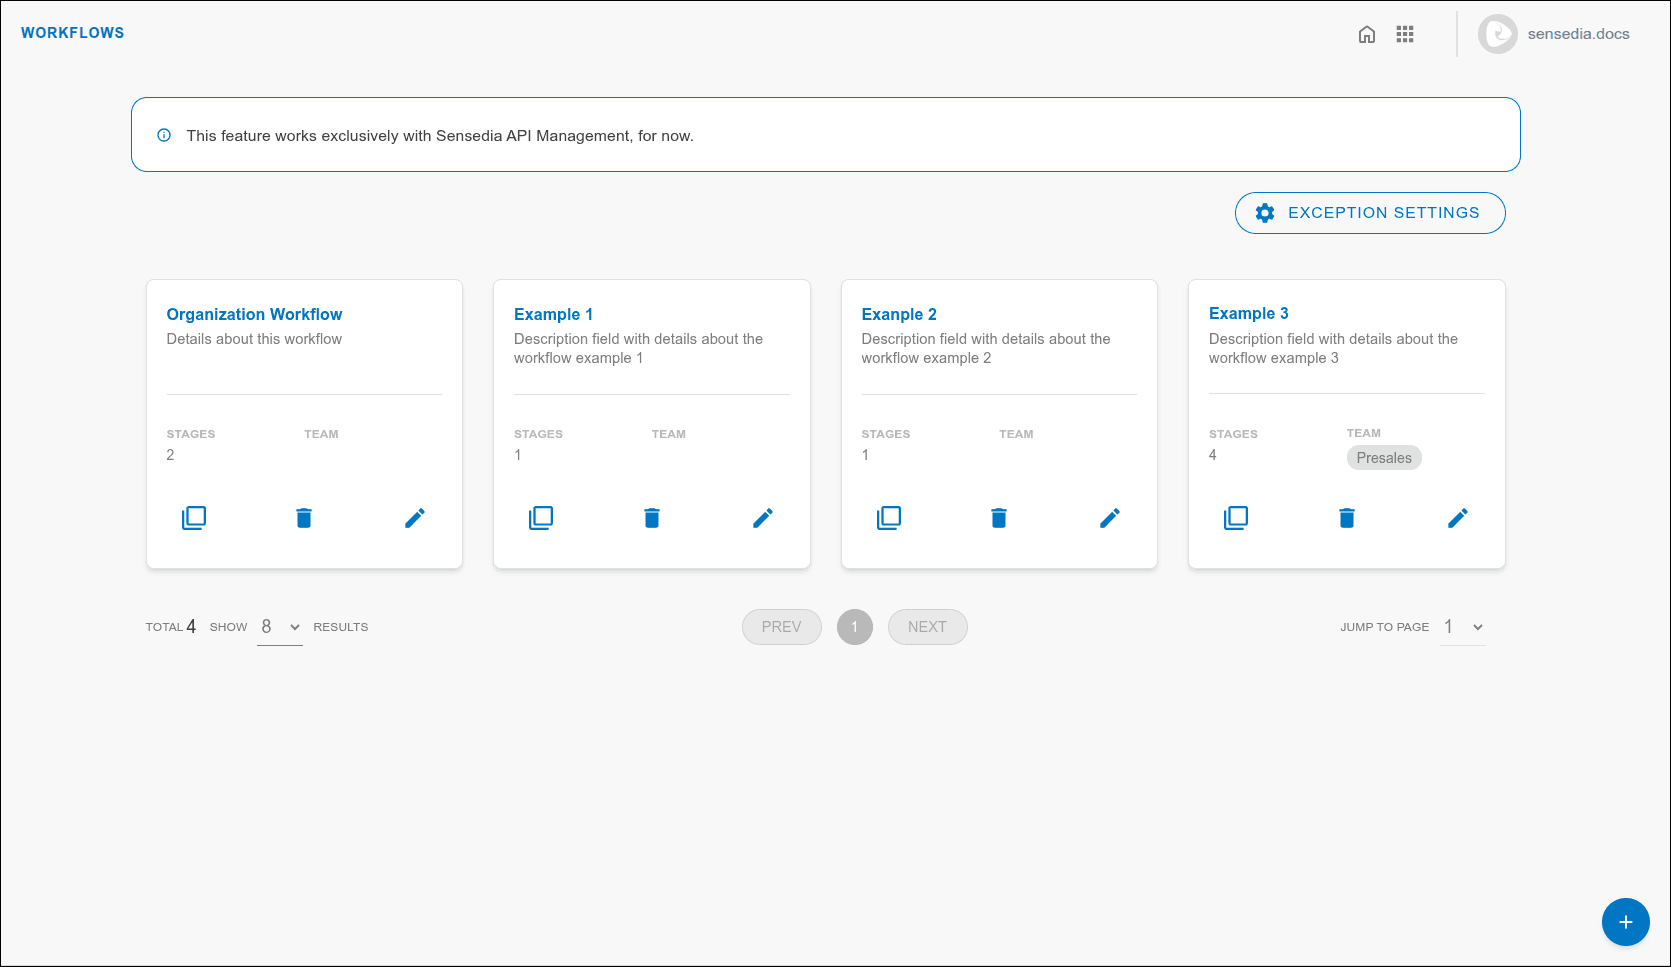
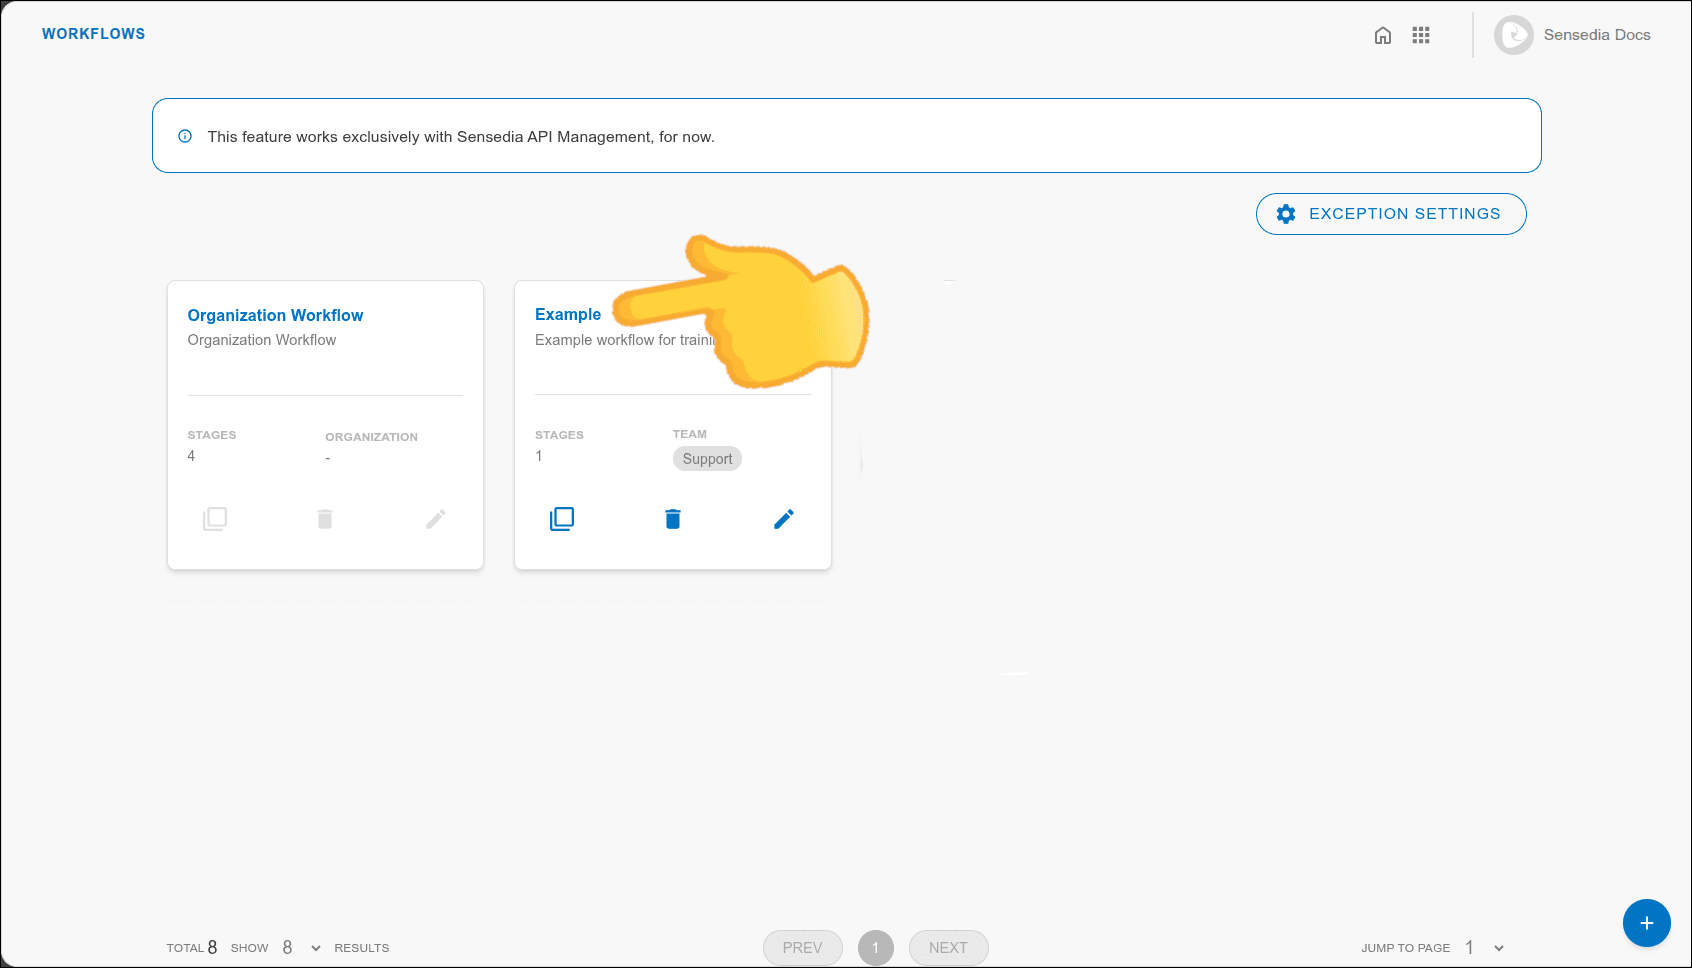
- **Organization Workflow**
This is the general workflow for the company. Automatically applied to APIs that do not have a Team Workflow configured. To ensure control at the organizational level, only one Organization Workflow is allowed.
- **Team Workflow**
Specific to each team. Can be customized to meet the team's specific needs and processes. Multiple Team Workflows are possible, but only one per team.
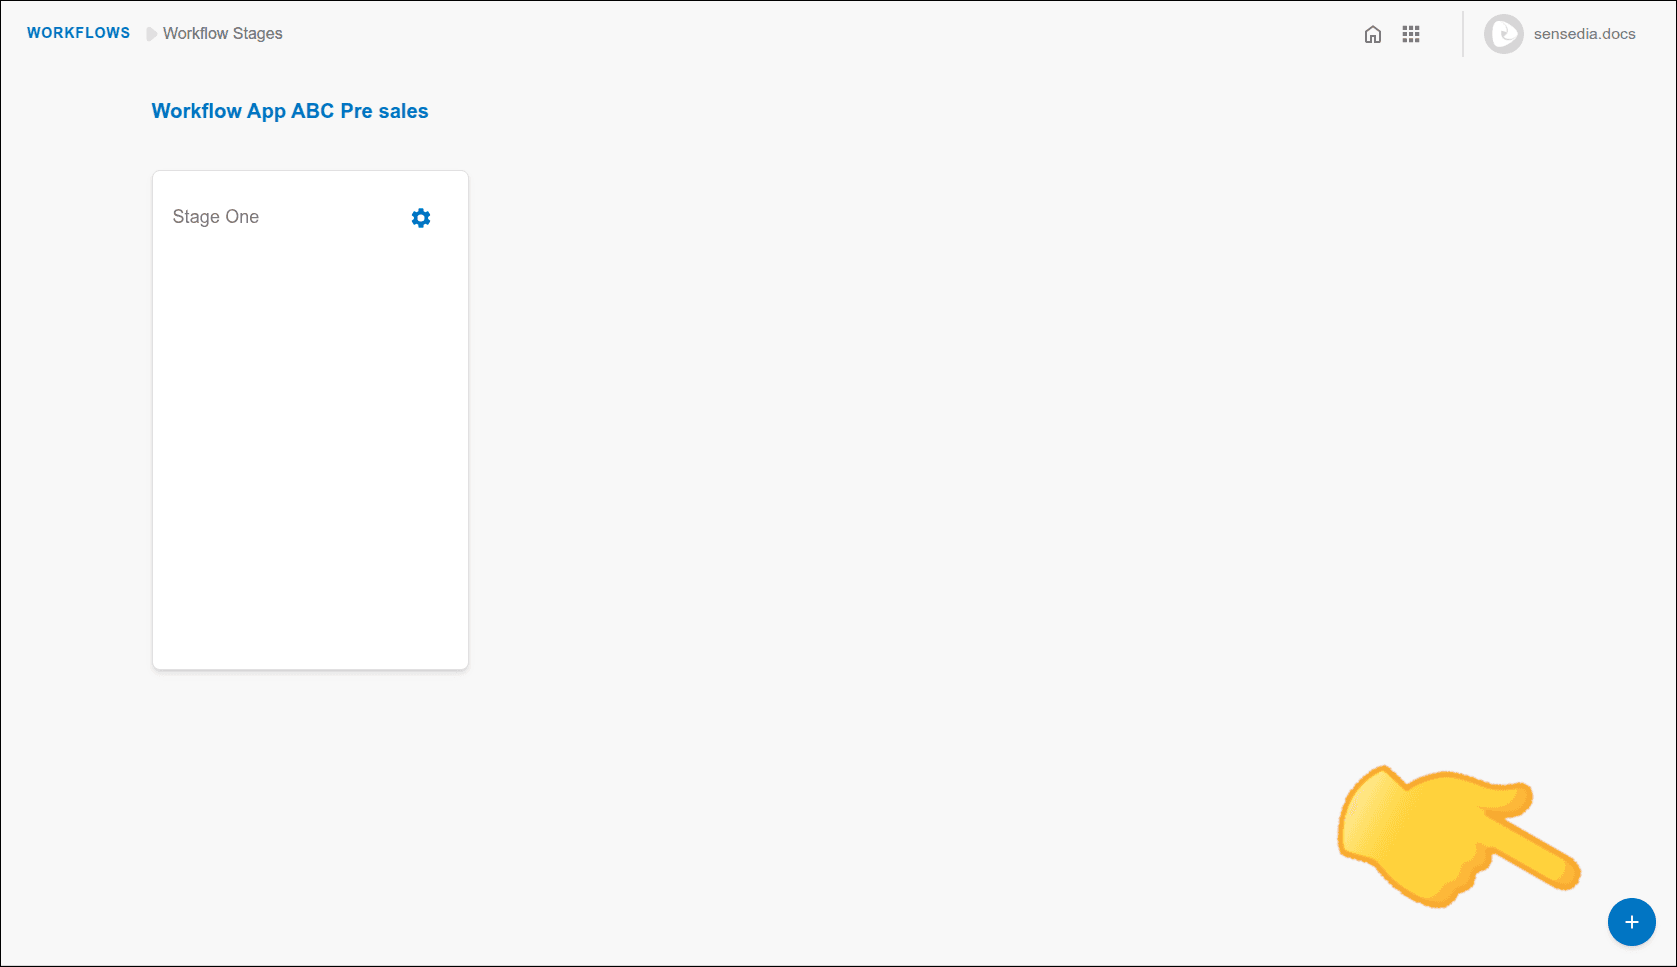
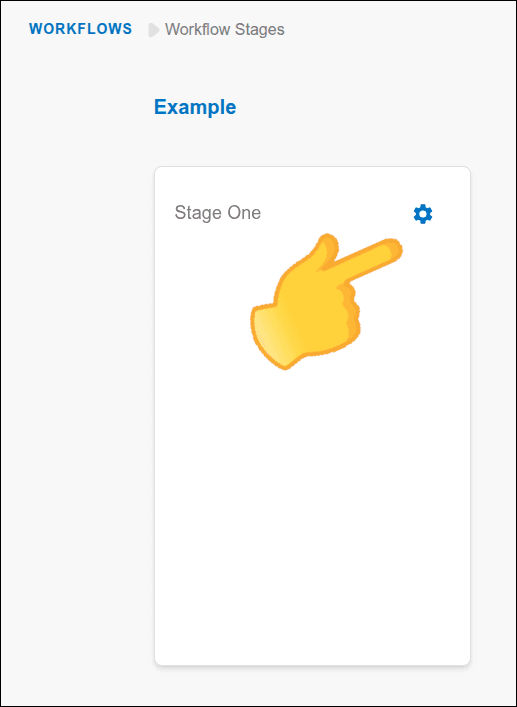
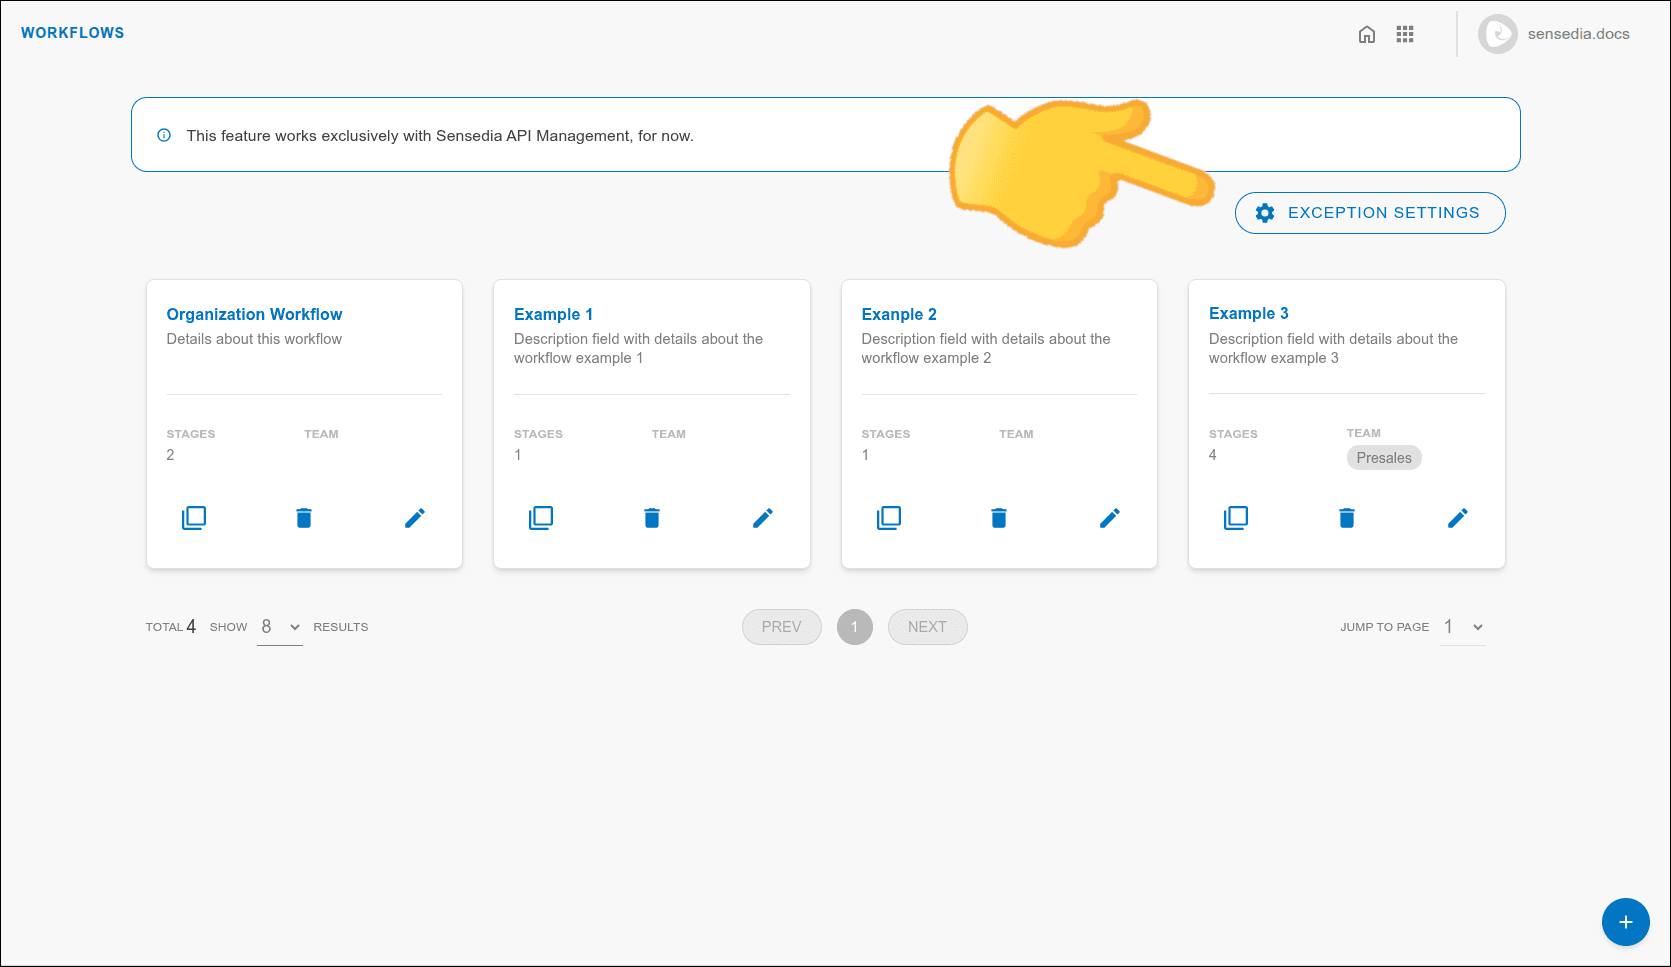
Main screen with workflow examples:
Examples of workflow stages:

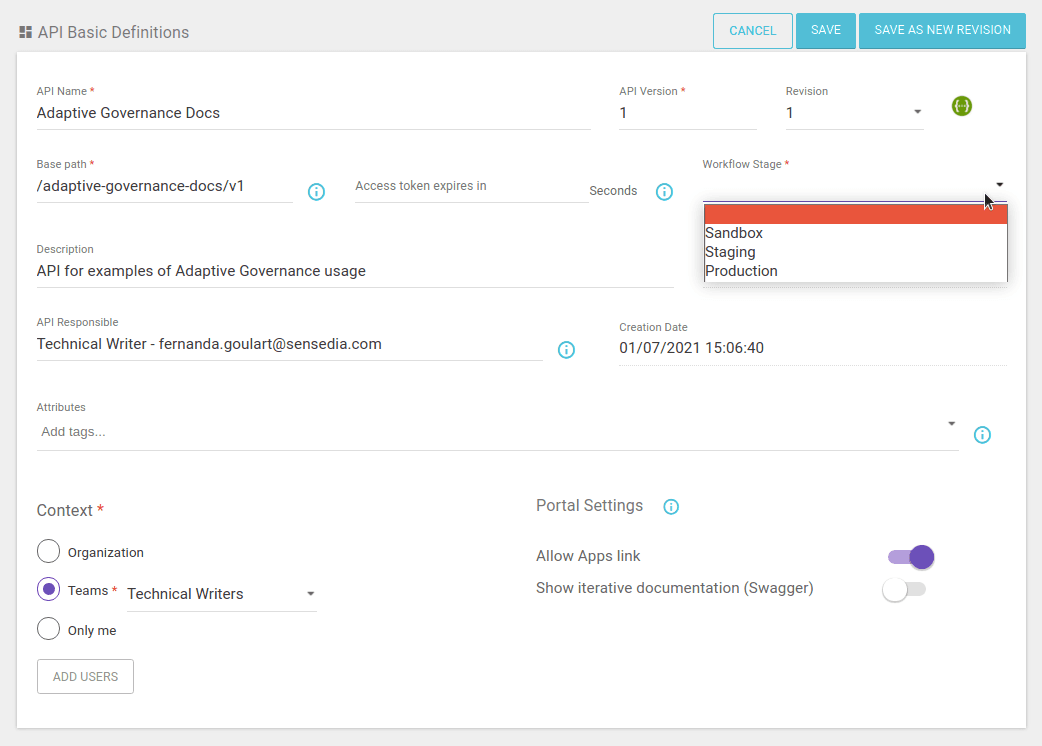
When you [create or edit an API in Sensedia API Platform](/docs/api-platform/creating-apis), you define the API's stage in the **Workflow Stage** field.
An API can only be moved to a stage if it meets the specific requirements for that stage, configured here in the **Workflows** of Adaptive Governance.
You can:
- have only one Organization Workflow, which is created by default,
- have multiple Team Workflows, but only one per team.
Even though each team can only have one main workflow, the same team might execute different processes depending on the type of API (such as corporate, legacy, internal) or the demand (legal, innovation, standard, etc.). In these cases, for each distinct process, the team can be registered multiple times – with different and representative names – so that each registration is associated with its respective workflow.
Example: Imagine an Integrations Team that handles different types of demands. The way their workflows are named can guide the action:
- To meet regulatory demands: Create the "Integrations - Regulatory" workflow.
- To develop new functionalities: Use the "Integrations - New Feature" workflow.
- To manage APIs for internal use: Name the workflow "Integrations - Internal Consumption".
- To migrate old APIs: The workflow can be called "Integrations - Legacy Migration".
## Creating a Workflow
### Step 1
Access the **Workflows** screen.
- Click **Workflows** in the left side menu or on the card on the home screen.
 The order of cards on this screen may vary
### Step 2
Click the **+** button in the bottom right corner.
### Step 3
In the modal window that opens, fill in the mandatory fields:
- **Name**: Workflow name.
- **Description**: Workflow description.
- **Team**: Select the responsible team.
### Step 4
Click **CREATE WORKFLOW**.
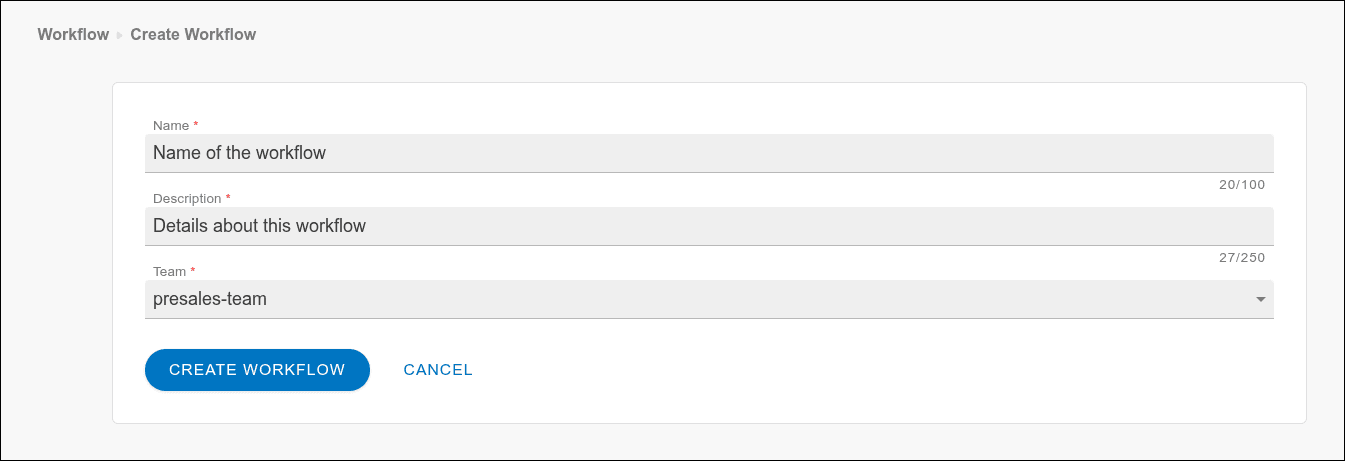
The new workflow will be displayed as a card on the screen.
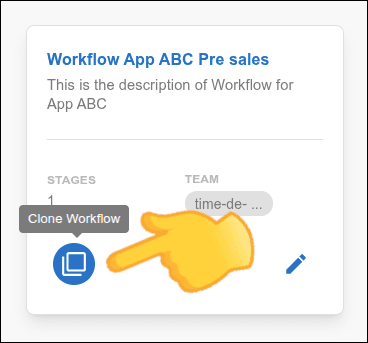
## Cloning a Workflow
You can clone an existing **Team Workflow** to create a new workflow with the stages already configured.
### Step 1
On the _card_ of an existing workflow, click the clone icon.
### Step 2
Fill in the fields: name, description, and team.
### Step 3
Click **CLONE WORKFLOW**.
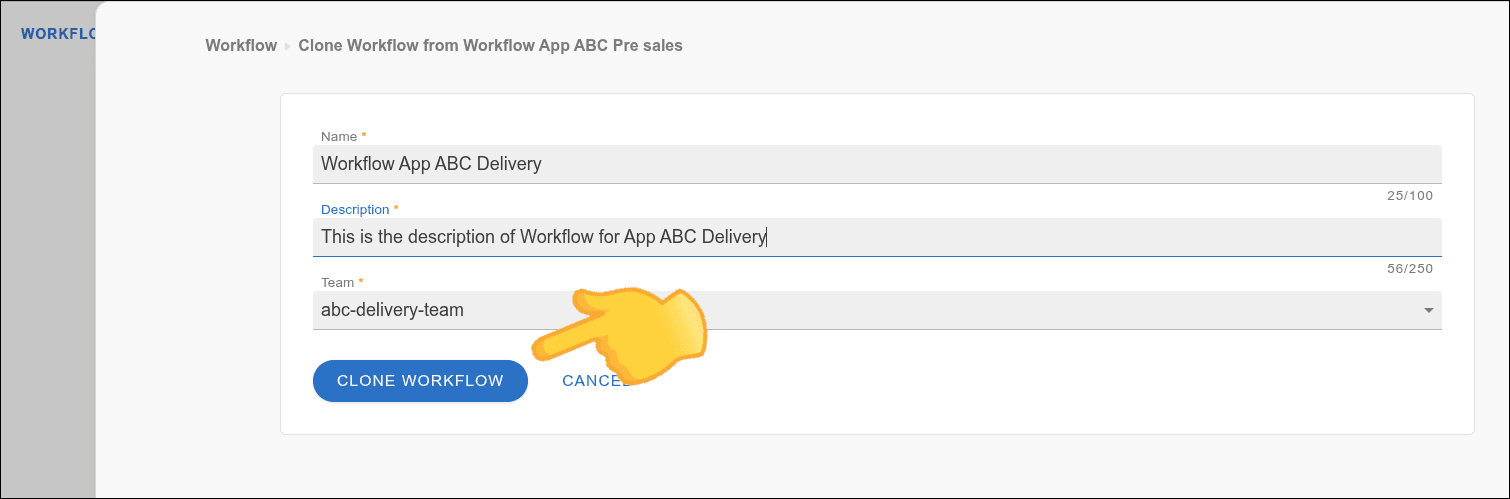
- The **Organization Workflow** cannot be cloned.
- The name of the new workflow must be unique.
- The associated team cannot already be linked to another workflow.
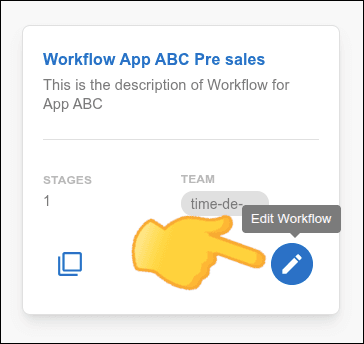
## Editing a Workflow
### Step 1
On the _card_ of the workflow, click the edit icon.
### Step 2
Edit the desired fields in the modal window.
### Step 3
Click **SAVE WORKFLOW** to save or **CANCEL** to cancel.
You **cannot edit** the **Organization Workflow**; you can only configure its stages.
## Deleting a Workflow
### Step 1
On the _card_ of the workflow, click the trash can icon.
### Step 2
Confirm deletion by clicking **DELETE**.
You cannot delete a workflow that has APIs associated with its stages.
## Adding stages to a workflow
Follow the steps below to add a stage to a workflow:
### Step 1
Click the workflow name to open the stage view.
### Step 2
Click **+** in the bottom right corner.
### Step 3
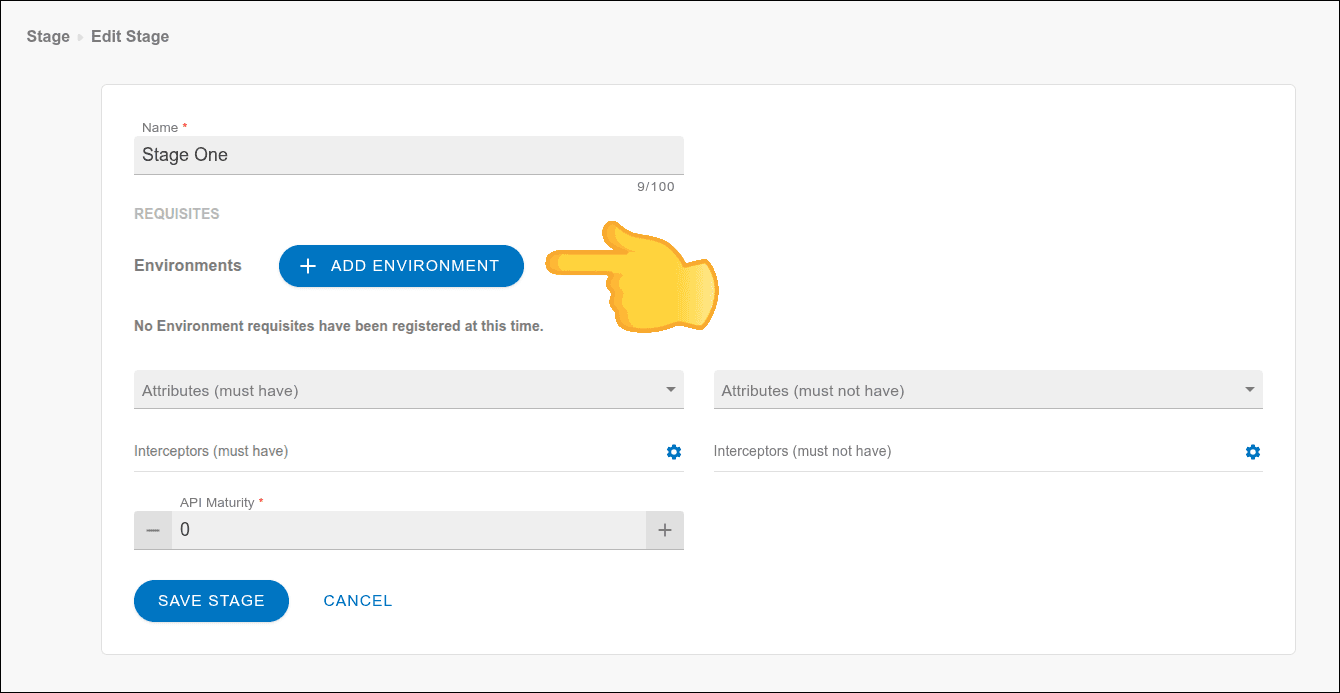
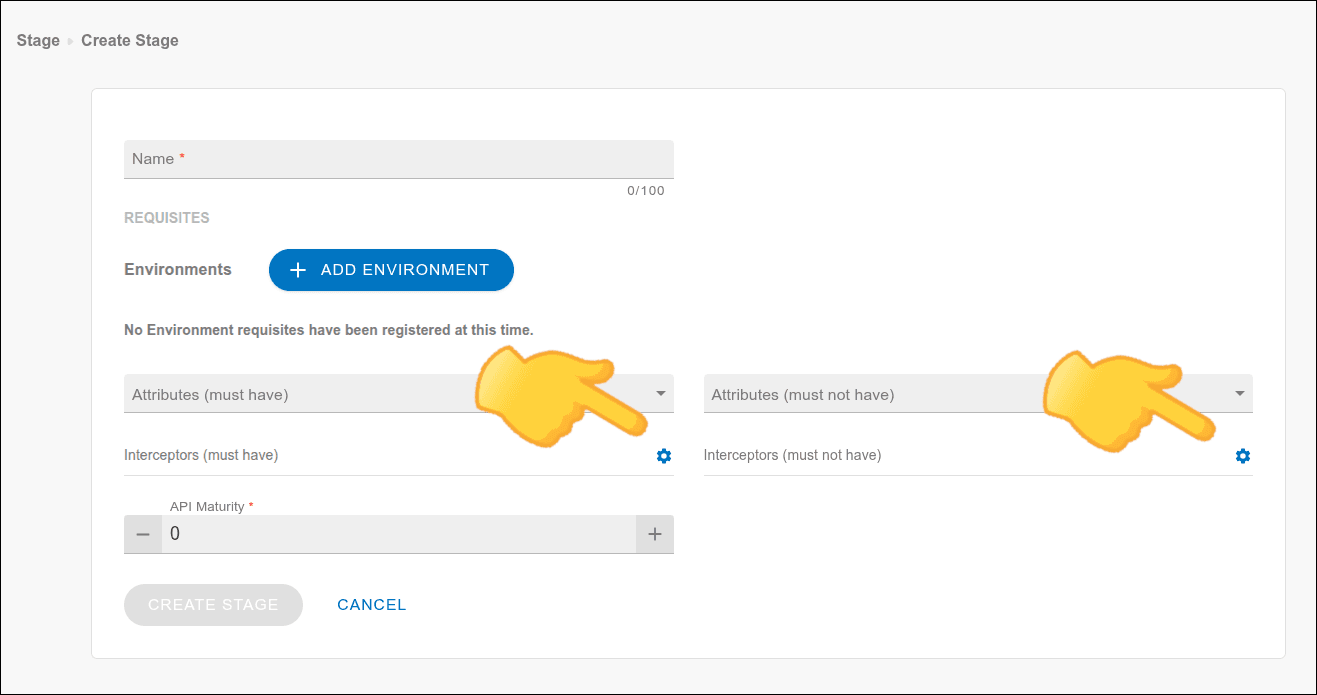
In the opened window, configure the stage by filling in the mandatory fields and click **CREATE STAGE**.
- **Name**: Stage name.
- **REQUISITES**: Conditions for the API to enter this stage:
- **Environments**: Environments where the API must be deployed.
- **Deployable Environments**: Environments permitted for deploy.
- **Attributes (must have)**: Mandatory API attributes.
- **Attributes (must not have)**: Attributes the API **cannot** have.
- **Interceptors (must have)**: Mandatory interceptors in the flow.
- **Interceptors (must not have)**: Interceptors **not allowed** in the flow.
See more details on this [interceptor configuration](#interceptors-settings).
- **API Maturity**: Minimum percentage of [Interface Completeness](/docs/adaptive-governance/ag-interface-completeness).

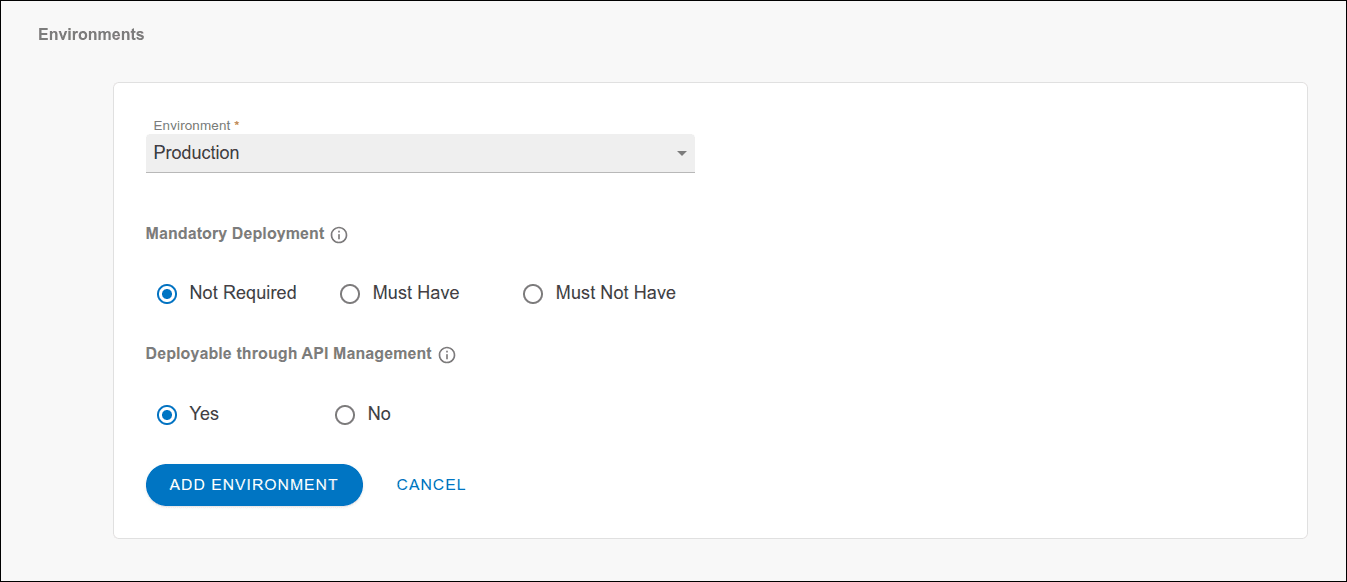
### Environment Configuration
Configure environment requirements and define whether they are mandatory or not allowed in the stage.
It is possible to both make deployment mandatory in an environment (**Must Have**) and **prohibit** deployment in specific environments (**Must Not Have**).
For each stage, you can define these rules for an environment:
- **Deployment Mandatory** or
- **Deployable through API Management**.
To configure a rule about the environment in a stage, follow the steps below:
### Step 1
Access Workflows by clicking on the card on the Adaptive Governance home screen or in the side menu. 
### Step 2
Click on the desired workflow name or [create one](#create-workflow).
### Step 3
On the stage _card_, click the configuration icon.
### Step 4
Click **+ ADD ENVIRONMENT**.
### Step 5
Select the environment and configure the rules:
| **Rule** | **Description** |
| --- | --- |
| **Deployment Mandatory** | Defines the deployment requirement in an environment for the API to advance to the stage: |
| **Deployable through API Management** | Defines whether the environment is available for deployment in this stage: |
- It is not possible to configure **"Not Required"** and **"No"** simultaneously.
- The **Must Not Have** rule is verified during the deploy validation (`/validate`). If the API is deployed in a restricted environment, the stage advance will be blocked.
### Step 6
Once you are done configuring, click **ADD ENVIRONMENT** again to add the configuration.
### Step 7
You will be redirected to the stage card, where you can configure other elements such as attributes and [interceptors](#interceptors-settings)
### Step 8
When finished, click **SAVE**.
### Interceptor Configuration
Configure interceptors and define whether they are mandatory or not allowed for the stage. This helps ensure that APIs follow the standards you define.
### Step 1
Click the settings icon in the interceptor field. To determine interceptors that:
- Are mandatory, click the icon in the "Interceptors (must have)" field;
- Are not allowed, click the icon in the "Interceptors (must not have)" field.
You can switch between "must have" and "must not have" by clicking the selector on the next screen, without having to reconfigure the entire interceptor.
### Step 2
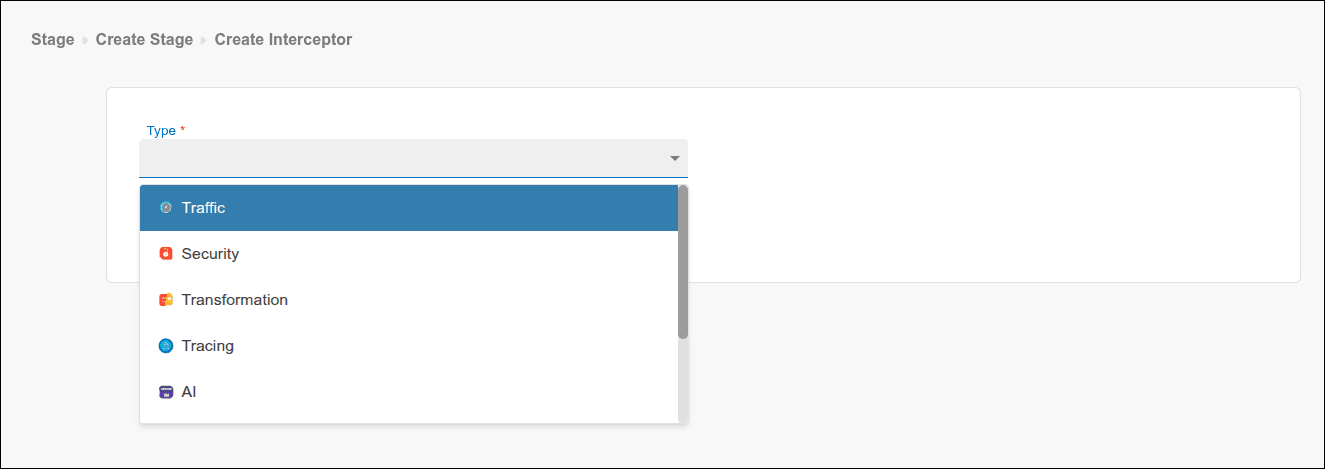
Select the interceptor type. Scroll down if necessary.
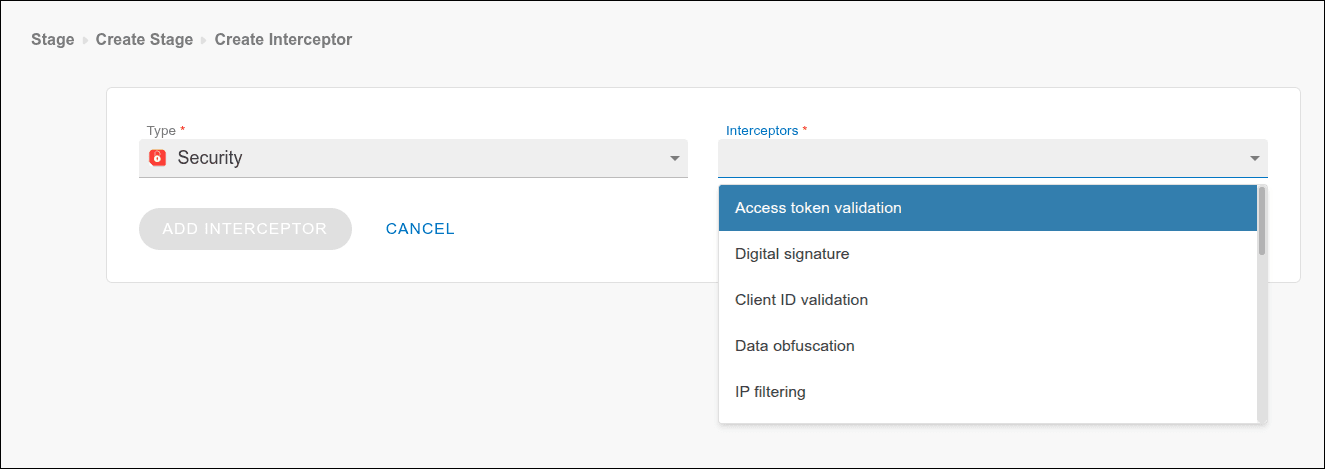
### Step 3
Choose the interceptors you want to add. Scroll down if necessary.
### Step 4
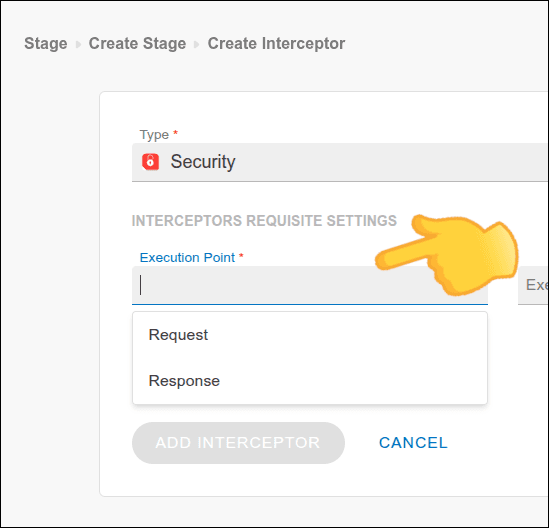
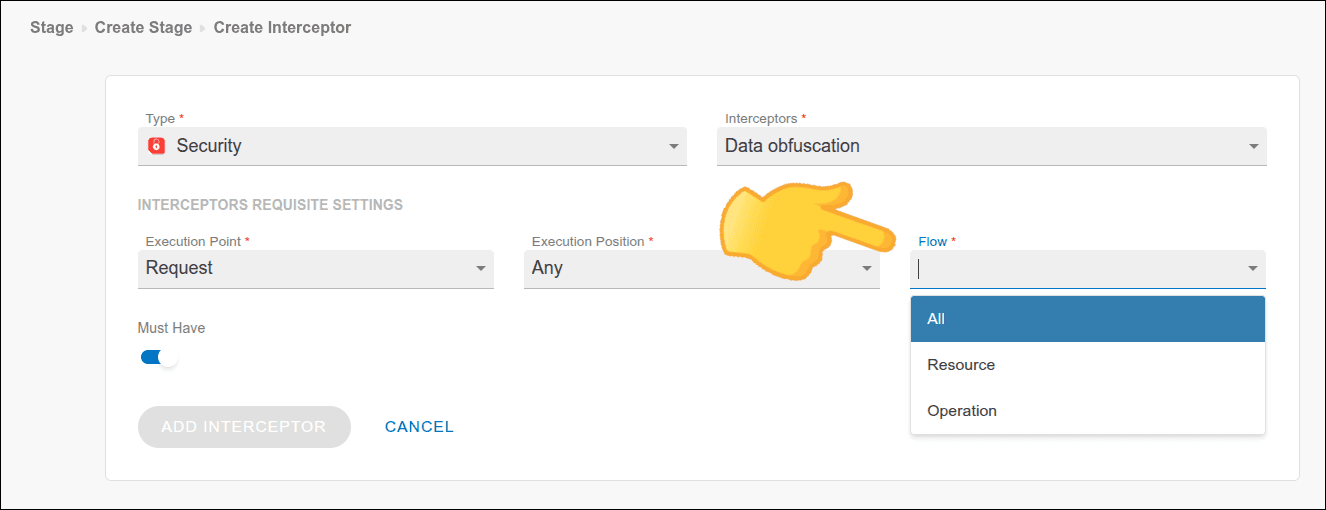
Define the characteristics the interceptor must have to be considered in this rule:
- **Execution point**: Interceptor execution point, which can be:
- **Request** or
- **Response**.
- **Execution position**: Interceptor execution position, which can be:
- **Any**,
- **First**, or
- **Last**.

- **Flow**: Interceptor flow, which can be:
- **All** (all flows).
- **Resource** (resource).
- Choose between **All** (all resources), **One** (a specific resource), or **Some** (some resources).
- **Operation** (operation).
- Choose between **All** (all operations), **One** (a specific operation), or **Some** (some operations).
### Step 5
Confirm whether the interceptor is mandatory or not allowed by activating or deactivating the toggle button.
### Step 6
Click **ADD INTERCEPTOR**.
Every new workflow comes with an initial stage called **Stage One**.
This stage **cannot be deleted**; it can only be edited.
## Editing or Deleting Stages
### Step 1
To edit, click the edit icon on the _card_ of the stage.
### Step 2
Change the fields as necessary and click **SAVE STAGE**.
### Step 3
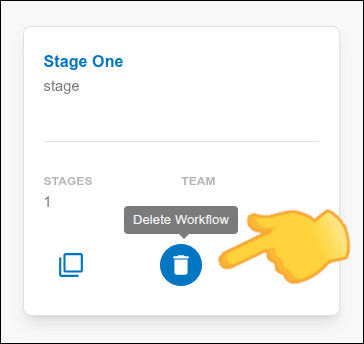
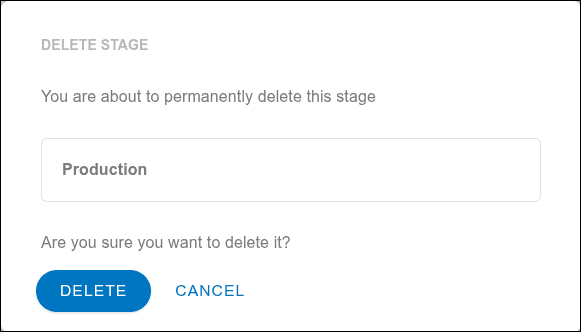
To delete a stage, click the delete icon (a trash can) on the corresponding _card_. Confirm by clicking **DELETE**.
If you edit the rules of a stage with active APIs:
- Reopen and save these APIs so that the new rules are applied.
- For APIs in production, wait for a new evolution demand and apply the rules to the new API version.
- You cannot delete a stage with associated APIs.
- The first stage of the workflow cannot be deleted.
## Usage Tips
These are suggestions to optimize the use of the Workflows feature:
- **Flexible entry stage:** It is good practice to leave a workflow's initial stage **without requirements**. This allows all APIs to be created without restrictions. Subsequent stages can have progressively more restrictive requirements, aligned with your API strategy and the team's development process.
- **Environment flow:** Use deployment environments as a basis for creating workflow stages. This helps maintain a clear flow such as "development -> homologation -> production."
- **Rule updates:** When modifying the rules of a stage that already contains APIs, remember to save those APIs again (even if without changes) so that the new rules are applied.
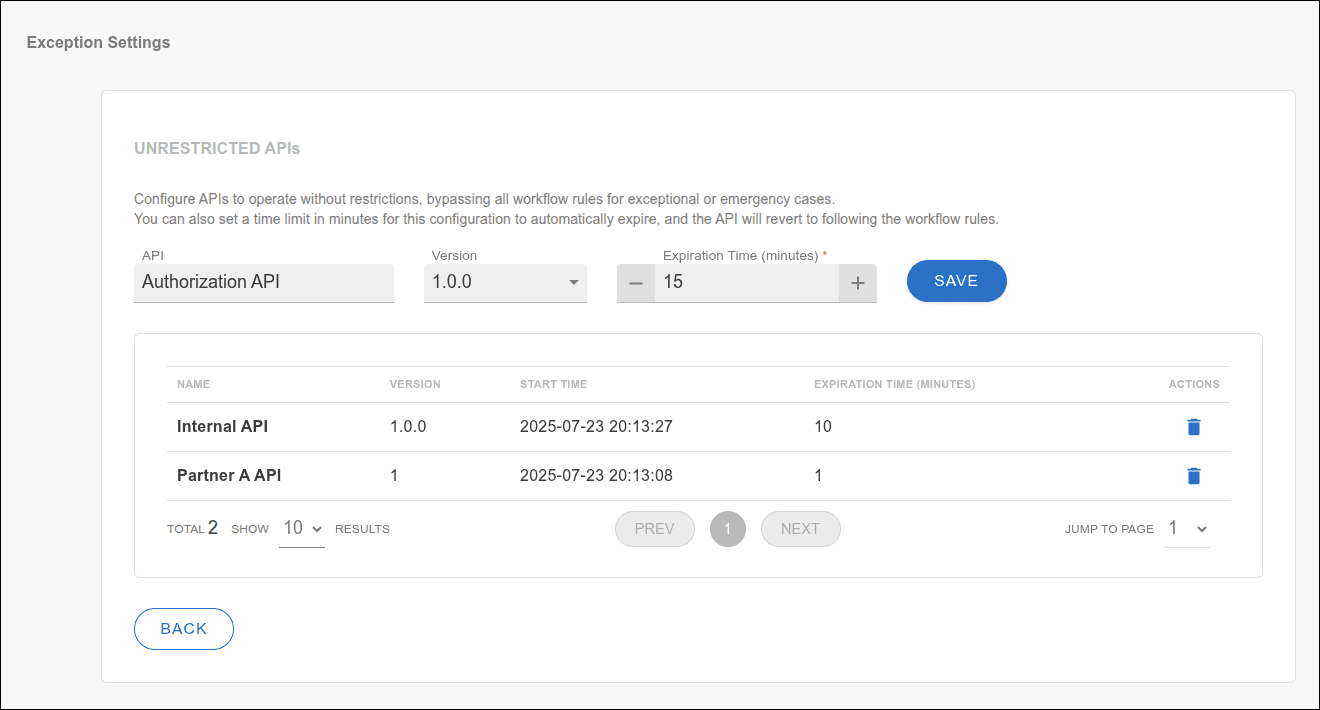
## Exception Configuration
With **Exception settings**, you can configure APIs that can operate, for a specific period, without following the workflow rules (UNRESTRICTED APIs). This option is suitable for exceptional or emergency cases where it is necessary to release API usage.
Use the temporary exception to meet exceptional or emergency demands, without having to change your governance configurations.
It's as if Adaptive Governance were temporarily disabled — but only for the APIs included as an exception.
Follow the steps below to configure an exception:
### Step 1
Access the workflow screen.
### Step 2
Click the **Exception Settings** button in the top right.
### Step 3
In the opened window, start typing the name of the API you want to add as an exception. Use the **API** field.
### Step 4
Select the API version.
### Step 5
Define a timeout (in minutes) for the exception to expire automatically. After the configured time, the API will revert to following the normal workflow rules.
The system automatically records the date and time of the exception's inclusion and applies a total requirements _bypass_. The exception behaves as if Adaptive Governance were disabled, but only for the selected APIs. APIs in an exception state can be deployed directly to any _environment_, without passing through _interceptors_ or stage policies.
- The exception is valid for **any** workflow, even if the API is moved between teams/workflows.
- After the defined time, the exception expires and normal governance is automatically re-established.
### Deleting an Exception
To manually remove an exception before expiration:
### Step 1
In the same **Exception Settings** window, click the trash can icon next to the API.
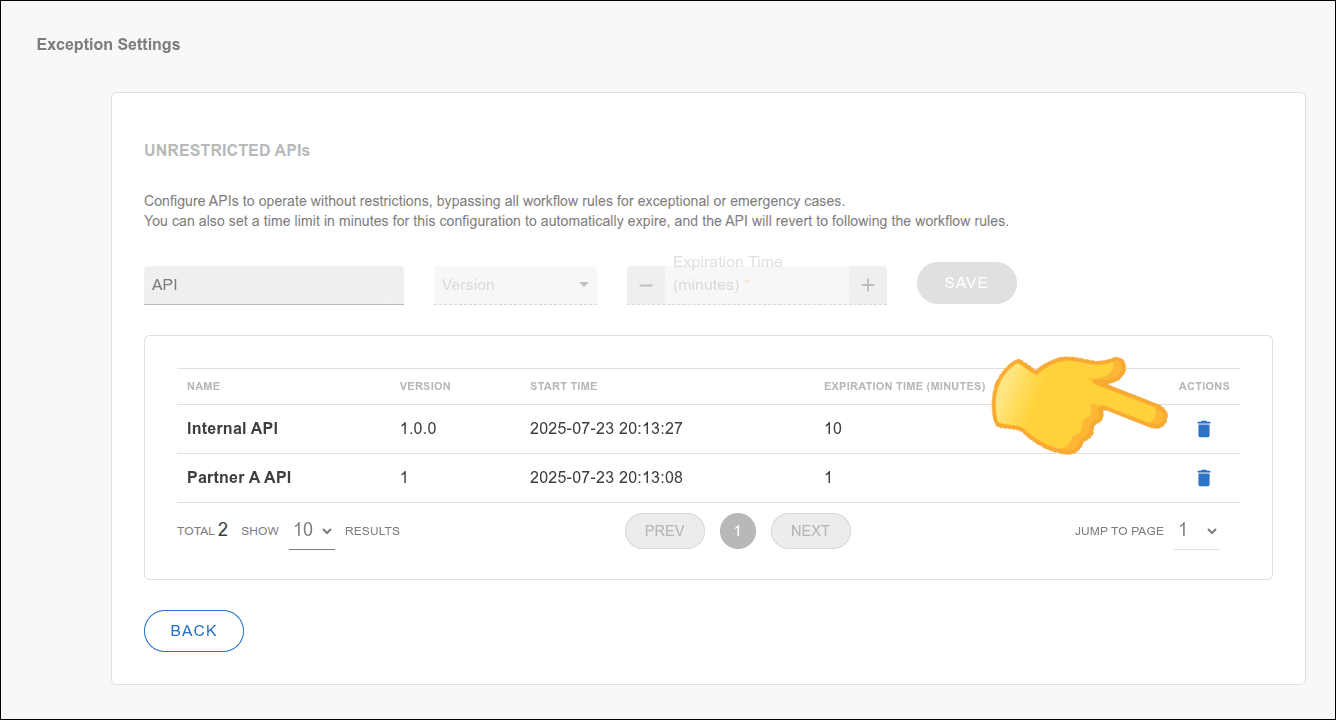
- Even before the defined deadline, the exception can be manually deleted.
- Upon deletion, workflow rules are **immediately** reapplied to the API, regardless of the configured expiration time.