---
title: Invitations
description: Understand how to send and manage invitations for developer registration in the portal.
documentId: developer-portal-invitations
locale: en-US
---
For a developer or any other person to be able to access the restricted content of your portal, they need to be registered as consumers of your resources. This is done by creating accounts for them.
An account can be created in two ways:
- By the developer themselves, following the steps to [create an account](/docs/developer-portal/registration-login).
In this case, depending on the configuration, the account is created and the developer may or may not access the portal content immediately.
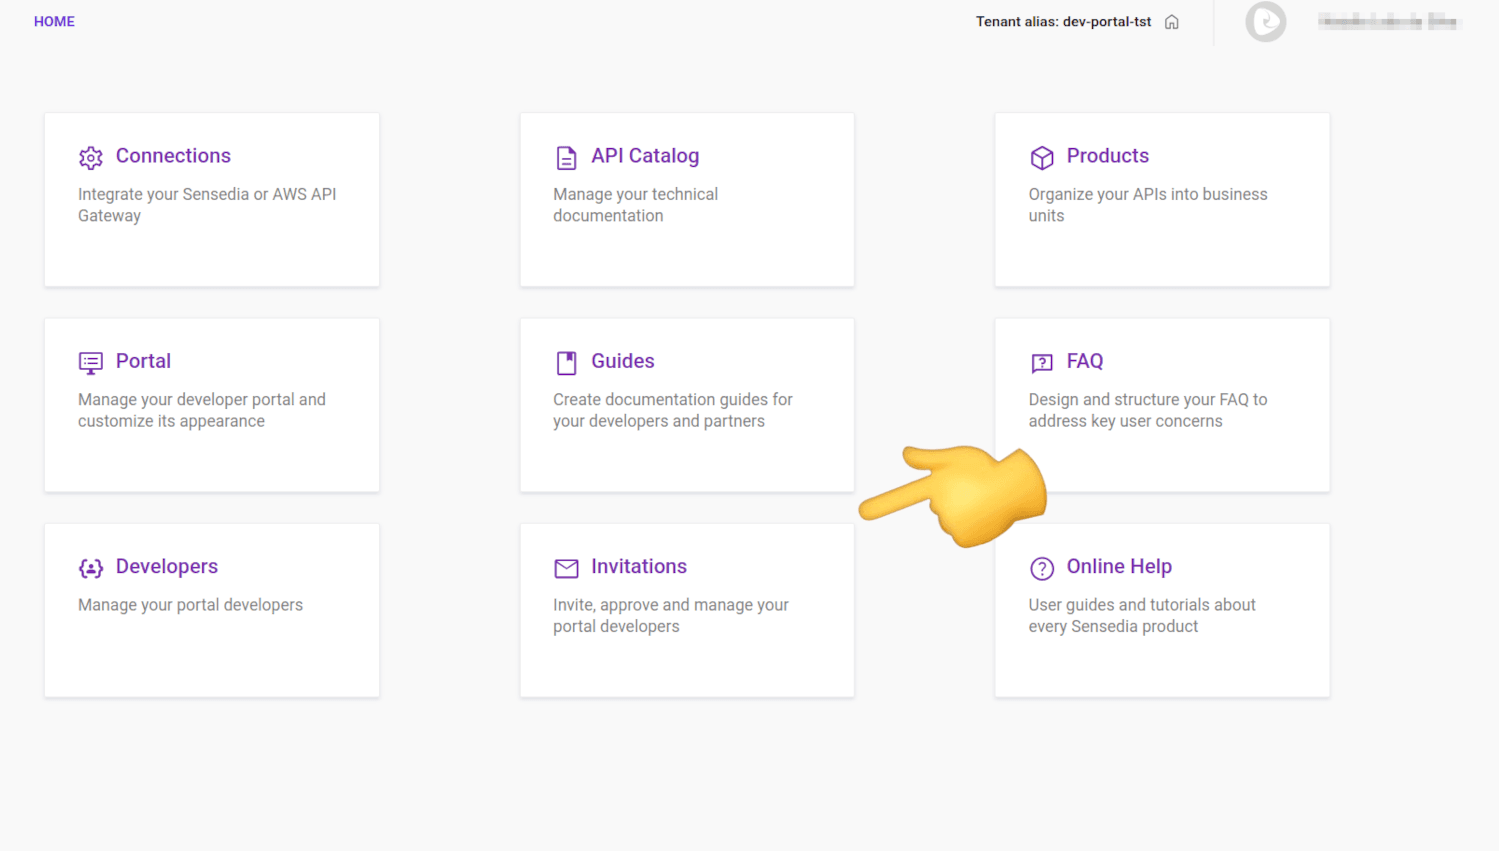
- By the portal administrator, [sending an invitation](#send-invitation) to the developer's email.
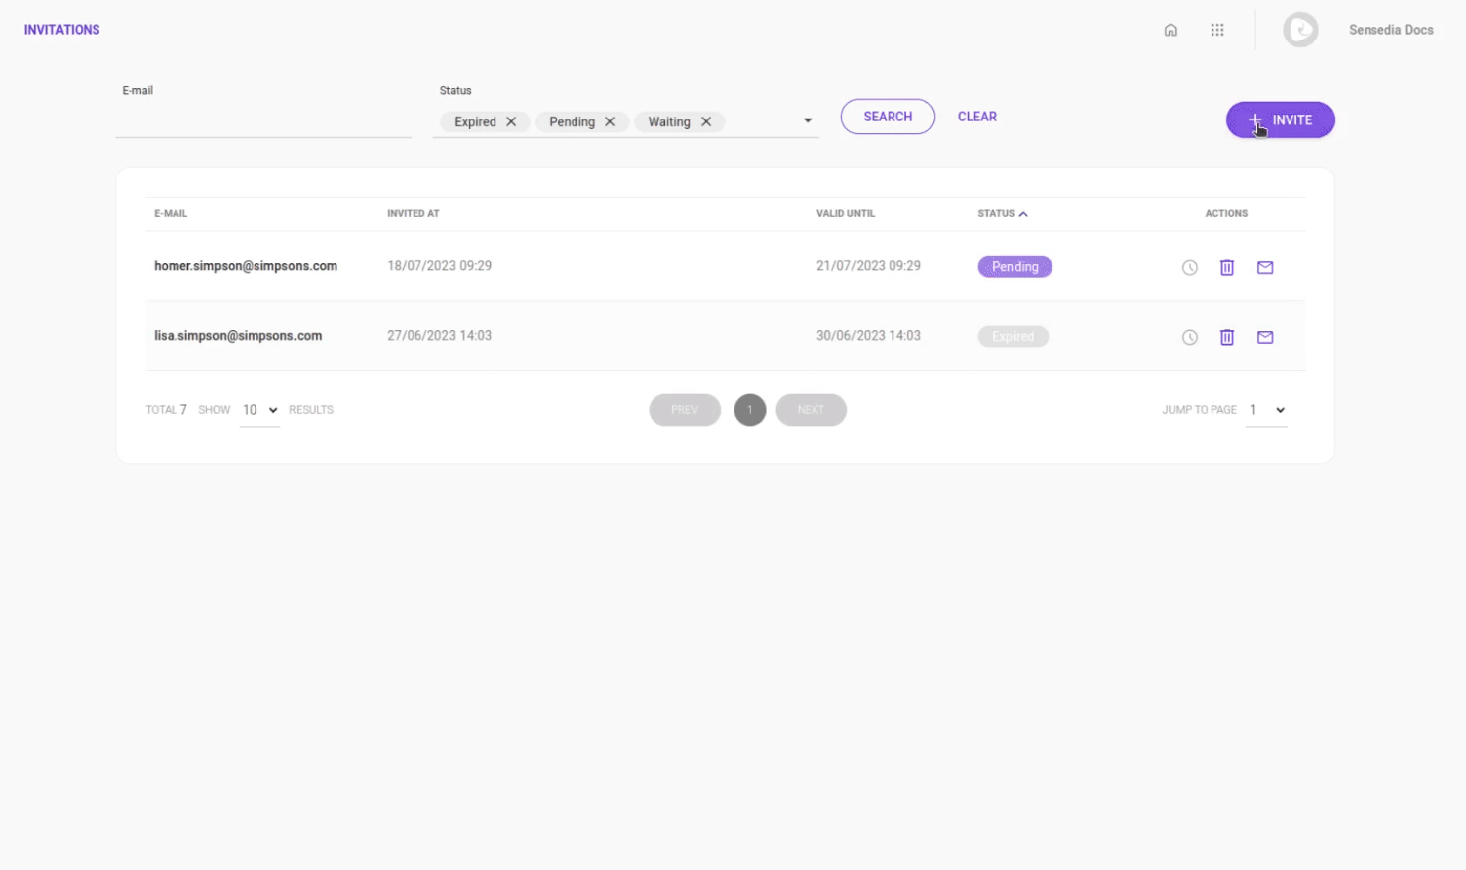
Invitations sent are listed on the **Invitations** page.
The invitation list displays:
- **Email:** email to which the invitation was sent;
- **Invited at:** date and time the invitation was sent;
- **Valid until:** invitation expiration date and time;
- **Status:** Pending, Expired, Waiting, Approved, Rejected, or Inactivated.
- **Actions:** review pending invitation, delete invitation and resend the invitation.
All invitations are pre-approved by default and the developer only needs to click the link in the email to complete the process. See [how to change the pre-approved feature](/docs/developer-portal/settings-developers#activate-inactivate).
All accounts, whether active or inactive, are listed as [Developers](/docs/developer-portal/developers).
See below how to send an invitation (i.e. how to register a developer).
### Step 1
**Registering a developer**
### Step 2
On the **Invitations** screen, click **+ INVITE**.
### Step 3
Enter the email to send the invitation. You may send invitations to more than one email address at a time. Use ";" between emails, no spaces.
### Step 4
Click **SUBMIT**
### Step 5
An invitation will be sent to the email. The recipient has 72 hours to click the **Confirm your account** button in the email.

### Step 6
Upon click, the link will open your portal displaying the **CREATE AN ACCOUNT** tab. The developer should inform their full name and choose and confirm a password. The password must contain:
- at least 10 and at most 16 characters,
- lowercase and uppercase letters,
- number and
- special character.
The informed password and password confirmation must be the same.
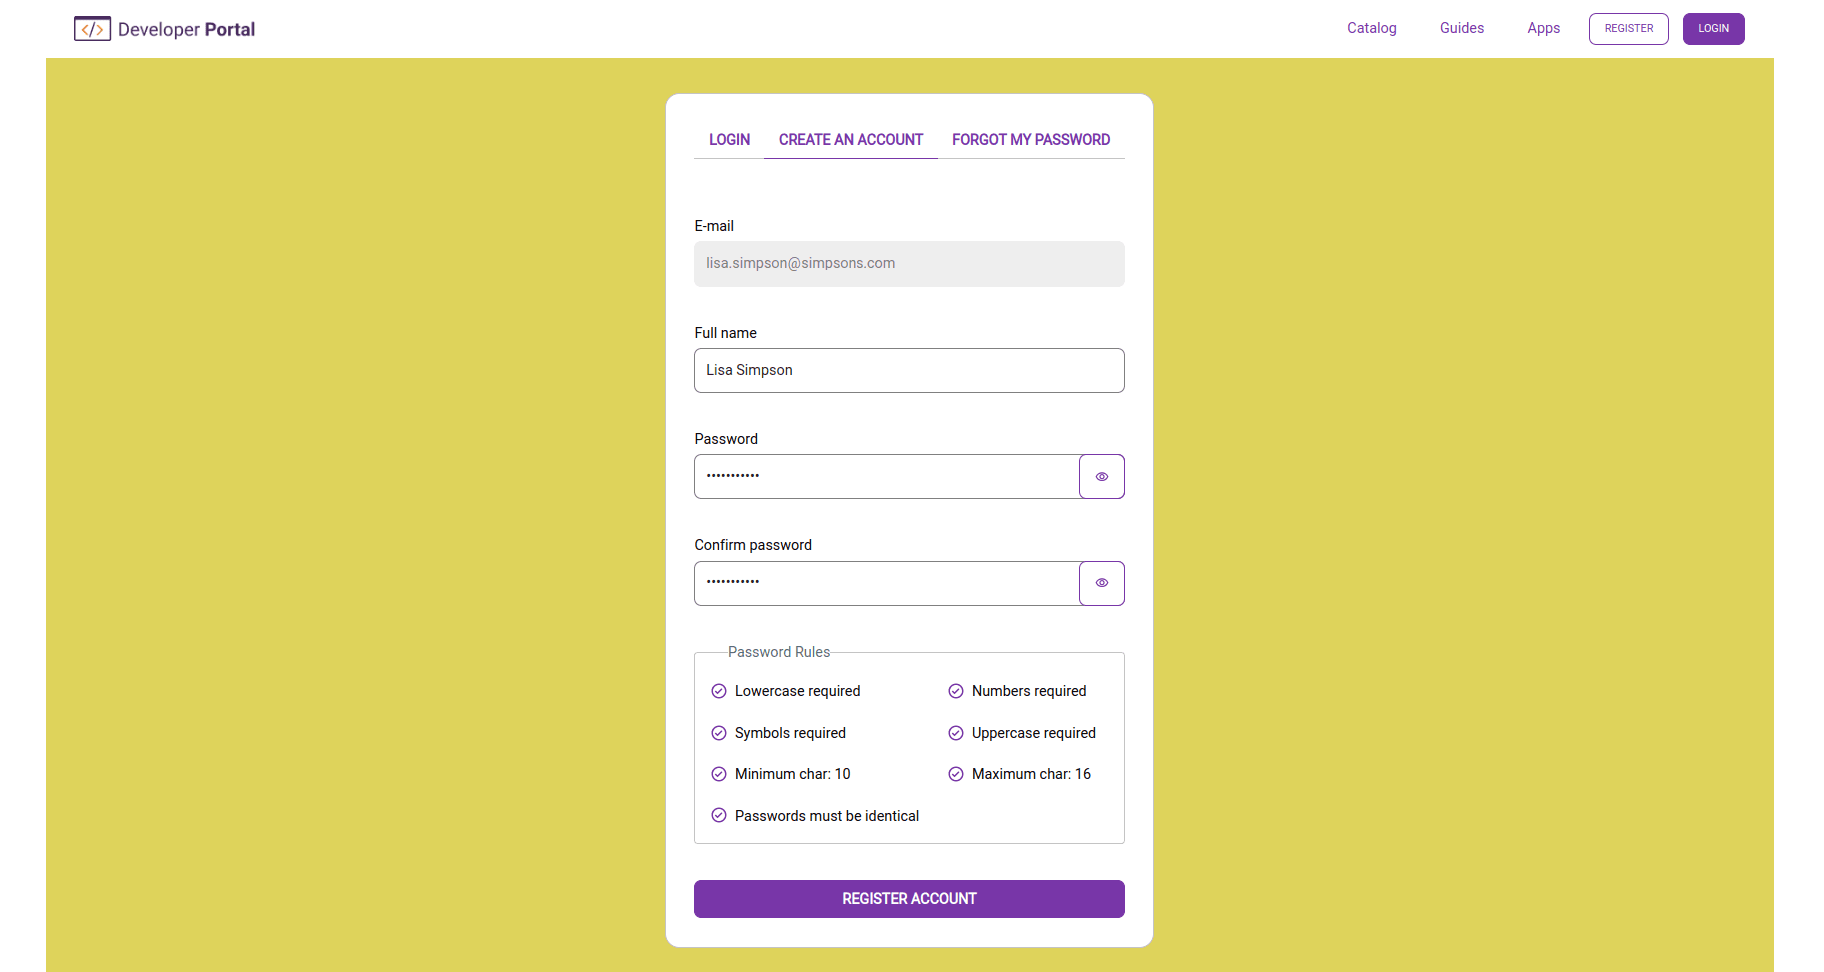
The login takes place on the same screen, but in the **LOGIN** tab.
The background color of the login screen can be customized. It is the same color as the body of your Developer Portal. See [how to choose background color](/docs/developer-portal/appearance).
## Actions
From the actions column you can:
- **Review pending invitation**: Click  to review the registration request from the developer.
This action is only available for invitations with the Waiting status.
- **Delete**: Click  to delete the invitation.
Only invitations with status Pending and Expired can be deleted.
- **Resend invitation**: Click  to have a new invitation sent to the email address.
## Search
You can perform searches by email or invitation status. The search also works with part of the email.
Select the status from the drop-down menu.
Click **SEARCH** to update the list with search results.
## Invitation status
An invitation can have the following statuses:
- **Approved**:
This status indicates that the account was successfully created. Invitations that had _Waiting_ statuses and were approved are automatically moved to the _Approved_ status. If the _auto approval_ option is enabled, the invitation will move to the status _Approved_ when the developer completes the registration process.
- **Pending**:
After an invitation is sent, it remains _Pending_ activation. To activate their account, the developer should access the email, click the link and finish the registration process. While pending activation, the invitation can be deleted or resent.
- **Waiting**:
After an invitation is sent, if the auto-approval option is disabled, it will remain _Waiting_ for approval. To approve it, click . Invitations awaiting approval cannot be deleted, but you can click  and deny approval. See [how to enable auto-approval](/docs/developer-portal/settings-developers#activate-inactivate).
- **Rejected**:
This status indicates that the invitation had its approval denied. If you change your mind, you can click  to have a new invitation email sent.
- **Expired**:
The developer has 72 hours to access the link in the invitation and complete the registration process. After that period, the invitation expires and it can then be deleted or resent.
- **Inactivated**:
When an invitation is resent, it remains _Inactivated_ until the developer completes the registration process.
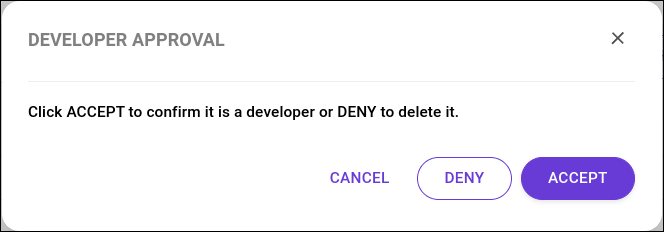
## Approving or rejecting a registration
You can approve or reject a registration while the invitation is in the _Waiting_ status.
If the auto-approval option is enabled, the invitation will not be in the _Waiting_ status, and you will not have the option to approve or reject it.
Follow the steps below to approve or reject a registration:
### Step 1
Go to **Consumers** to see the list of invitations.
### Step 2
In the **ACTIONS** column, click  and select one of the options: **ACCEPT** to confirm, **DENY** to reject or **CANCEL**.