---
title: Portal - Notifications
description: Email notification customization
documentId: developer-portal-portal-notifications
locale: en-US
---
In the notifications tab, administrators customize the emails sent to **Developers** and **Apps**, aligning communication with the company's visual identity. You can customize:
- Company logo
- Email subject
- Email body
Notification customization is available on Premium plans. For more information, contact your account manager.
## Header customization
Email header customization allows you to upload a logo for emails, with the following specifications:
- Maximum resolution: 300 pixels wide by 74 pixels high
- Maximum file size: 1MB
- Supported file types: JPG, JPEG, and PNG
## Message body customization
To customize the message body, select the category that will receive the notification: **App** or **Developer**.
According to the selected category, choose the notification type you want to customize by clicking on the pencil icon in the corresponding row.
**App**:
- Approve App
- Reject App
- Update App Reject
- Cancel App
- Delete App
- Create App
- Update App
- Webhook Auto Approval Error
**Developer**:
- Developer Registration Confirmation
- Invitation Rejected
- Reset Password
- Invitation Register Approval
- Send Invitation
The animation below shows the App and Developer categories and the notification types available for each one of them:
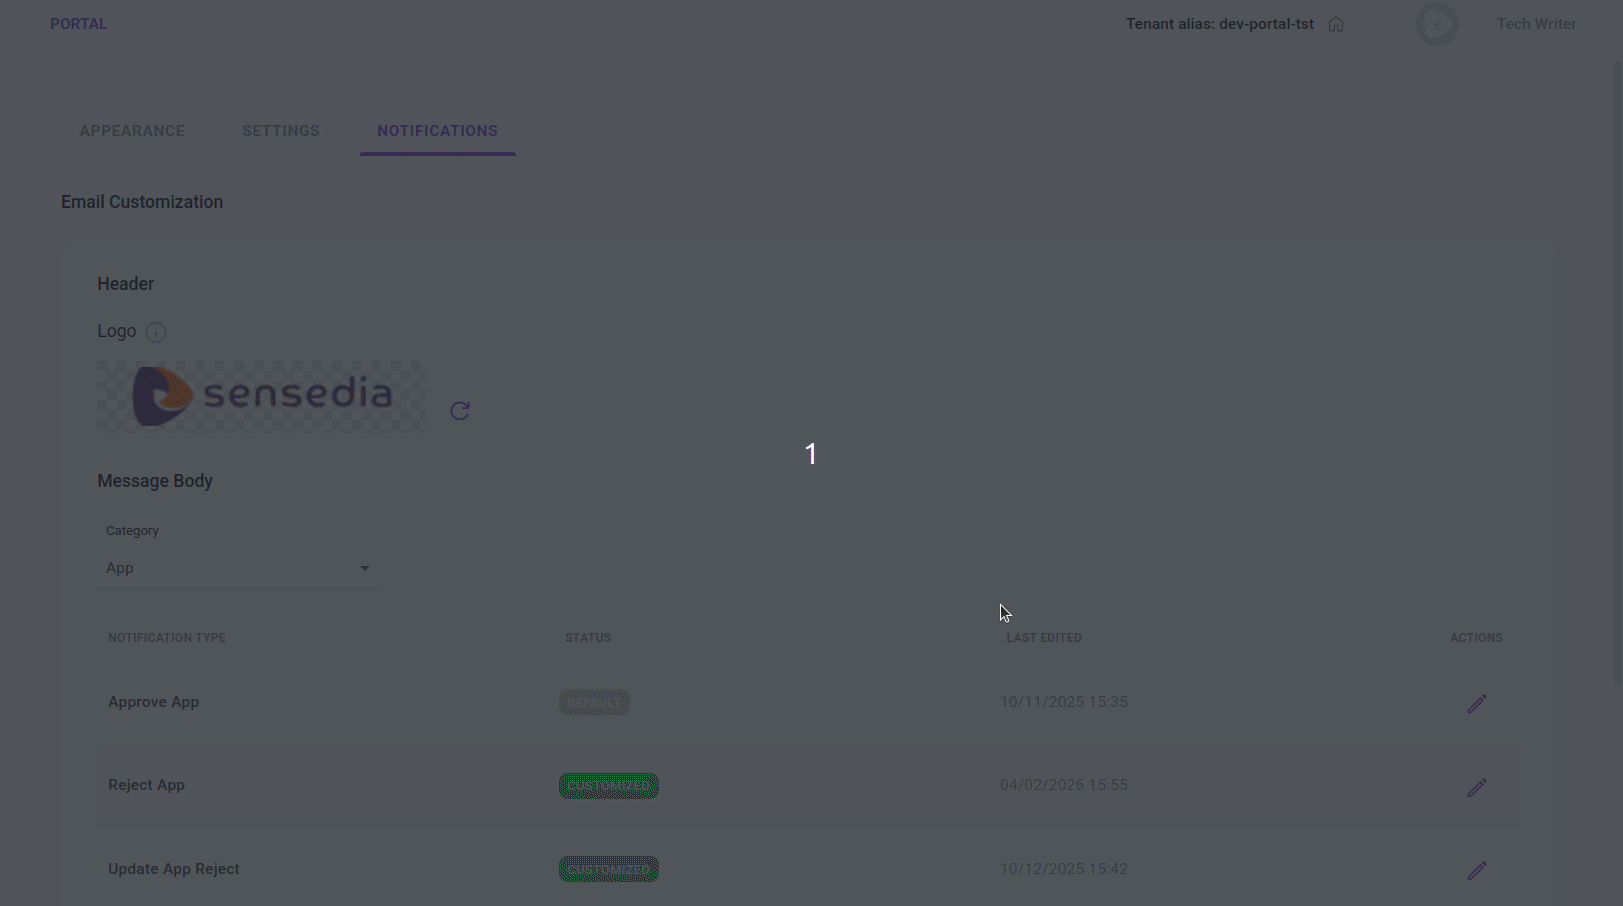
The default message is enabled for all notifications (_Default_ label in the **Status** column). When customizing a notification, the default message is replaced by the custom version and the **Status** column displays the _Customized_ label, in green.
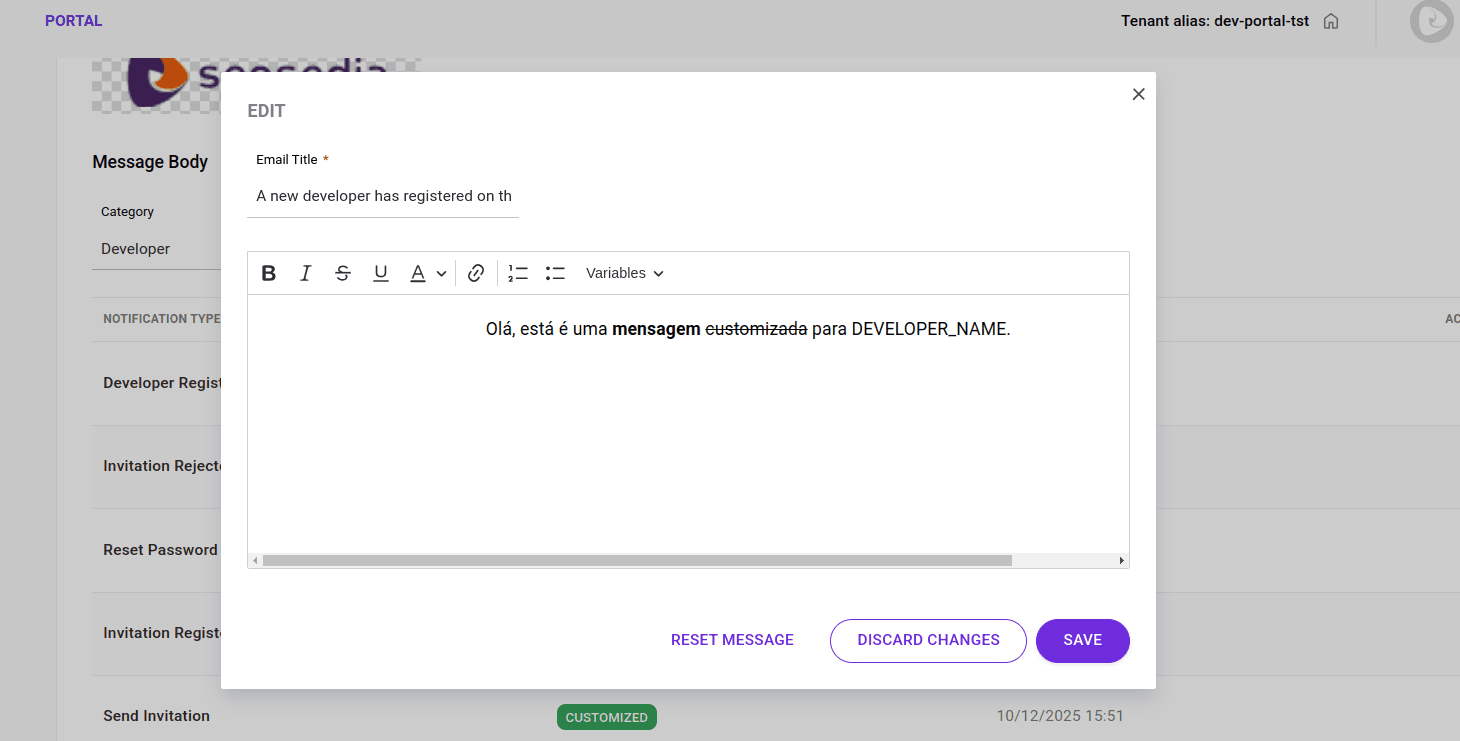
To customize a notification, follow the steps below:
### Step 1
Click the pencil icon in the **Actions** column.
### Step 2
Click "RESET MESSAGE" in the window that opens.
### Step 3
Add a subject for the email (max 100 characters).
### Step 4
Create your custom message in the text editor.
### Step 5
Click **SAVE**.
### Text editor features
The text editor offers several tools to help you create clear and well-formatted notifications. You can:
- Format text (max 1000 characters)
- Apply bold, italic, underline, strikethrough, and choose font color.
- Create lists to organize information.
- Insert links
- Use variables
For Developer category notifications:
- `DEVELOPER_NAME` and
- `CONFIRMATION_ACCOUNT_LINK` (for "Invitation Register Approval" and "Reset Password" notifications)
For App category notifications:
- `APP_NAME`.