---
title: Publishers
description: Understand what publishers are and how to create them.
documentId: publishers
locale: en-US
---
Publishers are the applications or partners that send data to the Sensedia Events Hub, communicating events that will be distributed to subscribers.
Publishers send events to topics, which define the publishing URL. Therefore, during the publisher registration process, you need to enable the topics to which each publisher can send requests.
## Publisher list
On the **Publishers** screen, you can view all your publishers and register new ones.
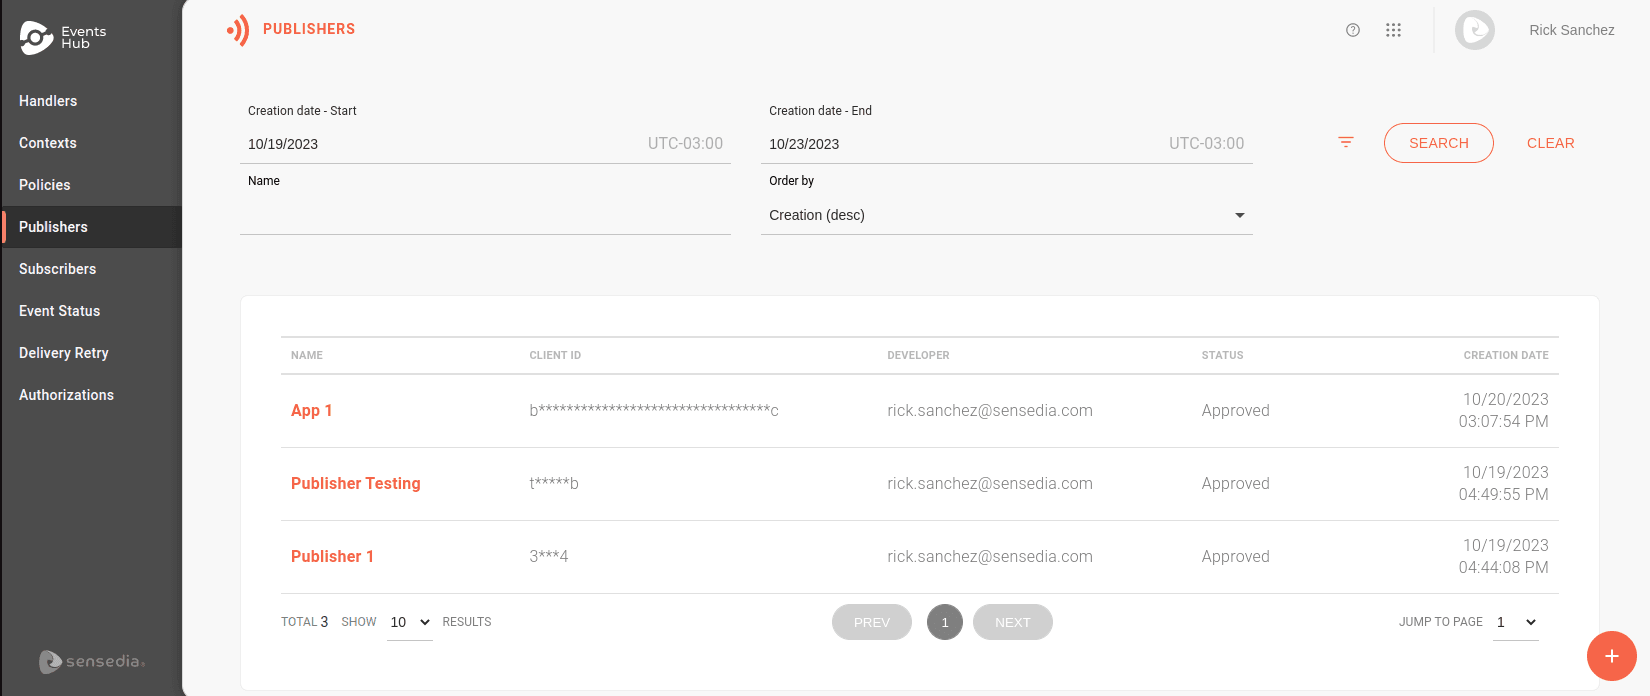
You can search for a specific publisher using the filters at the top of the page.
They allow you to search by:
- Start and end creation dates.
- Publisher name.
- Developer's email.
- Client ID.
- Status.
- Handler name.
Use the **Order by** field to define the list order. You can choose to view by the most recent or oldest creation date, or alphabetically.
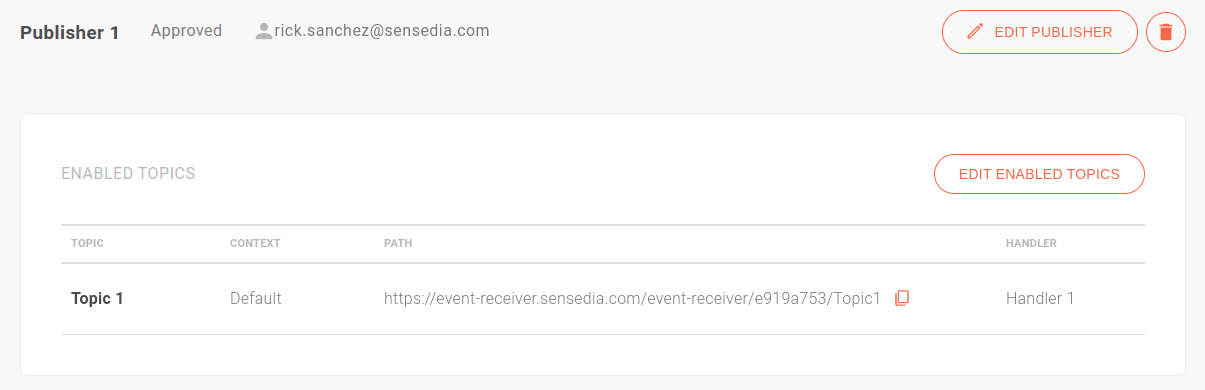
By clicking on a publisher's name, you are directed to the **Overview** screen.
Here, you can:
- View and edit the publisher's information using the **Edit Publisher** button.
- Delete the publisher by clicking the trash icon.
- Enable or disable topics for publishing using the **Edit Enabled Topics** button.
## Creating publishers
The Events Hub allows you to create publishers manually or import them from an app in the Sensedia API Platform.
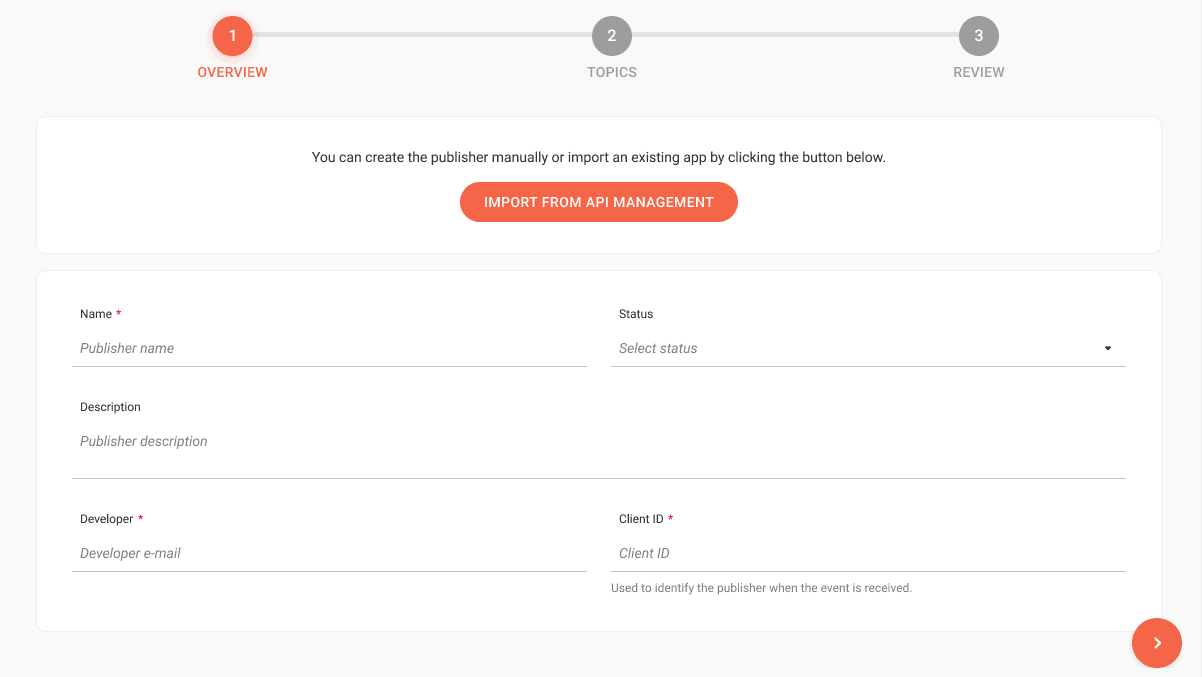
To start, click the  button. On the screen that opens, choose how you want to create the publisher:
### Importing an app
To create a publisher from an app registered in the **Sensedia API Platform**, follow these steps:
Click the **Import from API Management** button.
In the **APP NAME** field, type or search for the app name you want to import.
This will automatically fill all fields in the **Overview** section, which cannot be edited.
Click **Save**.
Click **ADD ENABLED TOPICS** to link the publisher to the topics.
When selecting a topic, click the  icon.
On the screen that opens, click the  icon and also enable the context the publisher will have permission for.
Click **Done** to save the changes.
### Registering manually
To create a publisher from scratch, follow these steps:
In the **Overview** section, fill in the fields:
- **Name**: the publisher's name, which must be unique.
- **Status**: select from approved, pending, rejected, or cancelled.
- **Description**: optional field to include a description.
- **Developer**: email of the developer responsible for the publisher.
- **Client ID**: the publisher's identification when the event is received by the Events Hub.
Click **Save and Next**.
Click **ADD ENABLED TOPICS** to link the publisher to the topics.
When selecting a topic, click the  icon.
On the screen that opens, click the  icon and also enable the context the publisher will have permission for.
Click **Done** to save the changes.
The **Topics** section is used to enable the topics to which the publisher can send events. Topics are created through handlers and are enabled in [contexts](/docs/events-hub/contexts). This allows you to use specific contexts for publishers within the same topic.
> **Publishers and Contexts**
>
>Imagine you want "Publisher A" to publish events to the "Outlet" topic.
>
>At the same time, your development team also needs to test this topic, but using a mock authorization endpoint.
>
>To do this, you can create a test context called "Testing," for example, and enable the "Outlet" topic for both the default context ("Default") and the "Testing" context.
>
>Authorization endpoints are defined by context. This allows you to configure a mock for "Testing" while keeping the default context with real authorization.