---
title: Authorizations - Canvas
description: Authorization configuration
documentId: ipaas-authorizations
locale: en-US
---
Authorizations are only applicable to **Canvas** type integration flows.
## Overview
Authorizations ensure security and control in accessing external systems and internal flows.
They allow you to authenticate connections with APIs, databases, and other services, using methods such as OAuth 2.0 *tokens* or API *Keys*.
This protects sensitive data during transfer, ensuring that only authorized connections are established, preventing unauthorized access and vulnerabilities.
To register and view your authorizations, access the **Authorizations** page:
1. Through the left side menu of the product; or
2. By clicking the specific card on the **Welcome** page.
## Register a new authorization
To register a new authorization, click the **+ AUTHORIZATIONS** button.
You can choose between **API Key** and **OAuth 2**.
To learn the step-by-step registration process for each of the available authorizations, visit the following pages:
- [API Key](/docs/integrations/ipaas-api-key)
- [OAUTH 2 - Client Credentials](/docs/integrations/ipaas-client-credentials)
- [OAUTH 2 - Authorization Code](/docs/integrations/ipaas-authorization-code)
- [OAUTH 2 - Authorization Code with PKCE](/docs/integrations/ipaas-pkce)
You must register authorizations in the environments where the integration flow will be deployed.
To execute an integration via test mode (**Test Mode**), you must register the authorization in the **Staging** environment.
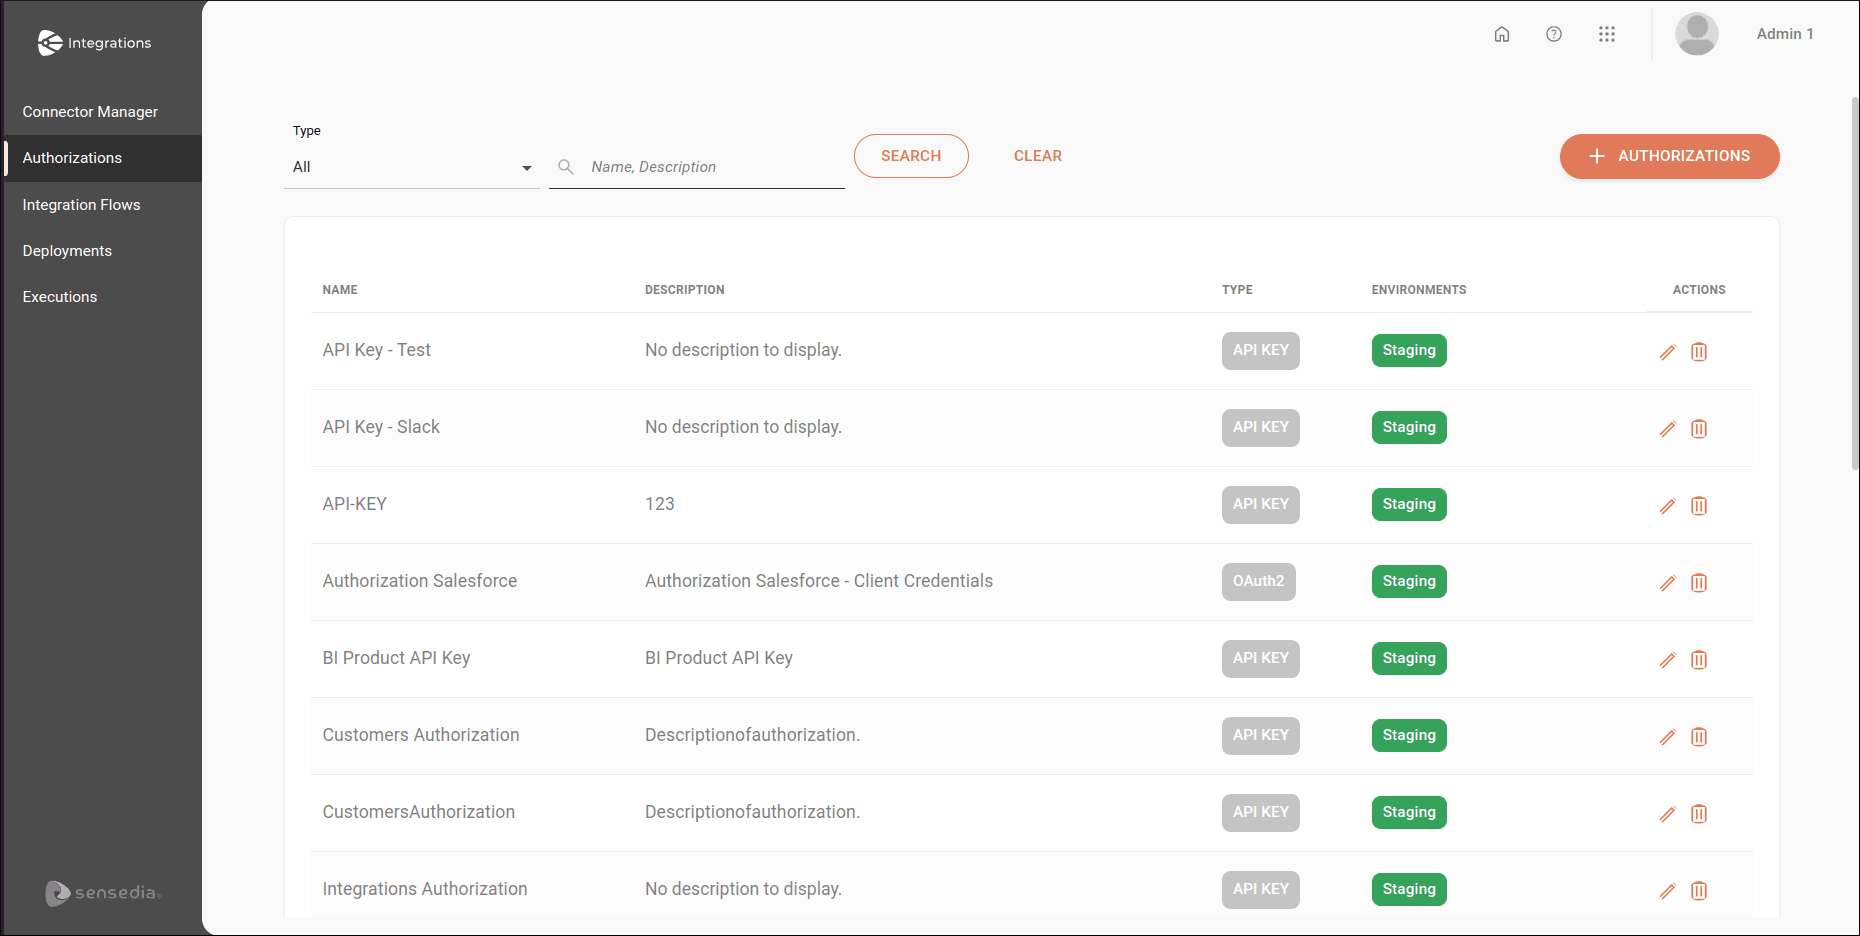
## View your authorizations
If no authorizations are registered, you will see a message informing that no authorization has been created.
If you have already registered authorizations, the page list displays the last 25 authorization records, in alphabetical order.
To search for a specific authorization, type the name or description entered during authorization registration in the **Name, Description** field and click **SEARCH**.
In the **Type** field, you can restrict the view by selecting the registered authorization type: **API Key** or **OAuth 2**.
If you want to clear what was typed or return to the initial view of the authorization list, click **CLEAR**.
The authorization list contains the following columns:
* **Name**: authorization name.
* **Description**: authorization description.
* **Type**: registered authorization type. Can be **API Key** or **OAuth 2**.
* **Environment**: environments where the authorization is configured and validated. Can be *Staging*, *Production*, or both.
* **Actions**: actions to be performed on registered authorizations:
* : edits the registered authorization type.
* : deletes the registered authorization.
You cannot delete an authorization linked to an integration flow.