---
title: REST
description: Learn about the REST trigger
documentId: ipaas-legacy-rest-trigger
locale: en-US
---
With the **REST** trigger, you can execute the integration flow through an external call using one of the HTTP methods.
Below, learn how to add it to the canvas and configure its form.
## Add the REST trigger to the canvas
Click the  icon in the left editing menu;
Select the **REST** trigger.
The  **Start** is replaced by the trigger as soon as you add it to the canvas.
Configure its form.
To remove the **REST** trigger from the canvas, select it and click the  button.
Deleting the trigger will disable the **Test Mode** function.
## Configuring the form
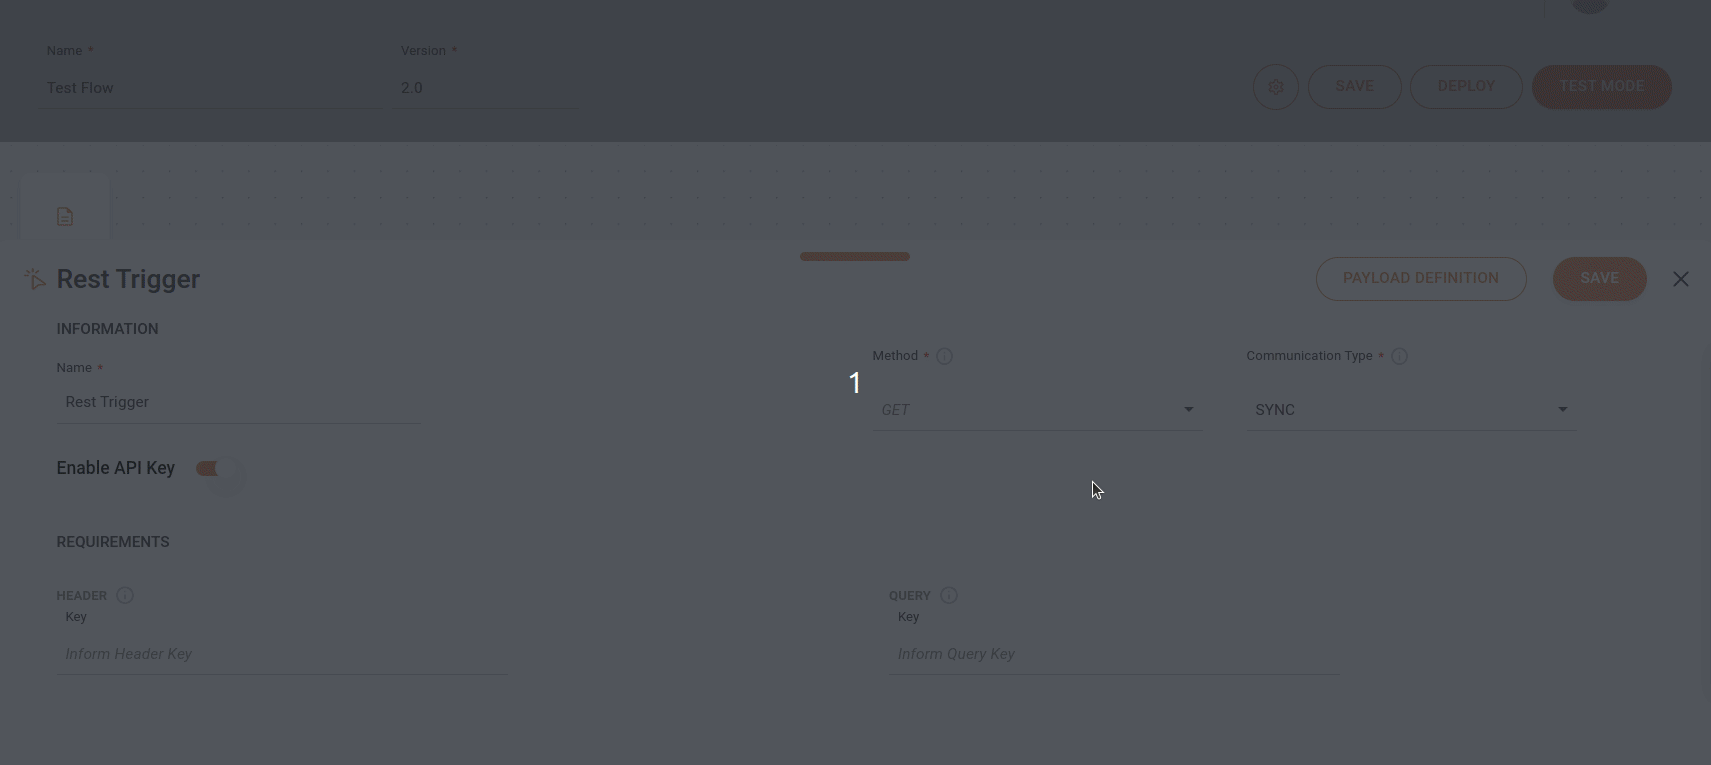
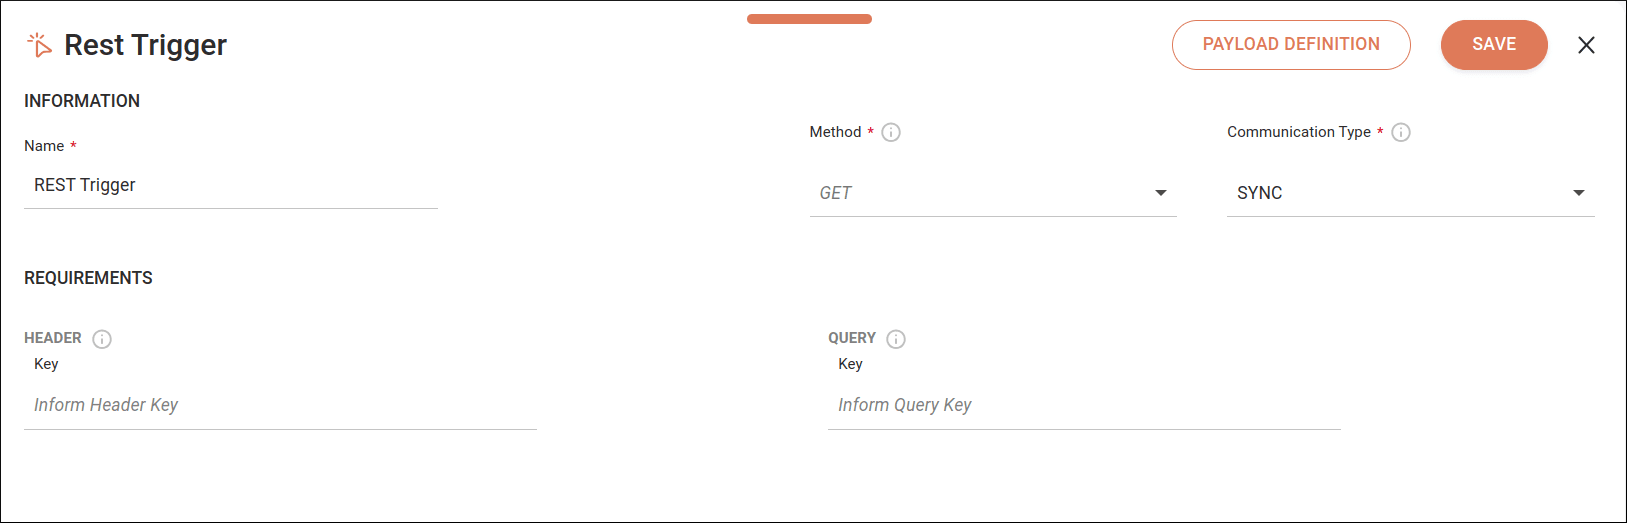
Select the trigger on the canvas.
Click the edit icon .
Fill in the following form fields:
* **Name**: enter the trigger name. The name cannot be used more than once in the same integration flow. By default, the field displays the name **REST Trigger**.
* **Method**: select the HTTP method to be used.
* **Communication Type**: define whether the call will be synchronous (SYNC) or asynchronous (ASYNC). By default, the SYNC option will be selected.
For an asynchronous call, the system will return a 202 response.
* **Header**/**Key**: enter the *Header* parameters. Alphanumeric field that allows special characters (`_`, `.` and `-`), with a limit of 60 characters.
* **Query**/**Key**: enter the *Query* parameters. Alphanumeric field that allows special characters (`_`, `.` and `-`), with a limit of 60 characters.
Registering the same *key* more than once is not allowed.
If you don't need to define the [payload](#payload-definition), click **SAVE**.
To delete a *key* in any of the components, click the  button to the right of the *key*.
To add a new *key*, click the **+** icon.
### Payload definition
Mapping the structure of the REST trigger's input *payload* will facilitate the use of mapped fields in other components of the integration flow.
You can edit the *payload* definitions at any stage of creating the integration flow.
If you have already created a JSON *schema*, when you click **PAYLOAD DEFINITION**, you will see the data already registered.
To configure the input *payload* structure, follow the steps below:
Click **PAYLOAD DEFINITION** in the upper right corner of the **REST** trigger screen.
In the window that opens, you will find two columns:
* **JSON SCHEMA**: In this column, enter the JSON *schema* that will define the structure transmitted in the request input. There is no character limit. To validate the data format, click the refresh icon on the right .
* **JSON STRUCTURE**: This column is read-only. It is used for viewing and validating the data format from the **JSON SCHEMA** column.
To delete an attribute from the *payload* definition, delete the corresponding row in the JSON *schema* column.
To confirm the data, click **CONFIRM**.
If the JSON *schema* is not in the correct format, you will see a message that the JSON *schema* is incorrect.
Back on the **REST** trigger configuration screen, click **SAVE** to save the records.
For more information about JSON *schema* specifications and how to create a validation file according to your needs, visit [JSON SCHEMA](http://json-schema.org).