- Home
- Documentation
- Access Control
- Client Apps
On the Client Apps screen, you create and manage credentials for system-to-system authentication and authorization (Machine-to-Machine, or M2M). Unlike credentials tied to a person, a Client App is an independent credential: it has its own key pair, its own roles, and its own status, with no dependency on a named user.
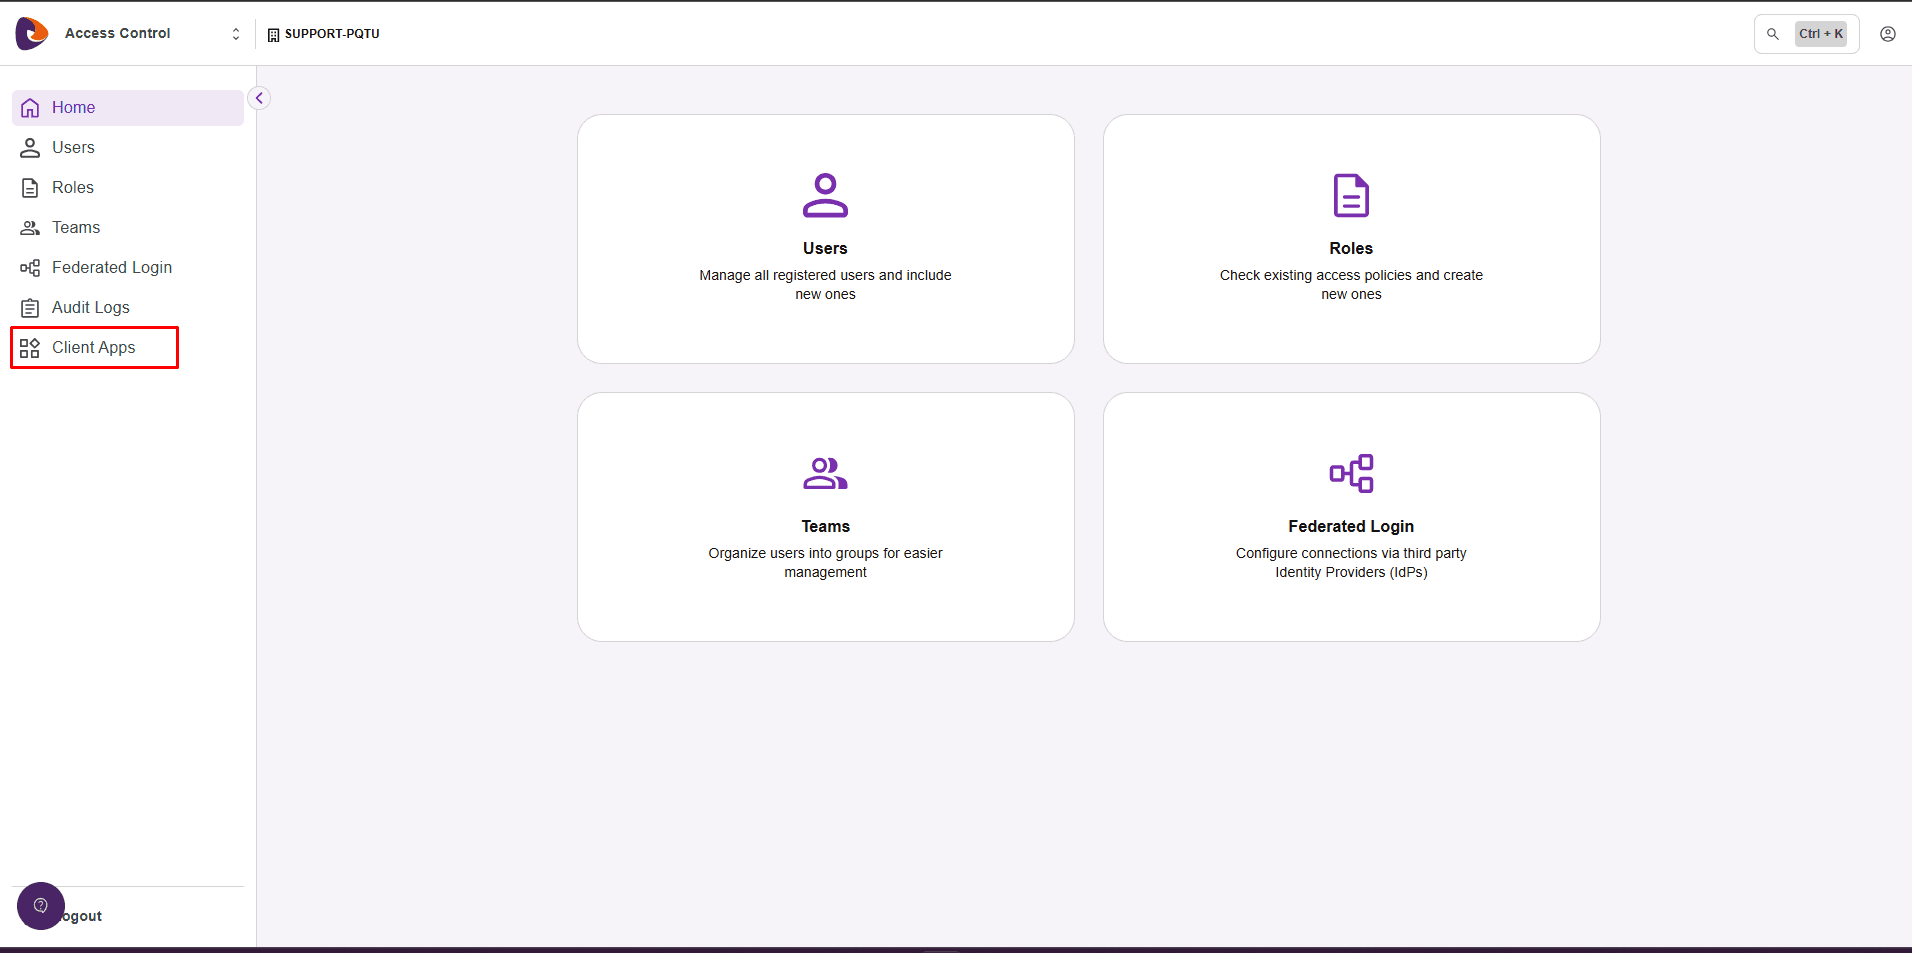
To open it, go to the Access Control side menu and click Client Apps.
The feature has two layers, described in separate sections on this page:
- Creation and management — where you create the Client App and manage its keys, roles, and status through the interface.
- Usage — where your application exchanges the keys for an access token and calls the platform APIs.
Use cases
Use a Client App when an application or service needs to access the platform APIs automatically, without a user logging in. For example:
- System-to-system integrations (such as a portal consuming an API catalog).
- Automated routines, jobs, and back-end services.
- Any scenario where tying access to someone's personal account is not desirable.
Client Apps and security credentials
Access Control offers two ways to generate credentials. Understand the difference to choose the right one:
Creating and managing the Client App
This layer covers the full credential lifecycle in the interface: create, view, edit roles, activate, deactivate, and delete.
NOTETo manage Client Apps, you need a role with permission for it. The Super Admin and Admin roles already include this permission. You can also use custom roles that have this permission, created in the Roles feature of Access Control — learn how in Roles and permissions.
Creating a Client App
In the Access Control side menu, click Client Apps.
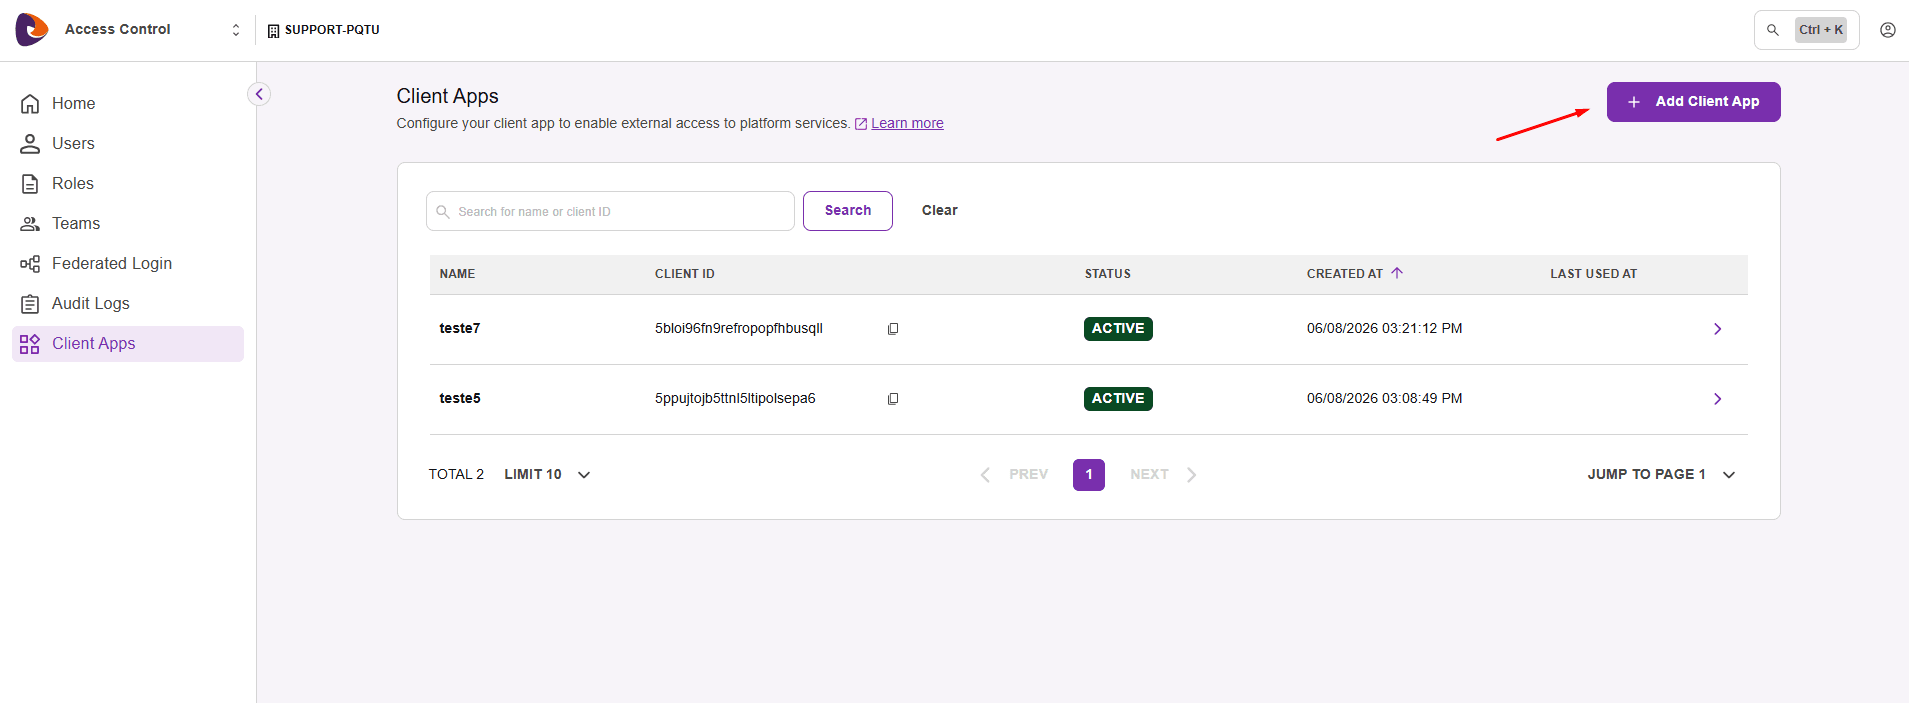
Click Add Client App in the top-right corner.
In Name, enter a name for the Client App. Under Assign Roles, click Add Role to assign the roles that define what this credential can access in the APIs.
The available roles are the same ones configured in Roles and permissions. Assigning roles is optional, but without them the Client App has no permission to access resources.
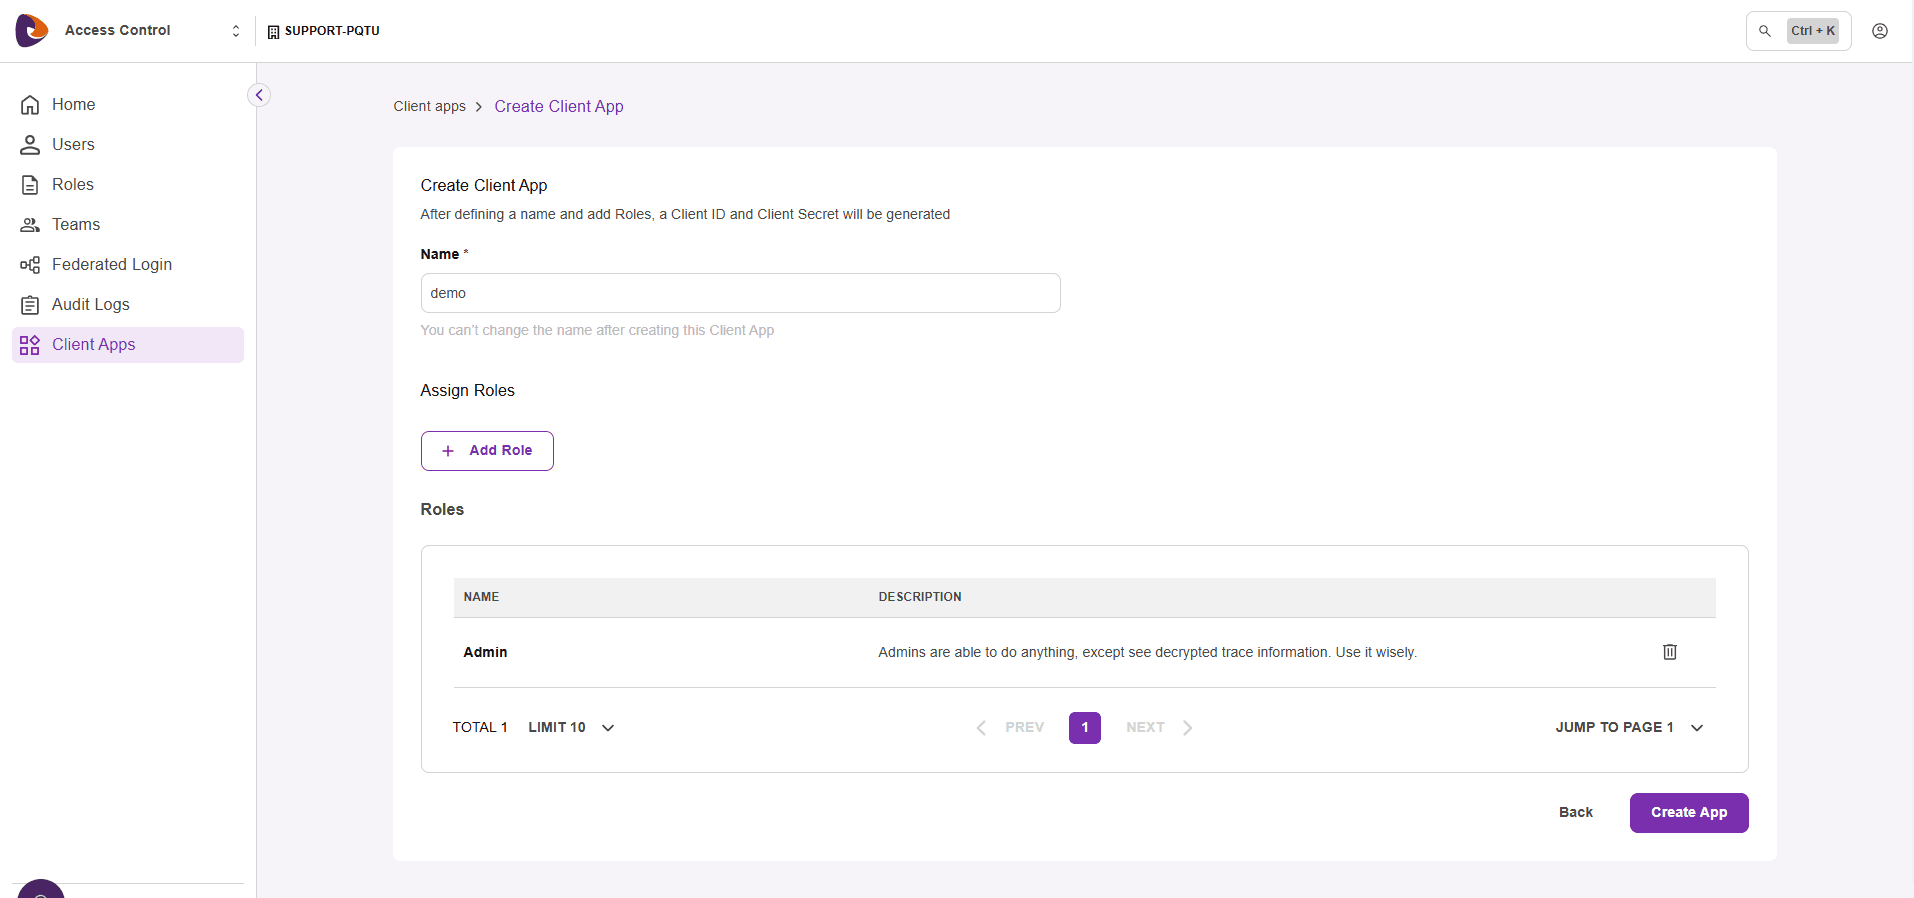
NOTEThe name must be unique within the environment, have 3 to 128 characters, and use only letters, numbers, spaces, and the special characters plus (+), equals (=), comma (,), period (.), at sign (@), and hyphen (-). You can't change the name after creating the Client App.
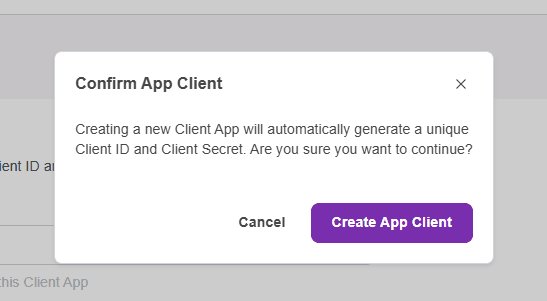
Click Create App and, in the Confirm App Client dialog, click Create App Client. The system automatically generates an App Client ID (public identifier) and an App Client Secret (private key).
Use the copy icons to save the App Client ID and the App Client Secret in a secure place, such as a password vault. Then click Continue.
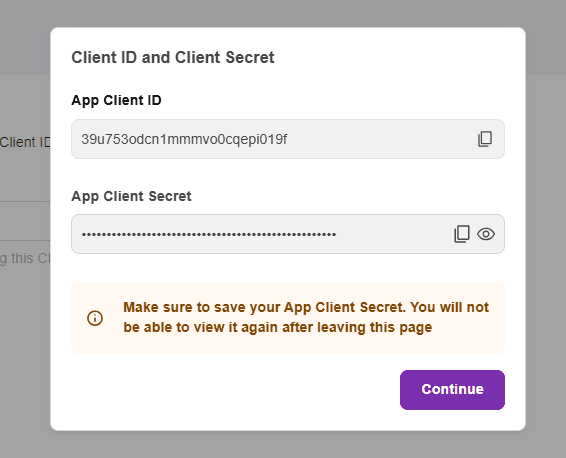
CAUTIONThe App Client Secret is shown only once, right after creation. After you close or refresh this screen, it can no longer be viewed or recovered by anyone — not even by an administrator. If you lose the Secret, you'll need to create a new Client App.
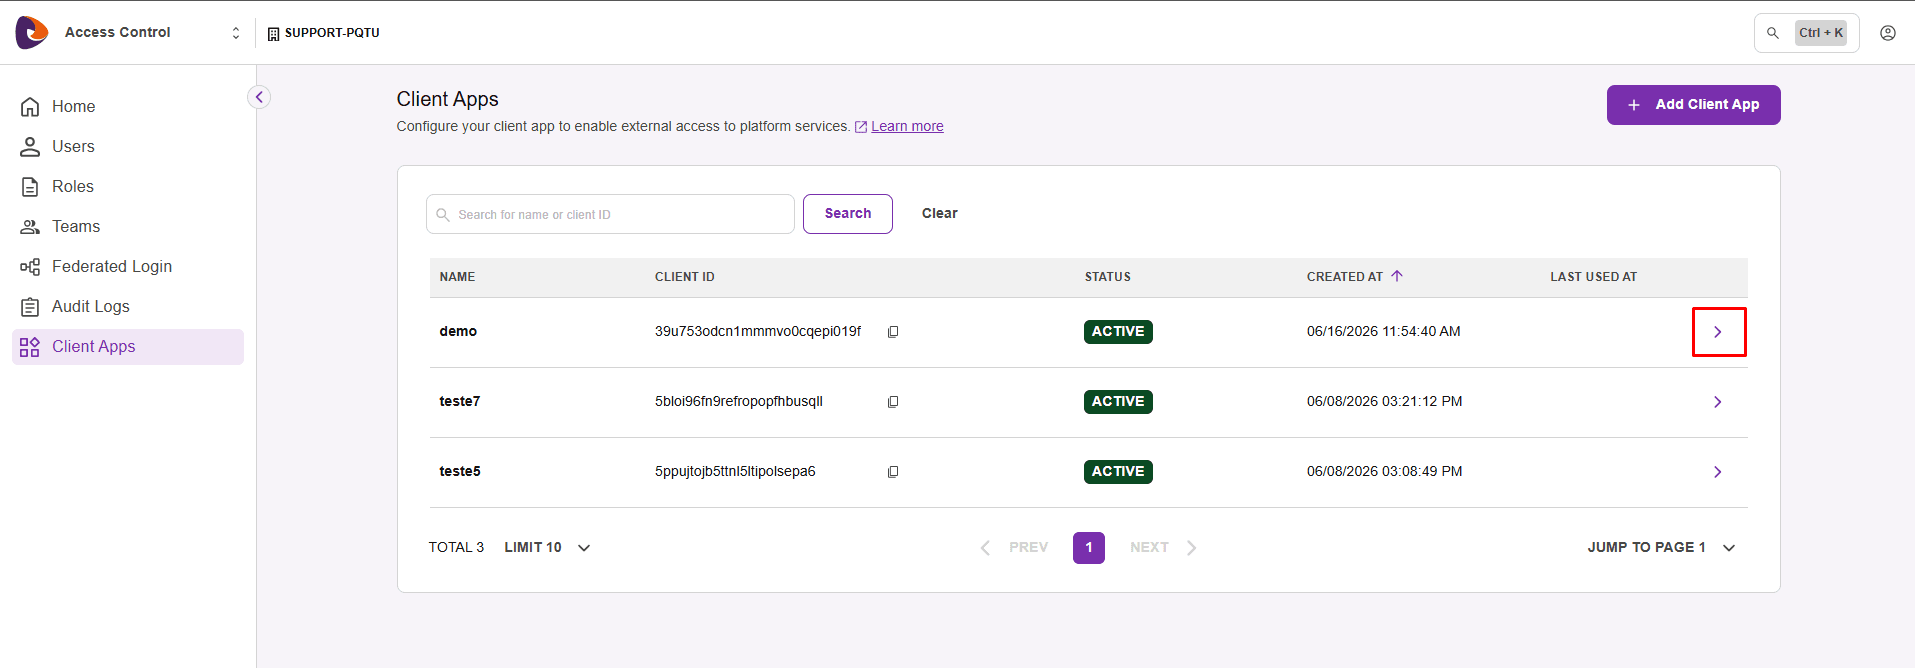
Viewing and searching Client Apps
The Client Apps screen lists all credentials in the environment, with the columns Name, Client ID, Status (ACTIVE or INACTIVE), Created at, and Last used at.
Use the Search for name or client ID field to find a credential, and the Created at column to sort the list. By default, the list is sorted by creation date.
Viewing the details
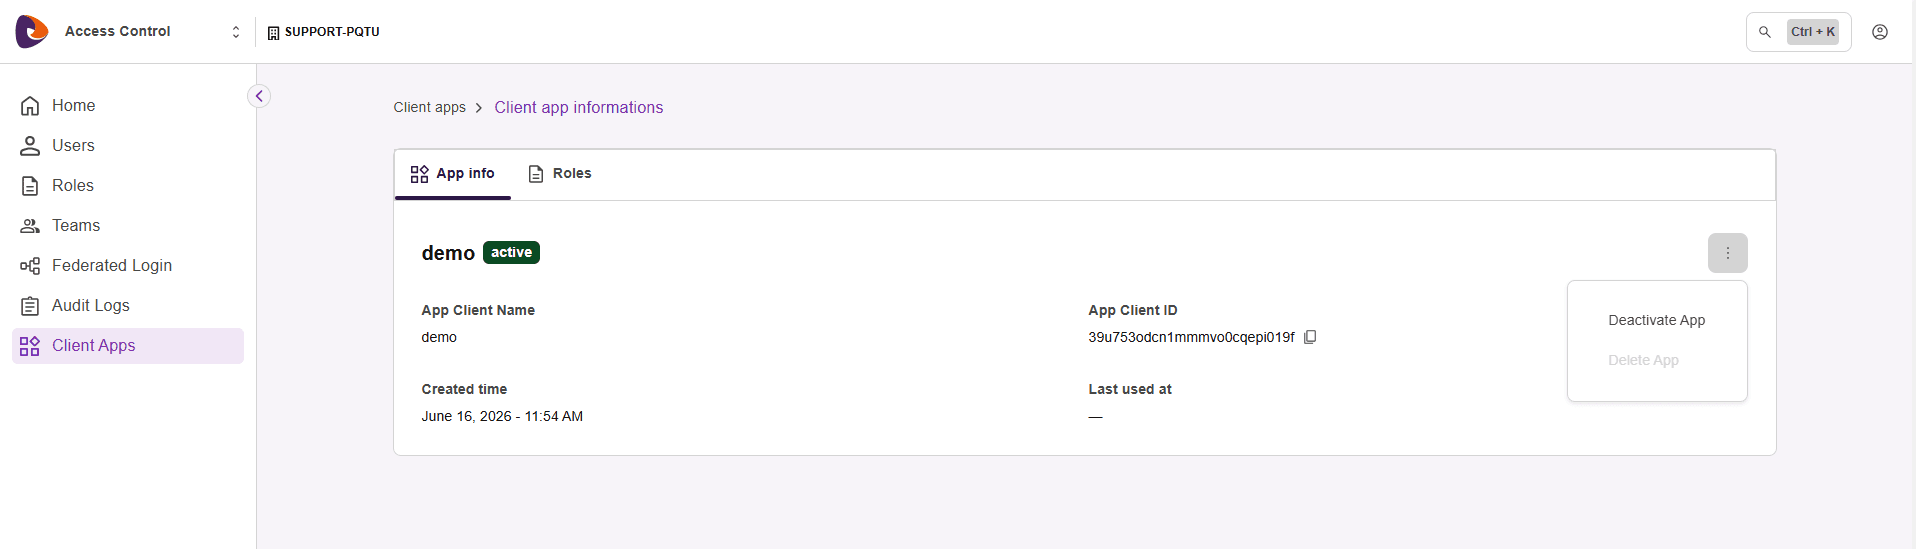
In the list, click the arrow at the end of the row to open Client app information.
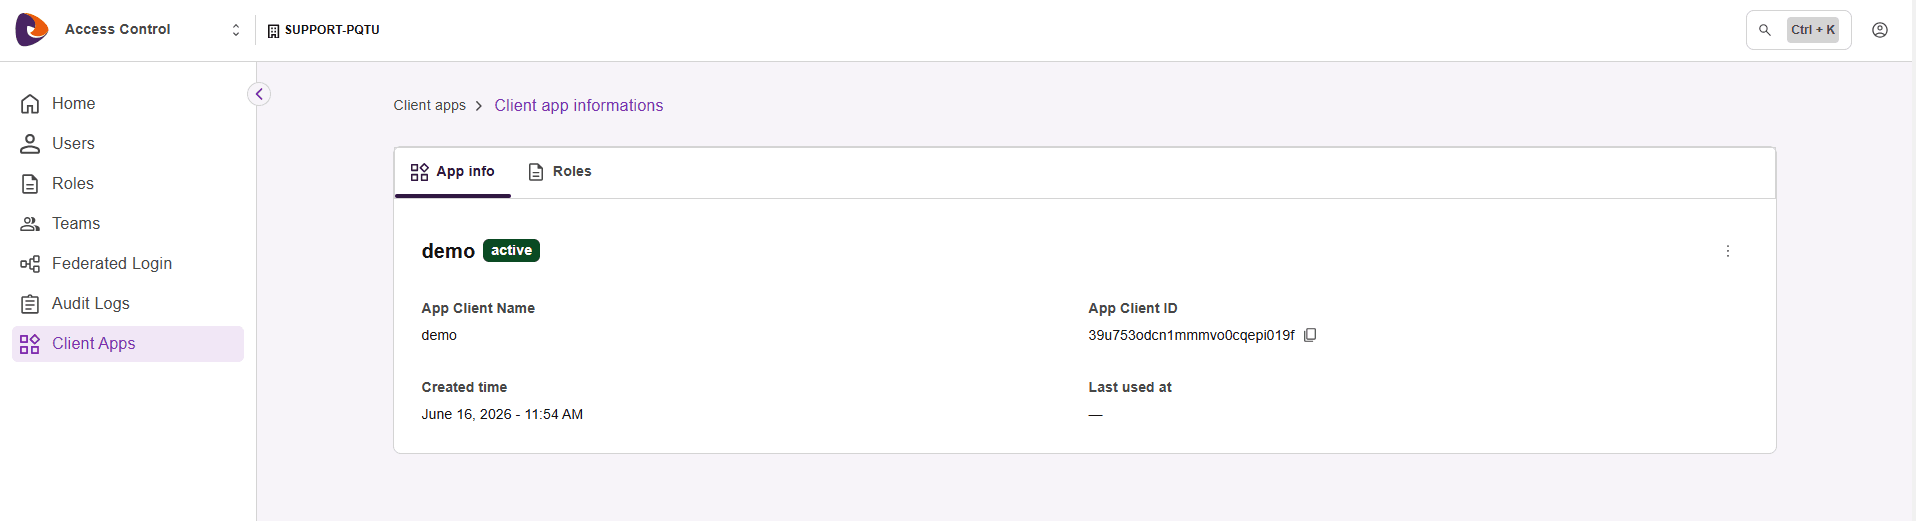
The details screen has two tabs:
- App info — name, status, App Client ID, creation date, and last used.
- Roles — the roles assigned to the Client App.
Editing the roles
You can change a Client App's roles at any time. The name, the App Client ID, and the App Client Secret are never changed — so integrations in production are not interrupted.
In the Client App details, go to the Roles tab.
Click Assign Roles to add new roles, or use the remove icon to take out an existing role.
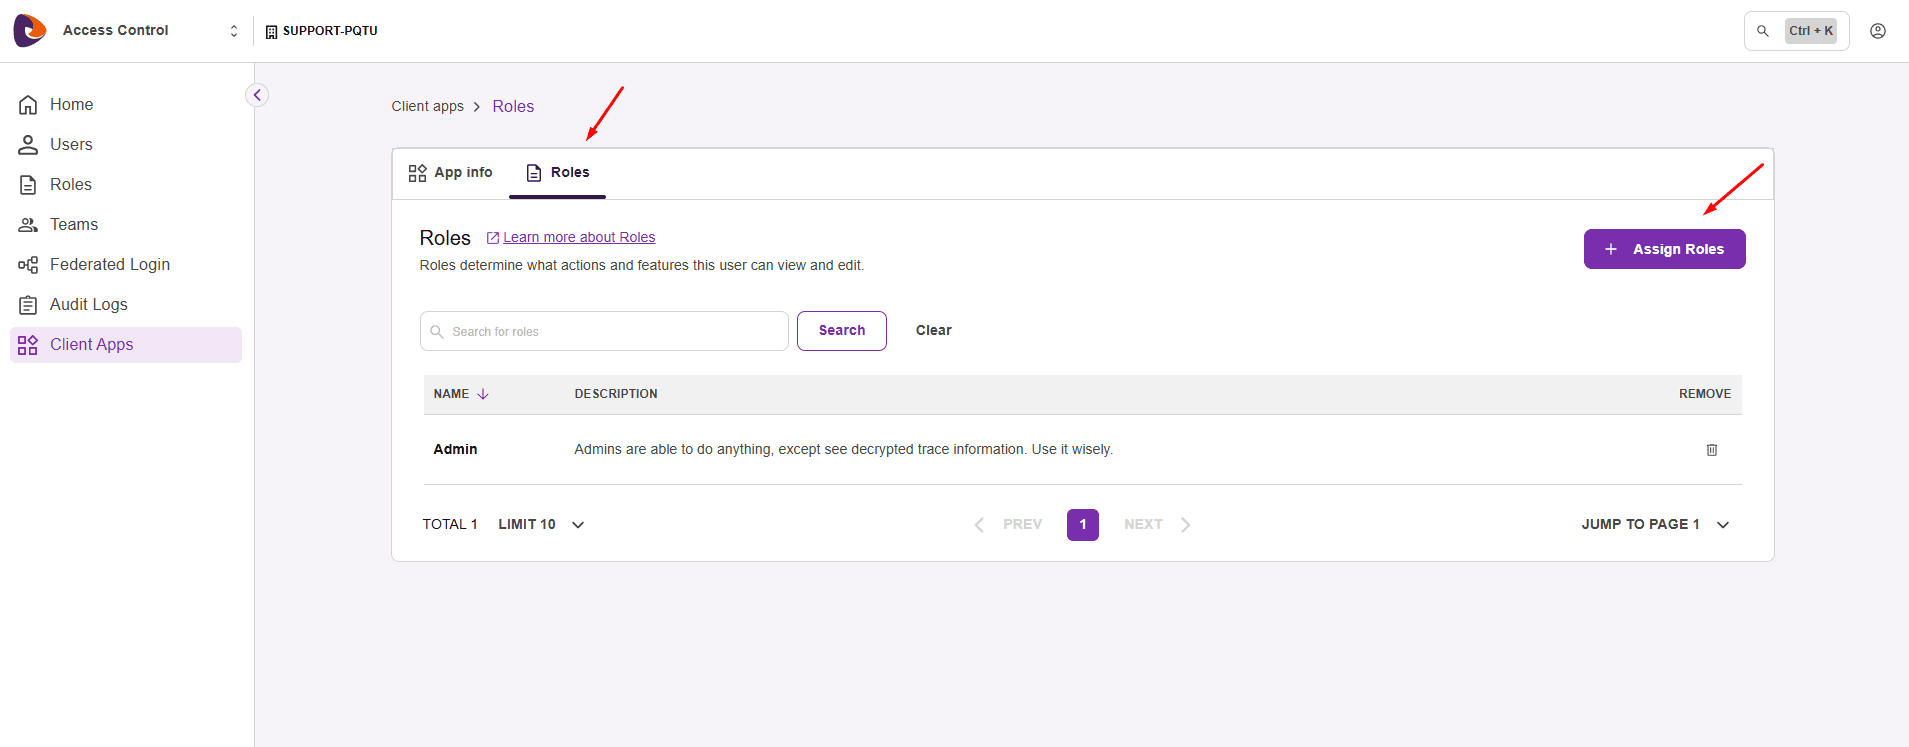
NOTERole changes apply to the next call made with the token — there's no need to generate new keys. Removed permissions stop applying, and the remaining permissions stay active.
Activating or deactivating a Client App
The status controls whether the Client App can authenticate. To change it, open the details and use the actions menu (three-dot icon).
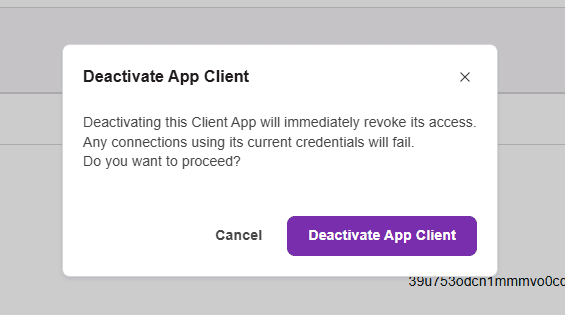
With the app active, click the actions menu and select Deactivate App.
In the Deactivate App Client dialog, confirm the action.
With the app inactive, click the actions menu and select Activate App.
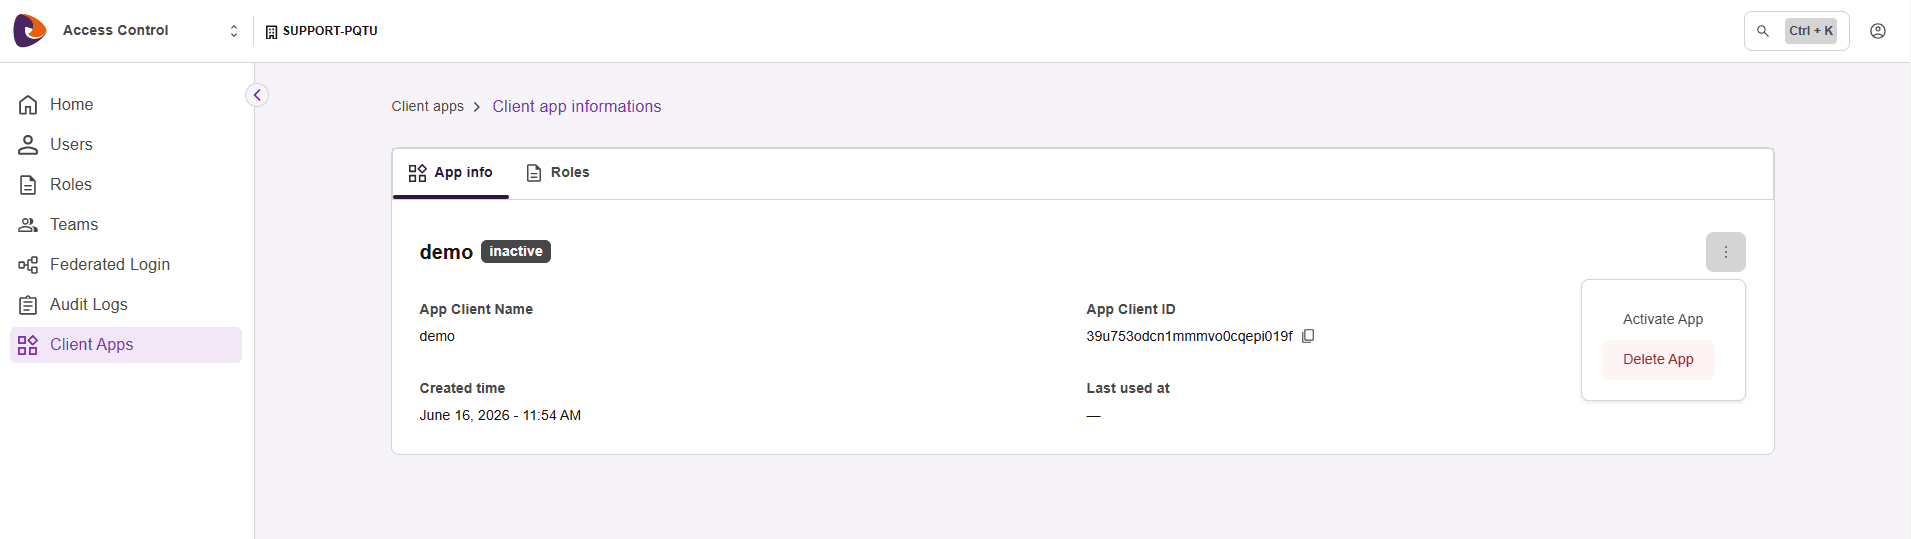
In the Activate App Client dialog, confirm the action.

WARNINGWhen you deactivate a Client App, access is revoked immediately. Any integration using its credentials starts failing right away, even if the token is still within its validity period. When you reactivate it, access is restored.
Deleting a Client App
IMPORTANTTo delete a Client App, it must be deactivated. While it's active, the Delete App option is unavailable. Deactivate the Client App before deleting it.
If it's still active, deactivate it first (see the previous section).
In the details, open the actions menu and click Delete App. In the Delete App Client dialog, confirm the deletion.

CAUTIONDeletion is irreversible. The App Client ID and the App Client Secret are permanently erased, and all role bindings are removed. Any attempt to generate or use a token with these keys starts failing immediately.
Limits and rules
- Limit per environment: you can have at most 20 Client Apps per environment, counting active and inactive ones.
- Unique, immutable name: the name is unique per environment and can't be changed after creation.
- Non-recoverable Secret: the App Client Secret is shown only once and can't be recovered afterward.
- Deletion of inactive ones only: you can only delete a deactivated Client App.
- Audit: creating, editing, and deleting Client Apps generate events in Audit Logs.
Using the Client App
This layer describes how your application uses the credentials to access the platform APIs. The flow is done entirely through HTTP requests, using the App Client ID and the App Client Secret generated at creation.
Generating an access token
To get a token, your application sends a request to the token Endpoint with the credentials in the Authorization header.
Request headers and body:
- Authorization:
Basicfollowed by theclientId:clientSecretpair encoded in Base64. - Content-Type:
application/x-www-form-urlencoded. - In the body, send
grant_type=client_credentials(the only accepted value).
Sample request:
Sample response:
The token is only issued if the Client App is active. The token carries the permissions of the roles assigned to the credential and never exceeds what was authorized.
Using the token in the APIs
With the token in hand, send it in the Authorization header of the calls to the platform APIs:
On every call, the platform checks whether the token is valid and whether the credential has permission for the requested resource.
Token validity and renewal
The token is valid for 24 hours (expires_in: 86400). The same token is reused for part of that period; when it expires, just repeat the generation request to get a new one.
TIPStore the token and reuse it while it's valid, instead of generating a new one on every call. Request a new token only when the current one is about to expire.
Checking a token's status
To quickly check whether a token can still be used before calling other services, use the status Endpoint:
Send the token in the Authorization: Bearer <access_token> header. The possible responses are:
200with{ "active": true }— the token is valid and the Client App is active.401with{ "active": false }— the token is invalid or expired, or the Client App was deactivated.
Since a deactivated Client App immediately invalidates the tokens it generated, this check reflects the current status of the credential — even if the token is still within its validity period.
Authorization and errors
Every call made with an M2M token goes through the same permission validation applied to named users. The token only accesses the resources for which the credential has explicit permission. The table below summarizes the error responses:
NOTEPermission changes apply from the next call made with the token onward, with no need to generate a new key pair.