- Home
- Documentation
- Integrations
- Creating a New Integration
Creating a New Integration
The Source screen is where you create your integration flows. You can create integrations in two ways:
-
Visually, in the Diagram tab: add steps to the canvas and fill in the configuration forms to define the integration flow.
-
Via code, in the Source Code tab: use CAMEL YAML DSL to write the integration script directly in the
main.yamlfile.
While you build the integration in the Diagram tab, you can switch to the Source Code tab and view the corresponding code, and vice versa.
The animation below illustrates the creation of an integration and the features available in each tab:
Check our step-by-step guide to build an integration:
(Optional) Create resources
(Optional) Create flow variables
(Optional) Validate the flow and execute it in test mode
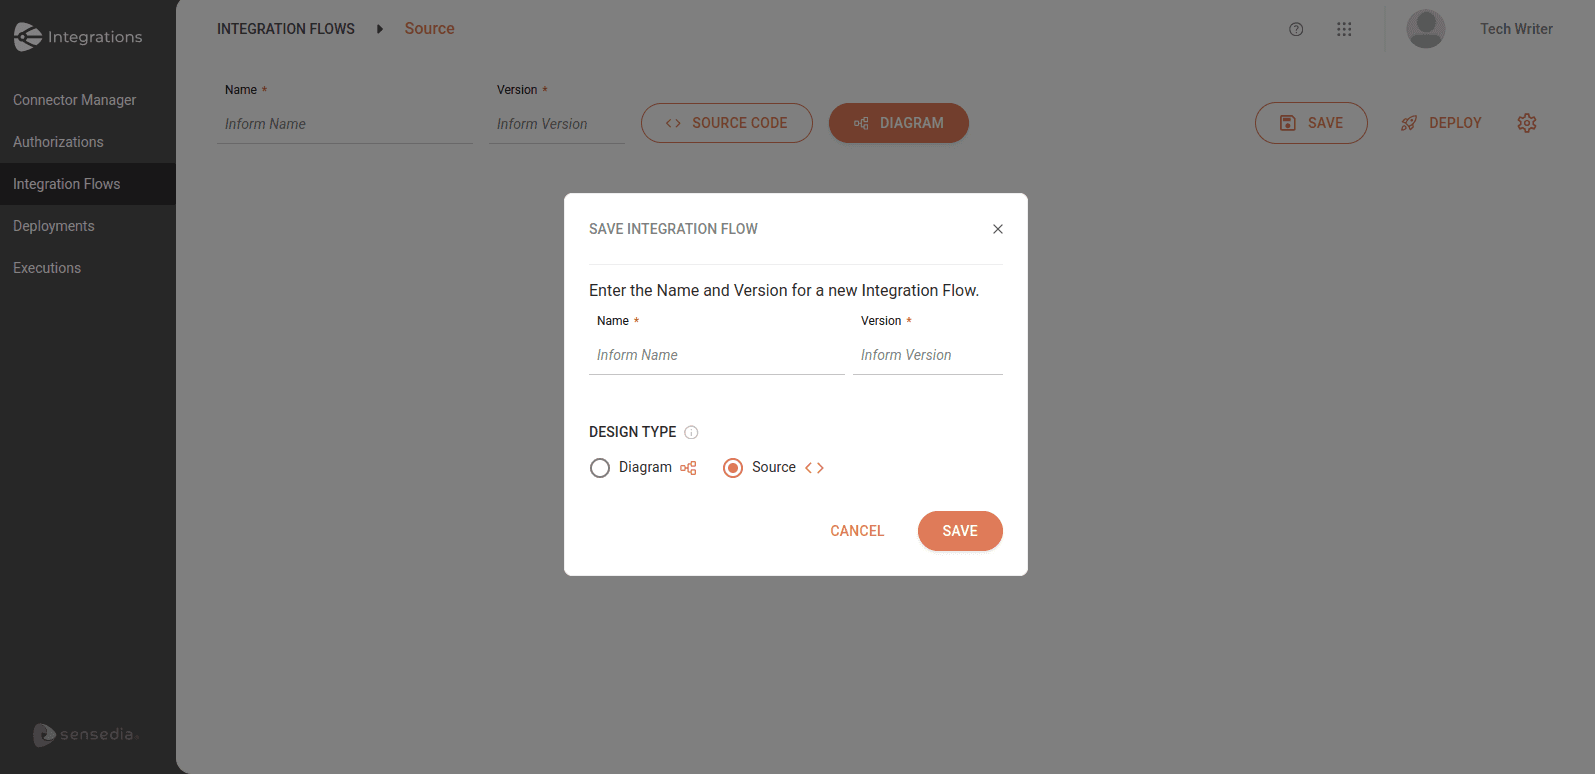
Create a new flow on the Integration Flows screen
- Access the Integration Flows screen.
- Click + NEW FLOW.
- In the modal window that opens, enter the name and version of the integration flow. You can edit them later.
- Select the Source design type.
- Click SAVE.
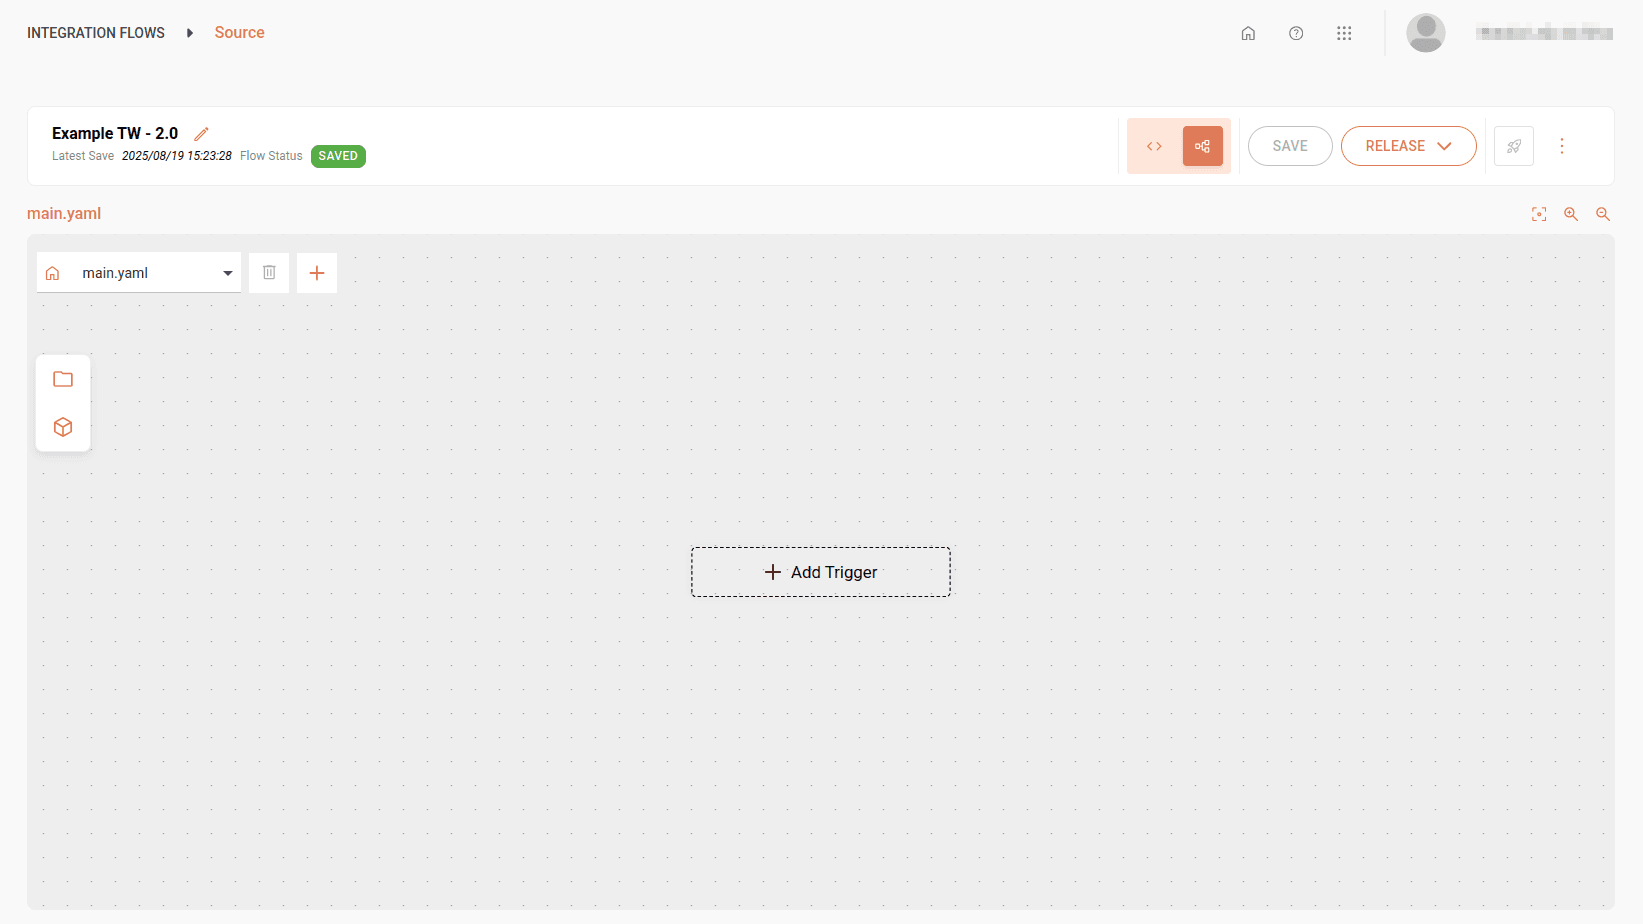
Access the Source screen
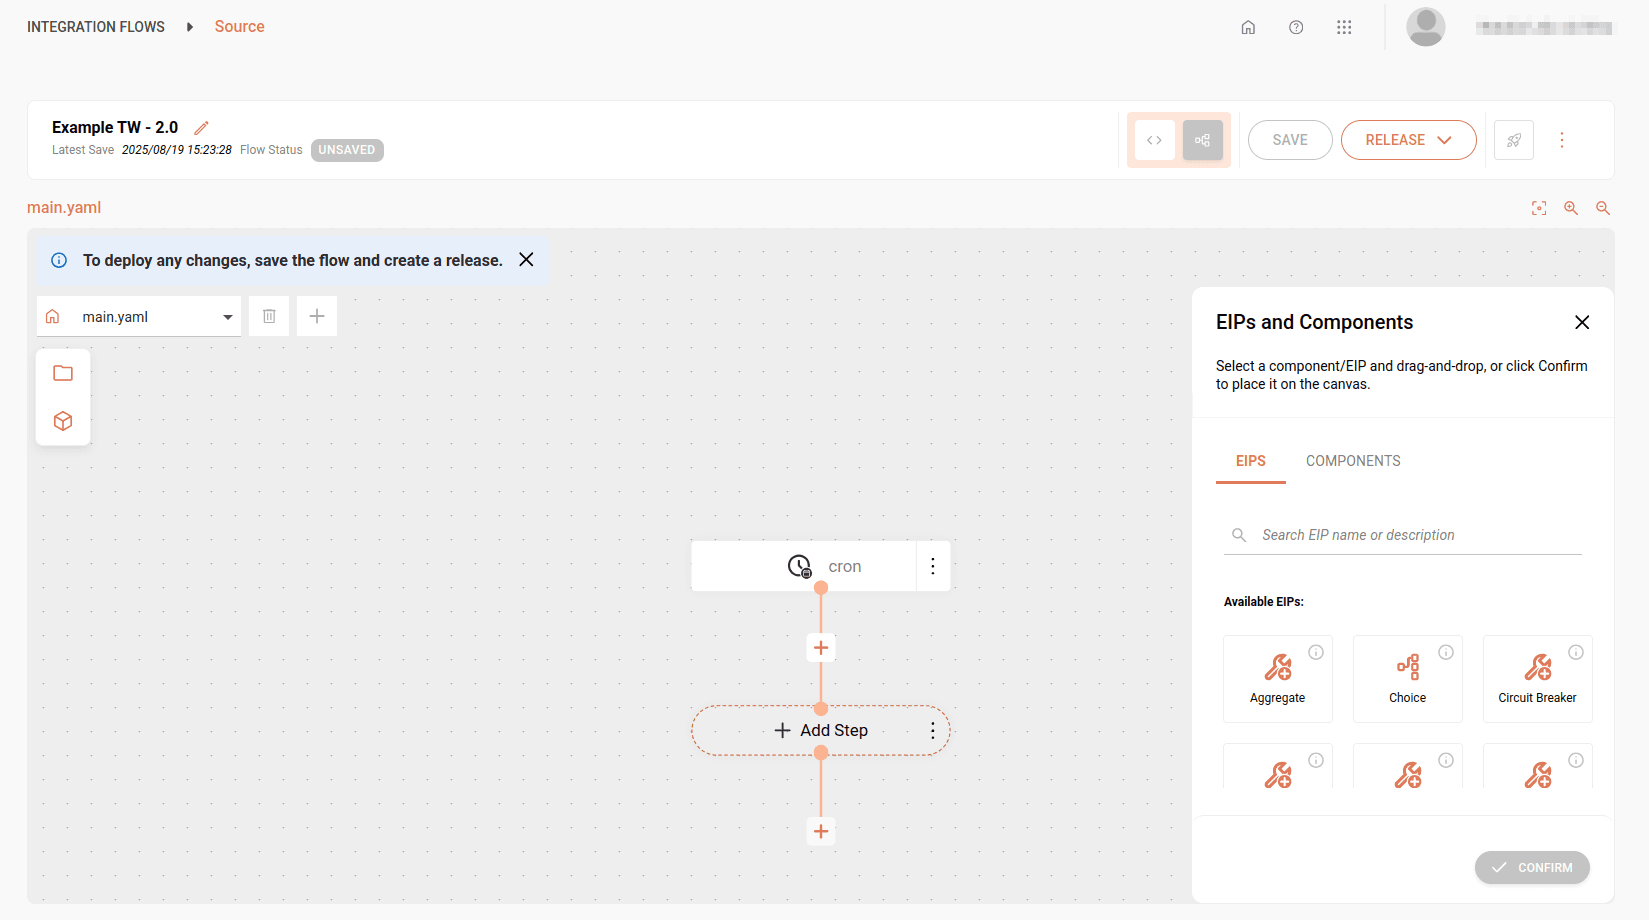
- After creating the flow, you will see the Source screen with the Diagram tab selected by default.
- In the
main.yaml, you will see the canvas with the empty trigger step as the first step of the integration.
The image below shows the Source screen displaying the Diagram tab.
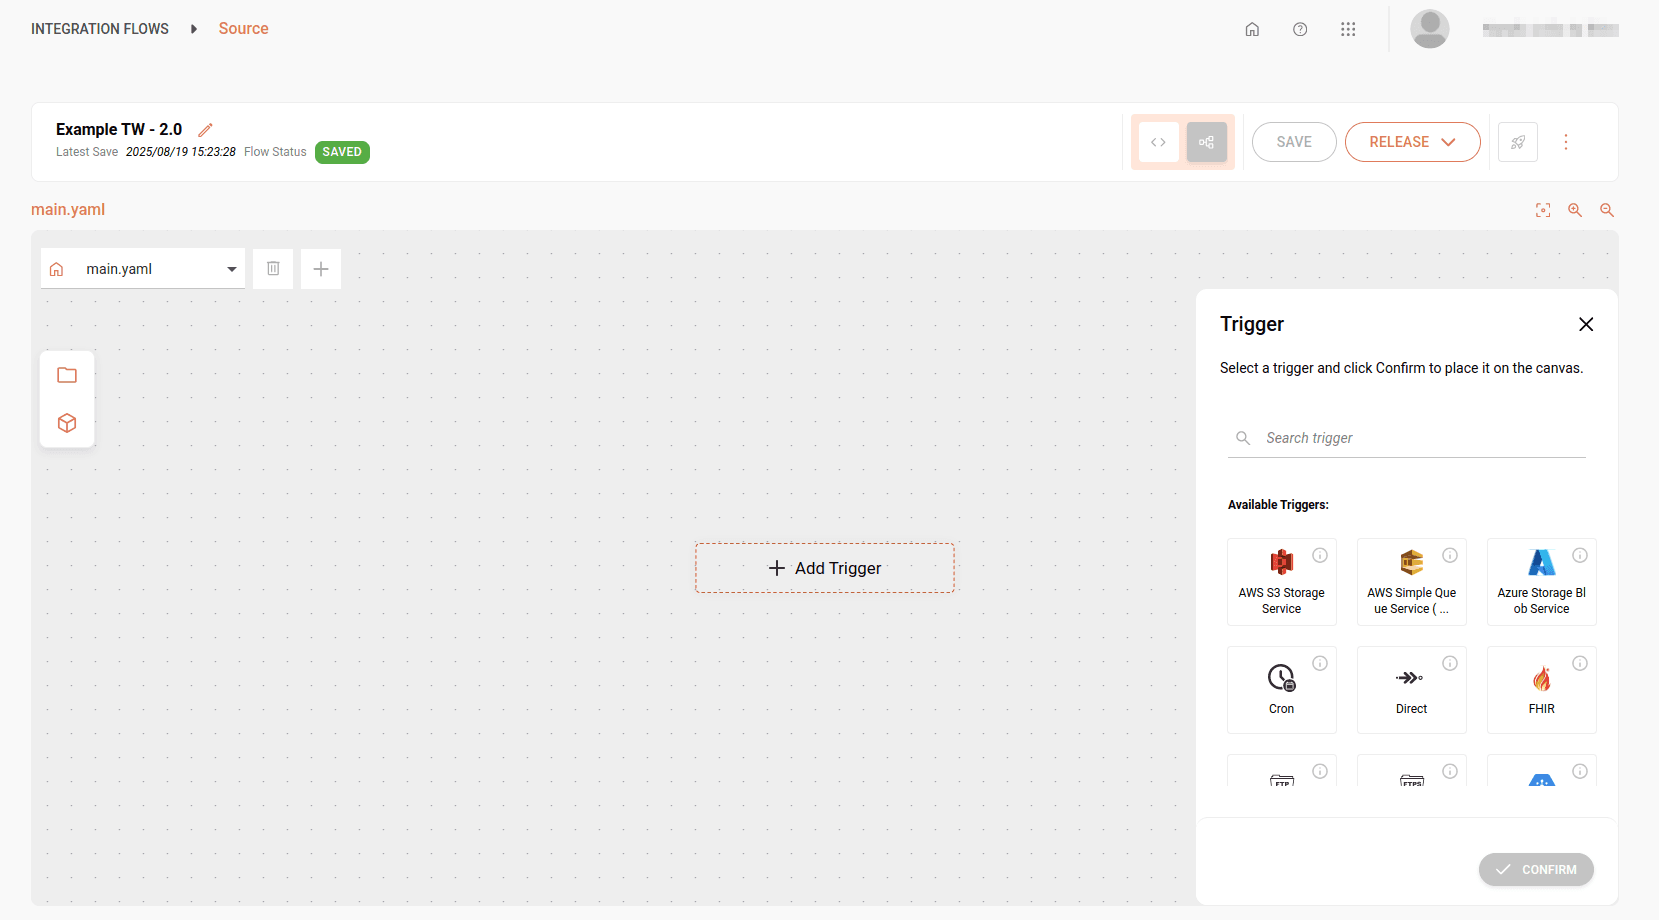
Select a trigger to execute the integration
- Click + Add Trigger.
- Select a trigger from the menu on the right side of the screen and click CONFIRM to add it to the canvas. Alternatively, you can drag it. If necessary, use the search tool to locate it.
- After adding the trigger to the integration, the configuration form will automatically open. However, you can continue adding steps and configure it later.
IMPORTANTYou can replace a trigger with another, but all settings of the original trigger will be lost. To replace a trigger, click the three-dot icon on the step and then click Replace.
Add components and EIPs to the route
-
After adding the trigger, you will see a
 icon indicating the addition of a new step.
 -
Click the
icon.
Then click + Add Step. -
Select a component or an EIP from the menu on the right side of the screen by clicking the corresponding tab. If necessary, use the search tool to locate a specific component or EIP. Then click CONFIRM. Alternatively, you can drag it.
NOTEAfter adding a step to the canvas, the configuration form will automatically open. However, you can continue adding steps and configure them later.
TIPTo enable sending and viewing execution records (logs) in Sensedia Analytics, add the Log EIP. When viewing the records, you will not be able to select the Trace and Debug levels.
(Optional) Create resources
For some Apache Camel components, such as "JSONata", it is necessary to use scripts stored in separate files. These files can be created in Resources, regardless of the file extension. This way, you can reference them directly in the main flow, ensuring they are used during the integration flow execution.
To create a resource file:
- Click the resources icon
 on the left side of the canvas.
 - Click +.
- Click the file and define the name and extension, such as:
jsonata.yaml,teste.txt, etc. - Add the file content in the text editor.
- Save the resource file by clicking SAVE.
NOTECheck more information about Resources.
(Optional) Create flow variables
Variables allow for custom flow configuration and environment parameterization, eliminating the need to create a separate integration flow for each environment.
To create a variable:
- Click the variables icon
 on the left side of the canvas.
 - Select the environment in which the variable will be applied: Production or Staging.
- Register the variable in the form that opens.
- Save the variable by clicking SAVE.
NOTECheck more information about variables.
(Optional) Validate the flow and execute it in test mode
Test mode allows you to execute and validate an integration flow before final deployment, facilitating error identification, data validation, and performance optimization. You can test flows even while they are still under construction, promoting continuous adjustments.
To execute an integration in test mode, it cannot contain structure and/or syntax errors. To validate your flow, save the file or use the Full Validation feature in the Source Code tab at the top right of the code editor (check symbol).
NOTECheck more information about test mode and error validation.
Create a release
A release is essentially a specific version of your integration flow. This feature allows you to control and manage different versions of your integrations. Creating a release is mandatory before deploying an integration.
NOTECheck more information about releases.
Deploy the integration flow
To deploy an integration, click the rocket icon at the top right of the screen.
Simply confirm the deployment environment and the integration release, and click DEPLOY.
NOTECheck more information about how to deploy the integration flow.