- Home
- ...
- Authorizations - Canvas
- OAUTH 2 - Client Credentials
To register an authorization of type OAuth 2 Client Credentials, access the Authorizations screen through the left side menu or the corresponding card on the Home screen.
NOTETo understand the differences between Sensedia Integrations authorization types, visit our Glossary.
On the Authorizations screen, click New Authorization in the upper right corner. The registration screen has three sections: Basic Info, Authorization Configuration and Environment Configuration.
In Basic Info, fill in the following fields:
- Name: authorization name, displayed when you select it in the integration flow. Accepts only alphanumeric characters, - or _, without spaces, with a limit of 100 characters.
- Description (optional): authorization description. Limit of 1024 characters.
In Authorization Configuration, select OAuth 2 in the Authorization Type field and the Client Credentials grant in the Grant Type field:
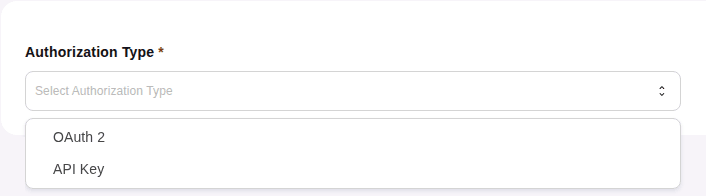
After the authorization is saved, its name, type and grant cannot be changed.
In Environment Configuration, configure the environments where the authorization will be used:
- Staging
- Production
TIPData registered in the Staging environment will be used when executing Test Mode.
You can configure one or both environments. To configure an environment, click the pencil icon in the Actions column of its row and fill in the following fields:
-
Token URL: enter the token URL.
-
Client ID: enter the client ID registered with the API provider.
-
Client Secret: enter the client secret registered with the API provider. To view the value, click the
 button on the right.
-
Scope (optional): enter which scope values you want to send in the authorization request. Limit of 250 characters per value. Maximum of 500 values. To add a value, click +, type the scope and press Enter. To delete a value, click the x on the tag.
-
Client Authentication: presents the following options:
-
Send as Basic Auth header (default): the Auth authentication request will be sent in the request header.
-
Send client credentials in body: the Client Credentials authentication request will be sent in the request body.
-
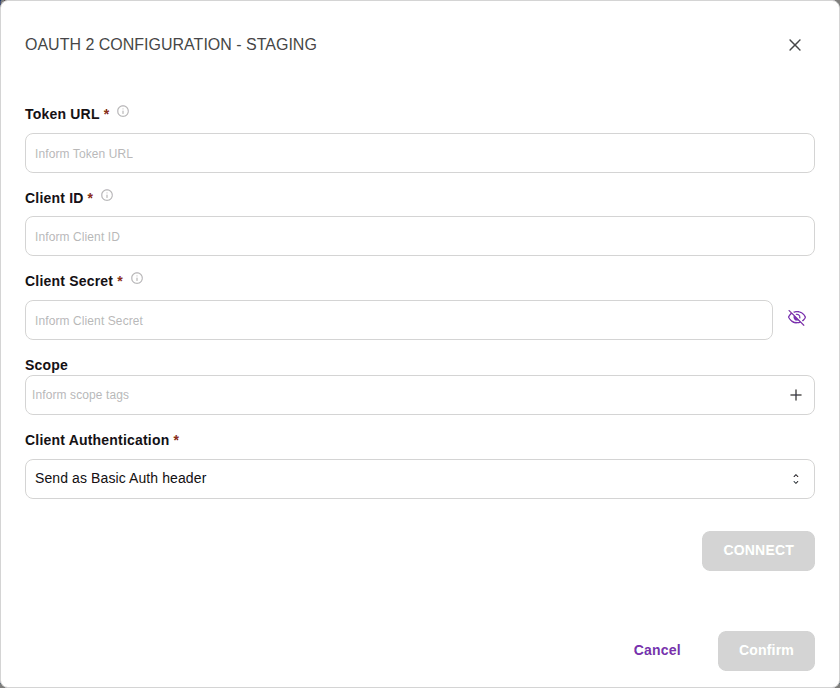
To validate the entered data and make a request to the server generating a new token, click CONNECT.
If the data is validated successfully, the button will change to CONNECTED. If the entered data changes, you must click CONNECT again.
After connecting, click Confirm, which is only enabled once the connection is validated. The environment status changes from Not Configured to Configured.
To erase an environment's configuration, click the clear icon next to the pencil and confirm. The configuration is only removed when you save the authorization.
To save the authorization, click Save.
NOTEThe Save button is enabled when the Name field is filled in and at least one environment is configured.
To exit without saving your changes, click Cancel and confirm the action.