Connection with AWS Gateways

Access Credentials

To create a connection for the AWS API Gateway, you must enter your AWS credentials on the Connections screen.

These credentials are obtained from AWS.

Access the AWS Management Console and follow the steps below to:

Consult the AWS documentation for more details.

Creating a User

There are several ways to create an IAM user in your AWS account.

Follow the steps below to create a user through the AWS Management Console:

  1. At the top of the AWS Management Console, in the search bar, search for and select IAM.
    screenshot of the search screen in AWS Management Console showing the IAM result

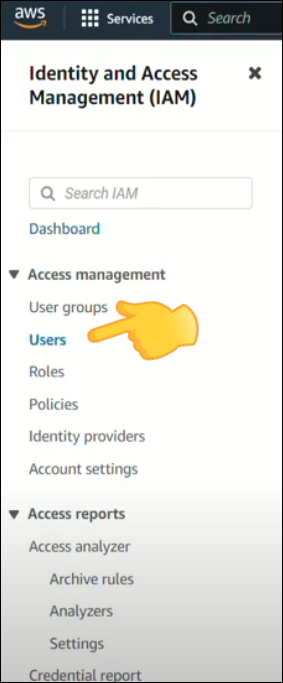
  2. In the left menu, under Access management, select Users.
    screenshot of the AWS management dashboard highlighting the Users option

  3. Click the Create user button in the top-right corner of the screen.

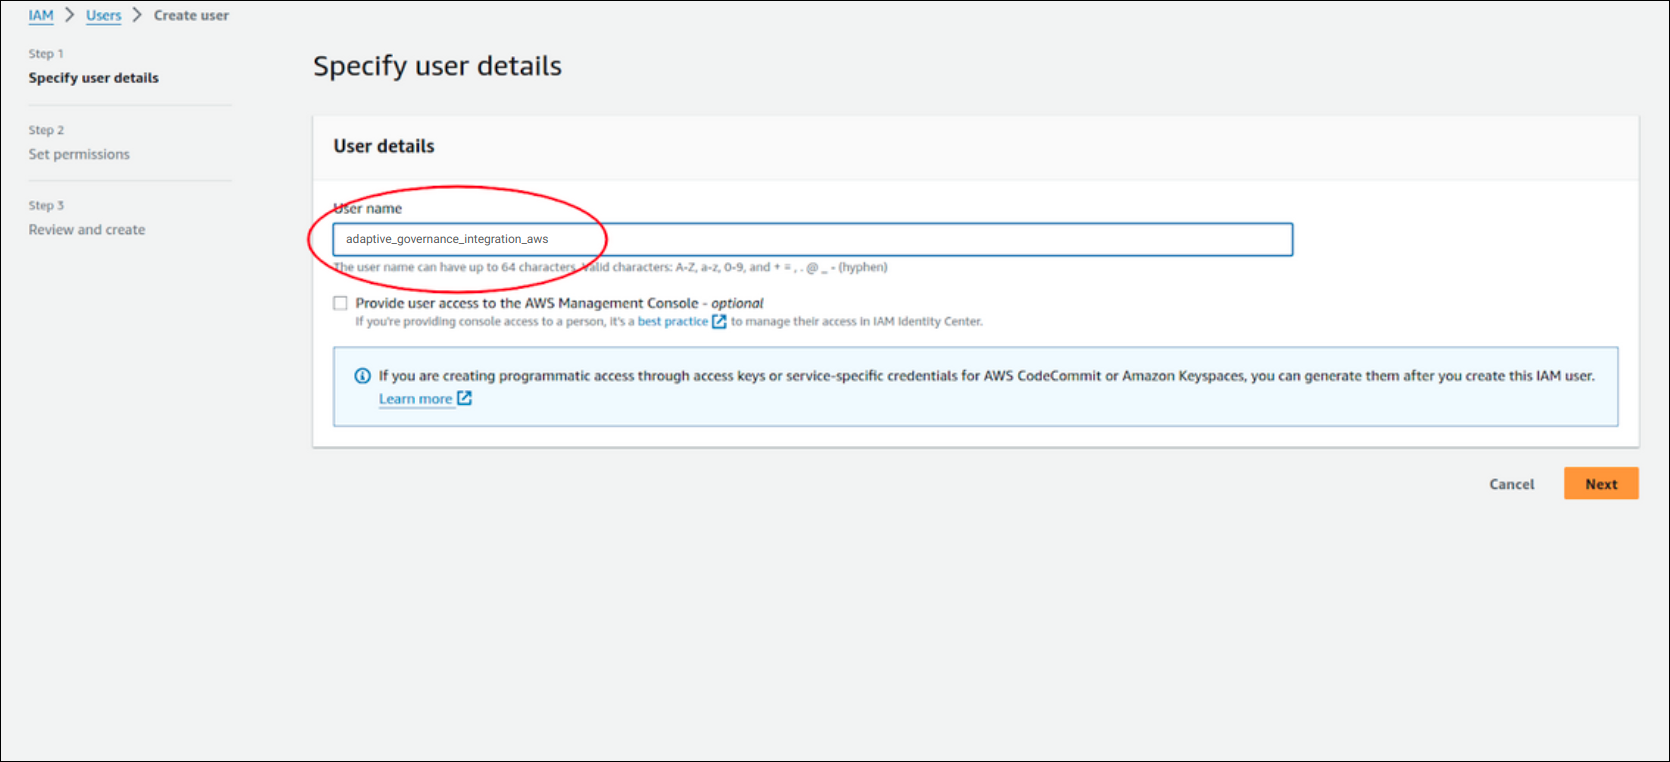
  4. In the User name field, enter the value: adaptive_governance_integration_aws and click Next.
    screenshot of the AWS management panel with emphasis on the user name field

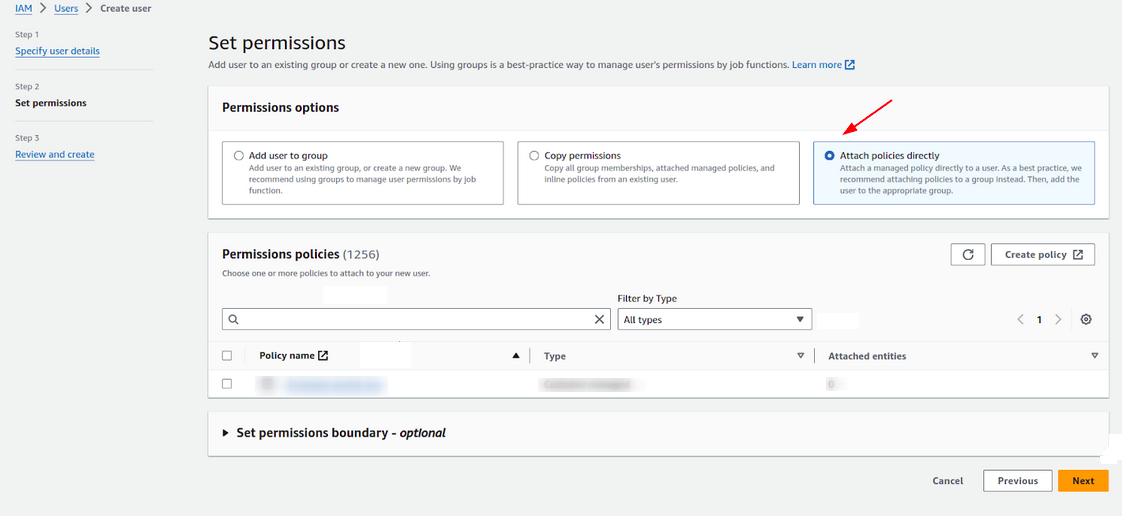
  5. Under Permissions options, select Attach policies directly and click Next.
    screenshot of the AWS panel highlighting the option to add <em>policies</em>

    Under Permissions policies, DO NOT select Policy name.
  6. Under Review and Create, review the information and click Create user.


Adding an Access Policy

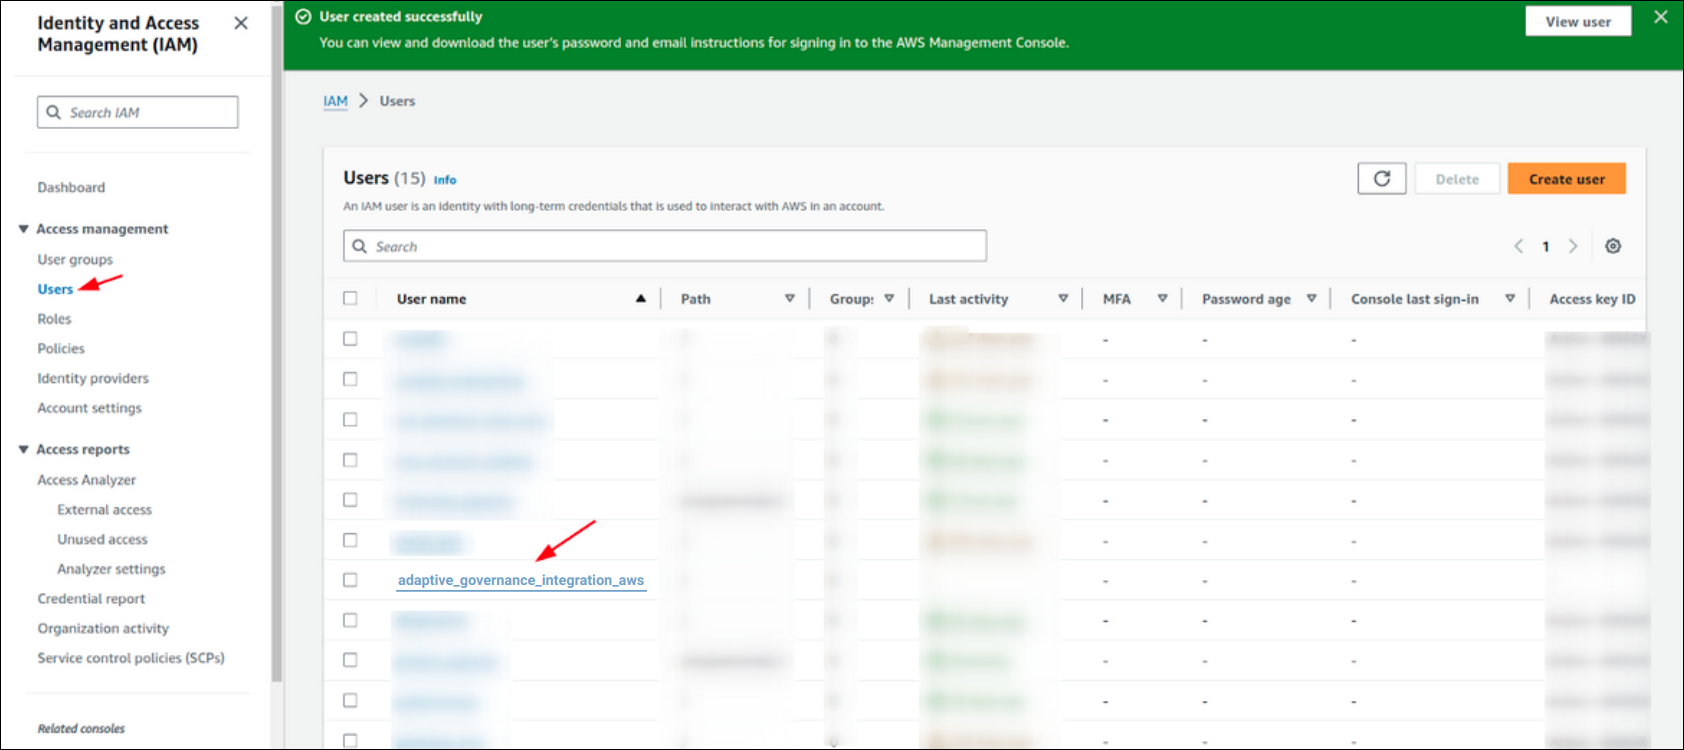
  1. In the user list, select adaptive_governance_integration_aws
    screenshot showing the created user in the user list

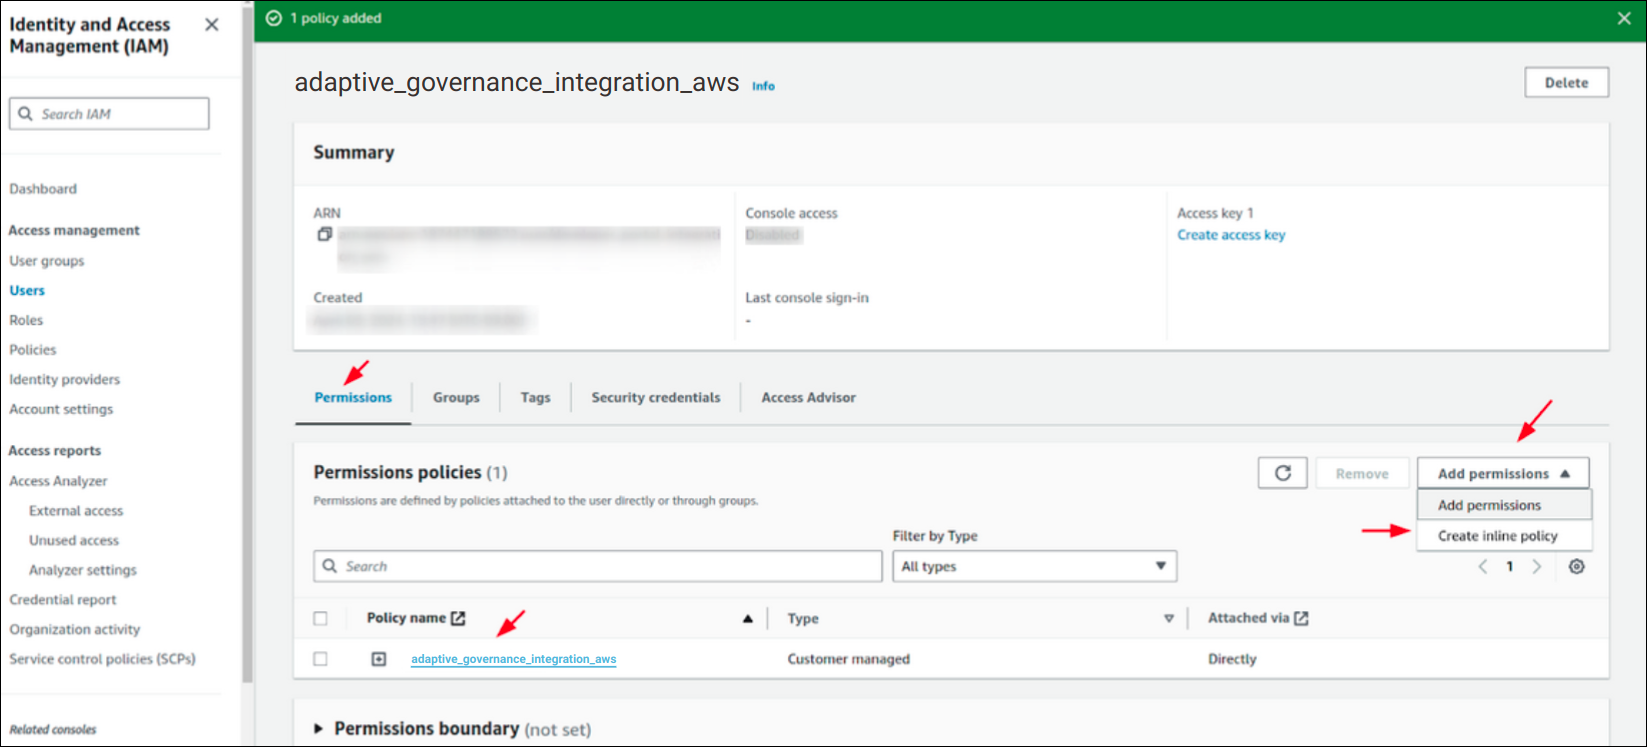
  2. In the Permissions tab, under Permissions policies, click the Add Permissions button, and then click Create inline policy.
    screenshot showing the Permissions tab and Add Permissions button

  3. In the Policy editor, select the JSON tab.
    screenshot showing the JSON tab in the policy editor

  4. Copy and paste the code below into the editor.

    {
        "Version": "2012-10-17",
        "Statement": [
            {
                "Sid": "VisualEditor0",
                "Effect": "Allow",
                "Action": [
                    "apigateway:GET"
                ],
                "Resource": [
                    "*"
                ]
            }
        ]
    }
    
    or
    
    {
        "Version": "2012-10-17",
        "Statement": [
            {
                "Sid": "VisualEditor0",
                "Effect": "Allow",
                "Action": [
                    "apigateway:GET"
                ],
                "Resource": [
                    "arn:aws:apigateway:*::/restapis",
                    "arn:aws:apigateway:*::/restapis/*",
                    "arn:aws:apigateway:*::/restapis/*/stages",
                    "arn:aws:apigateway:*::/restapis/*/deployments",
                    "arn:aws:apigateway:*::/restapis/*/deployments/*",
                    "arn:aws:apigateway:*::/apikeys",
                    "arn:aws:apigateway:*::/usageplans"
                ]
            }
        ]
    }

    [IMPORTANT] Depending on your business needs, there are some policy templates that can be used.

  5. Click Next.

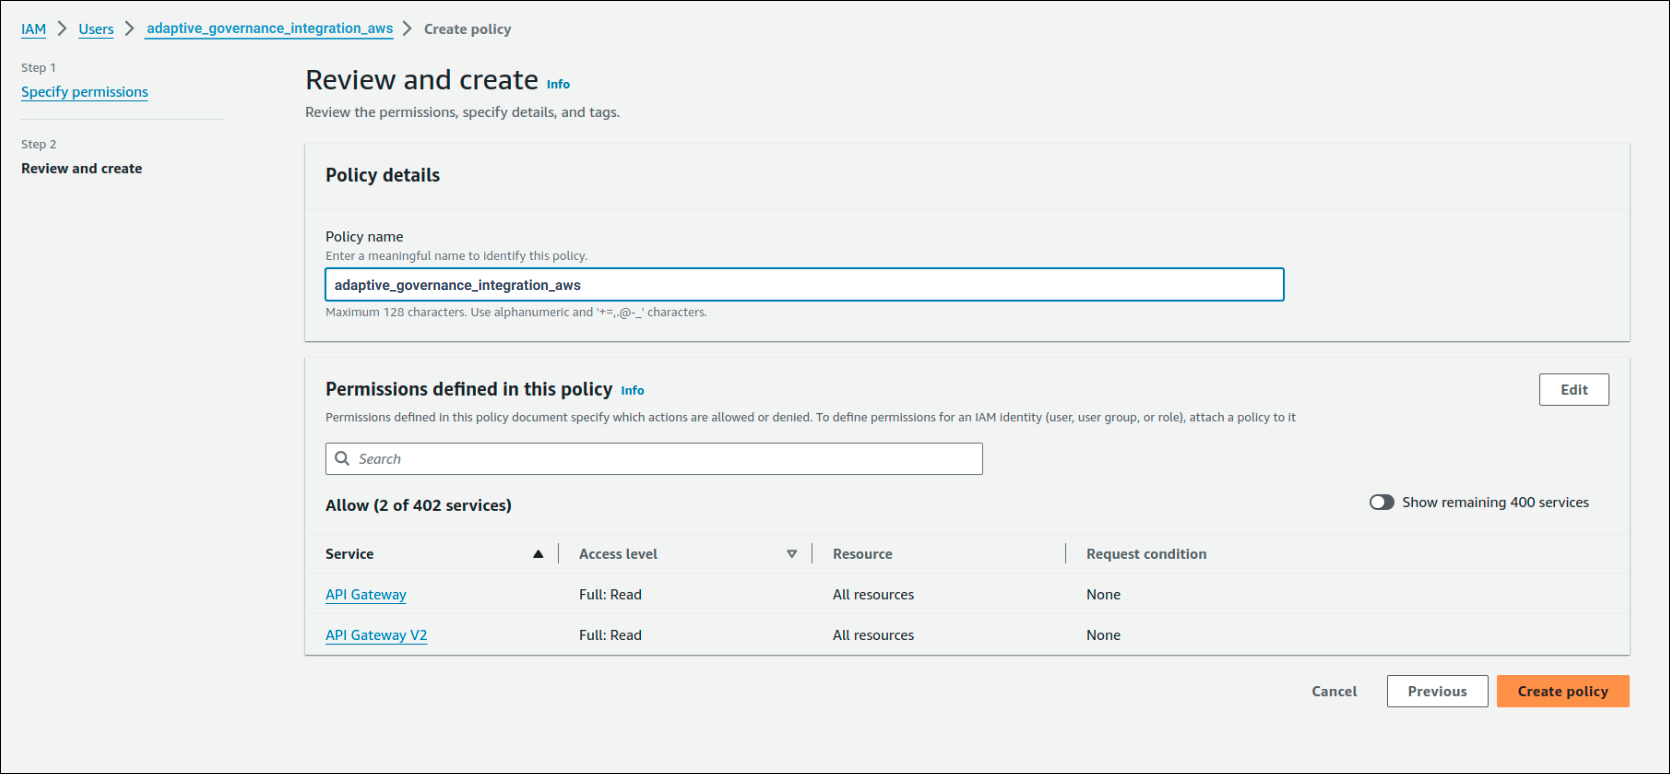
  6. In the Policy name field, enter the value adaptive_governance-aws and click Create policy.
    screenshot showing the Create and Review screen


Creating the Credentials

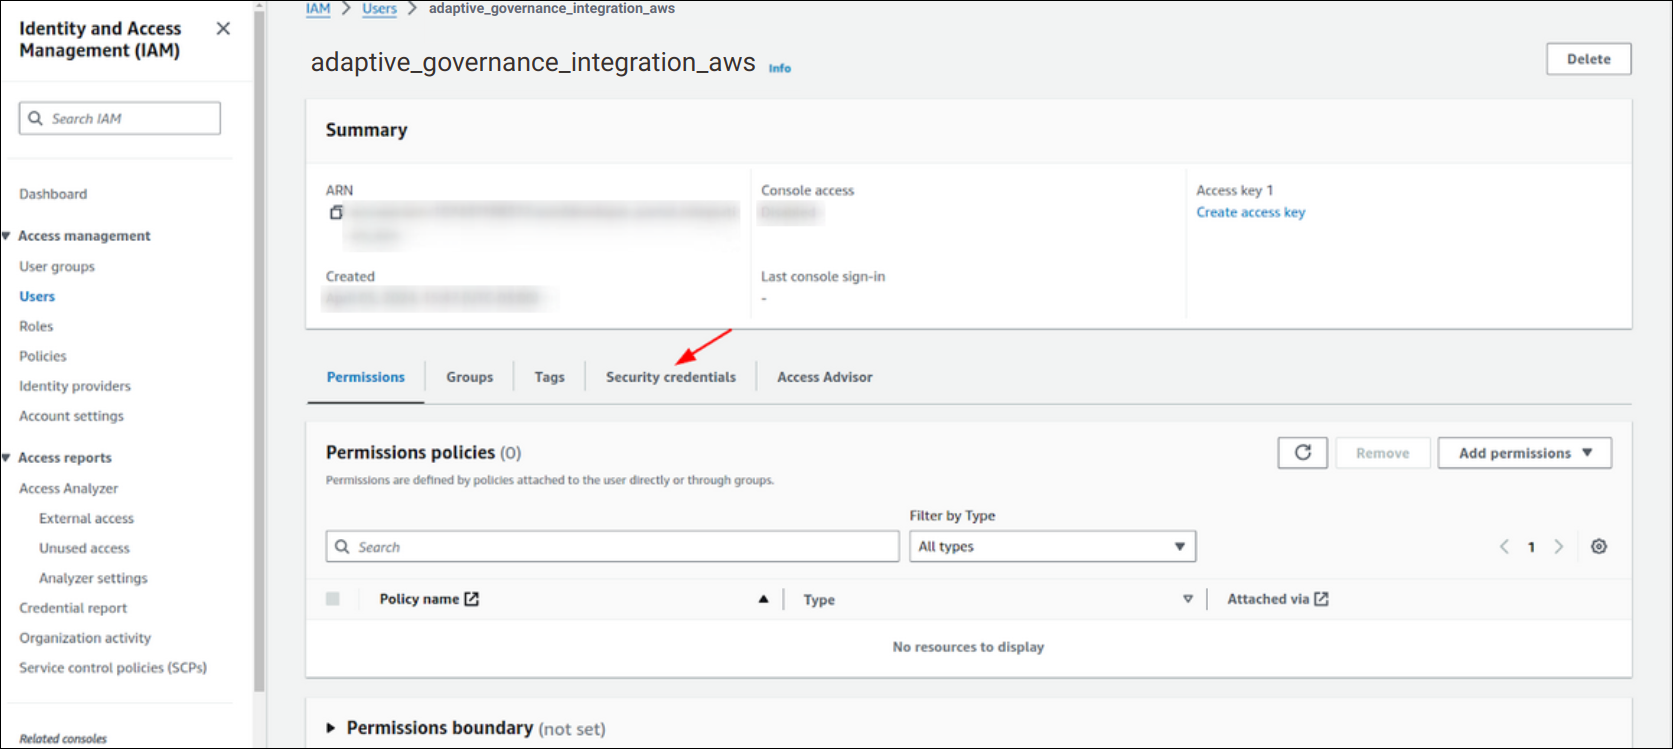
  1. In the user list, select adaptive_governance_integration_aws and click the Security credentials tab.
    aws security credentials

  2. Scroll down to Access keys and click Create access key.
    aws create access key

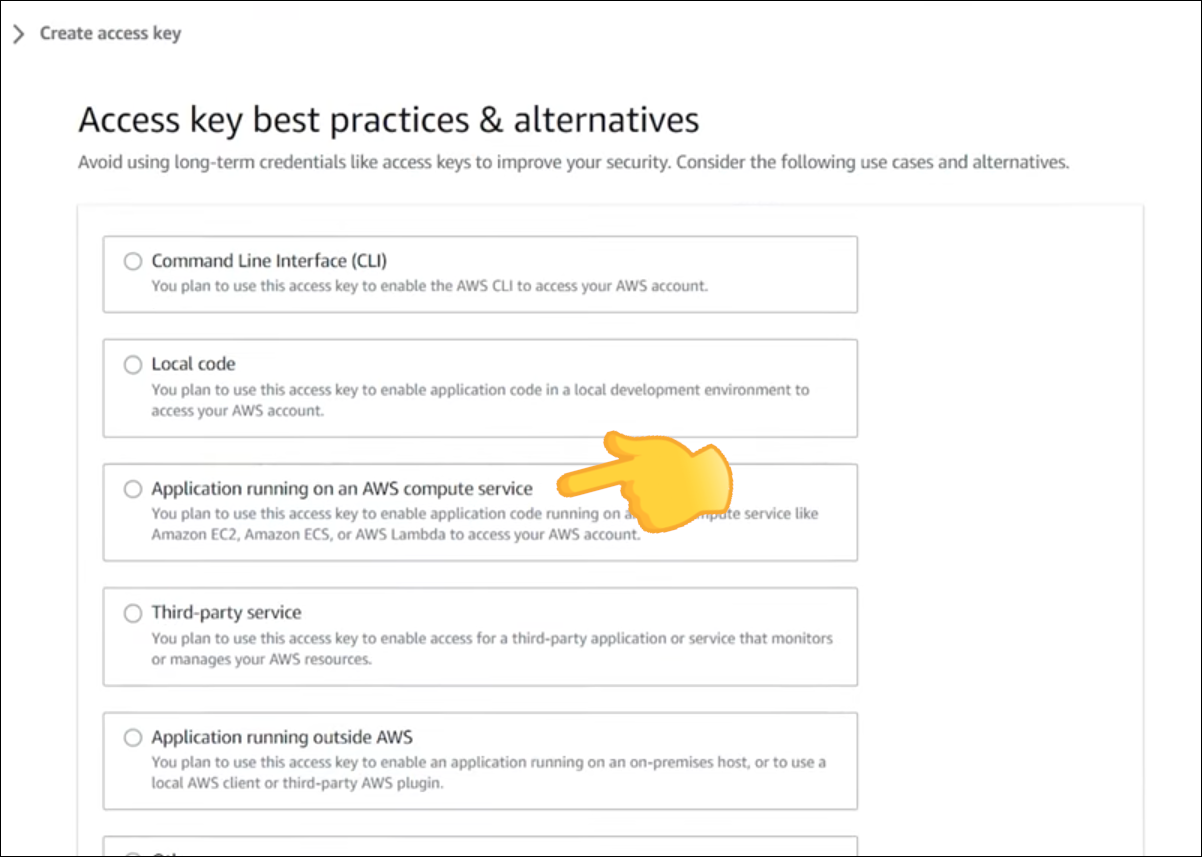
  3. Select the option Application running on an AWS compute service.
    screenshot showing the option for Application running

    Check the confirmation box at the bottom of the page.
    confirmation box
  4. Click Next.

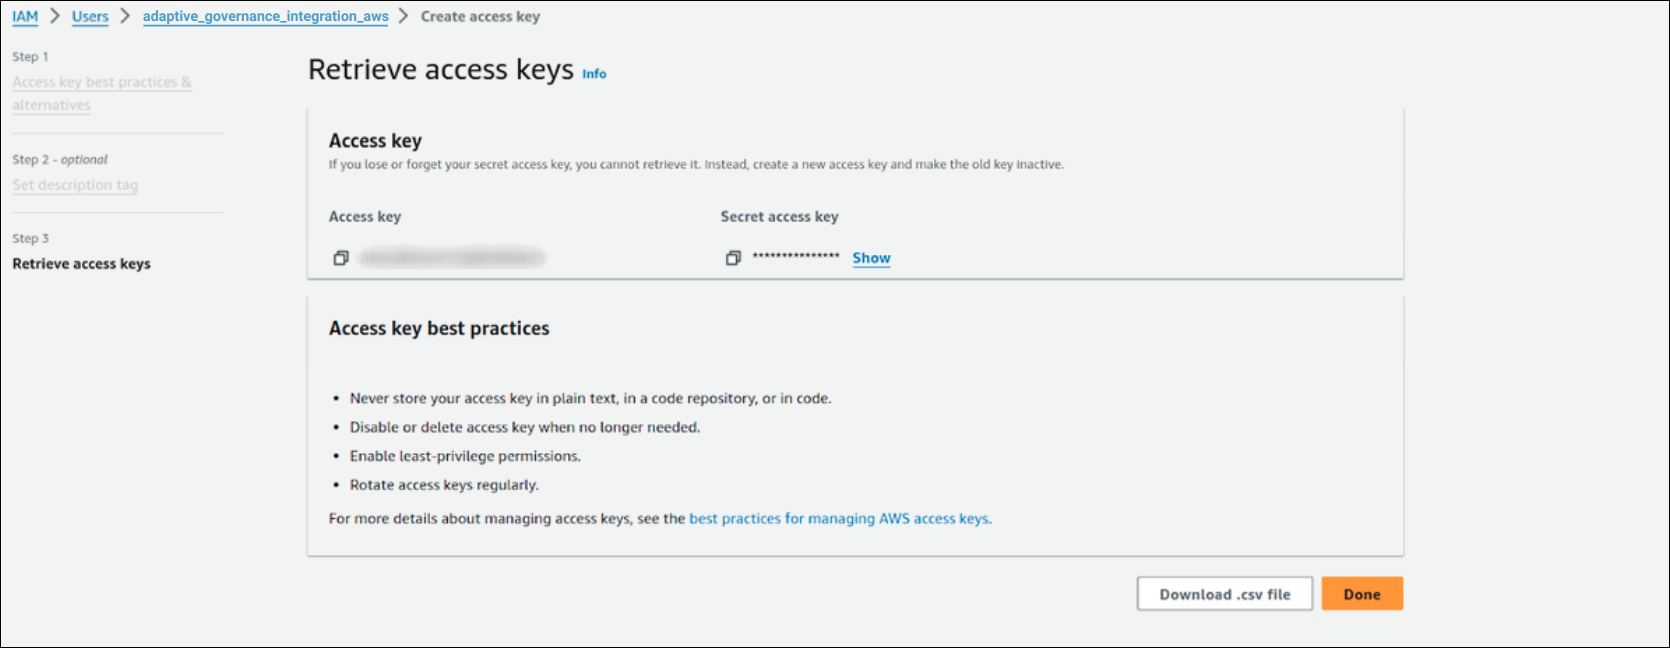
  5. You will see your access key and secret access key.
    Make a note of these credentials to use when registering the AWS connection in Adaptive Governance.
    screenshot showing the Retrieve access keys screen

  6. Click Done.

Creating a New Connection

Follow the steps below to create a new connection.

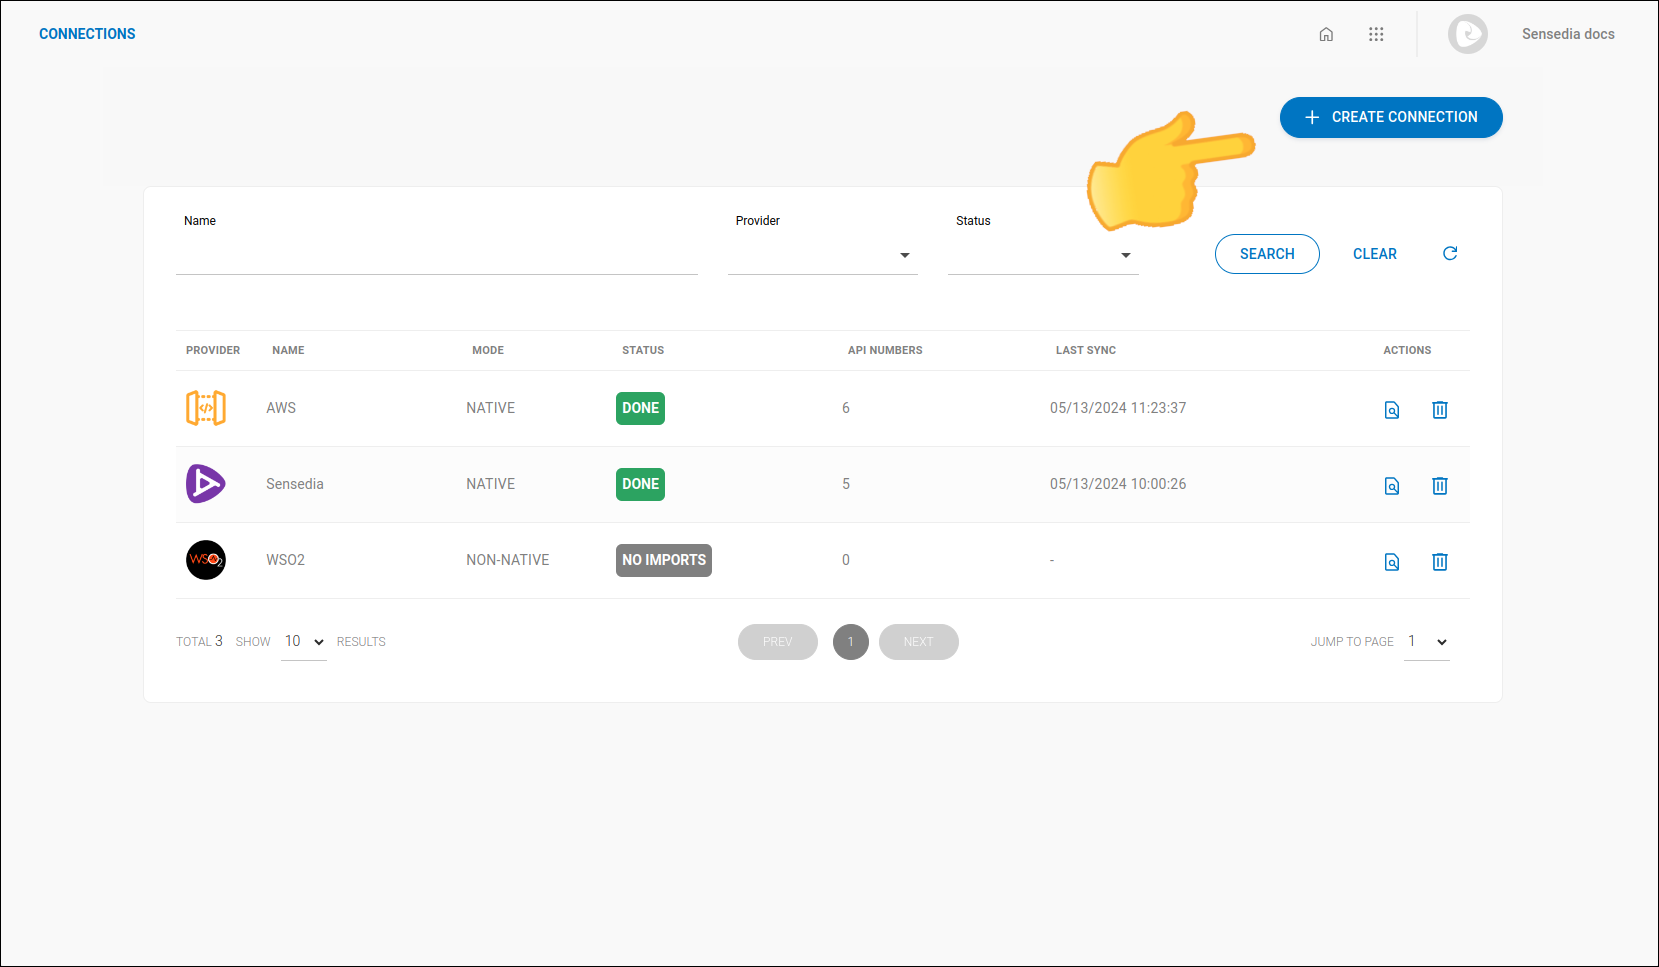
  1. Access the Connections screen by clicking the left-side menu or the card on the home screen.

  2. Click the + CREATE CONNECTION button located at the top-right of the screen.
    screenshot of the connections screen highlighting the create connection button

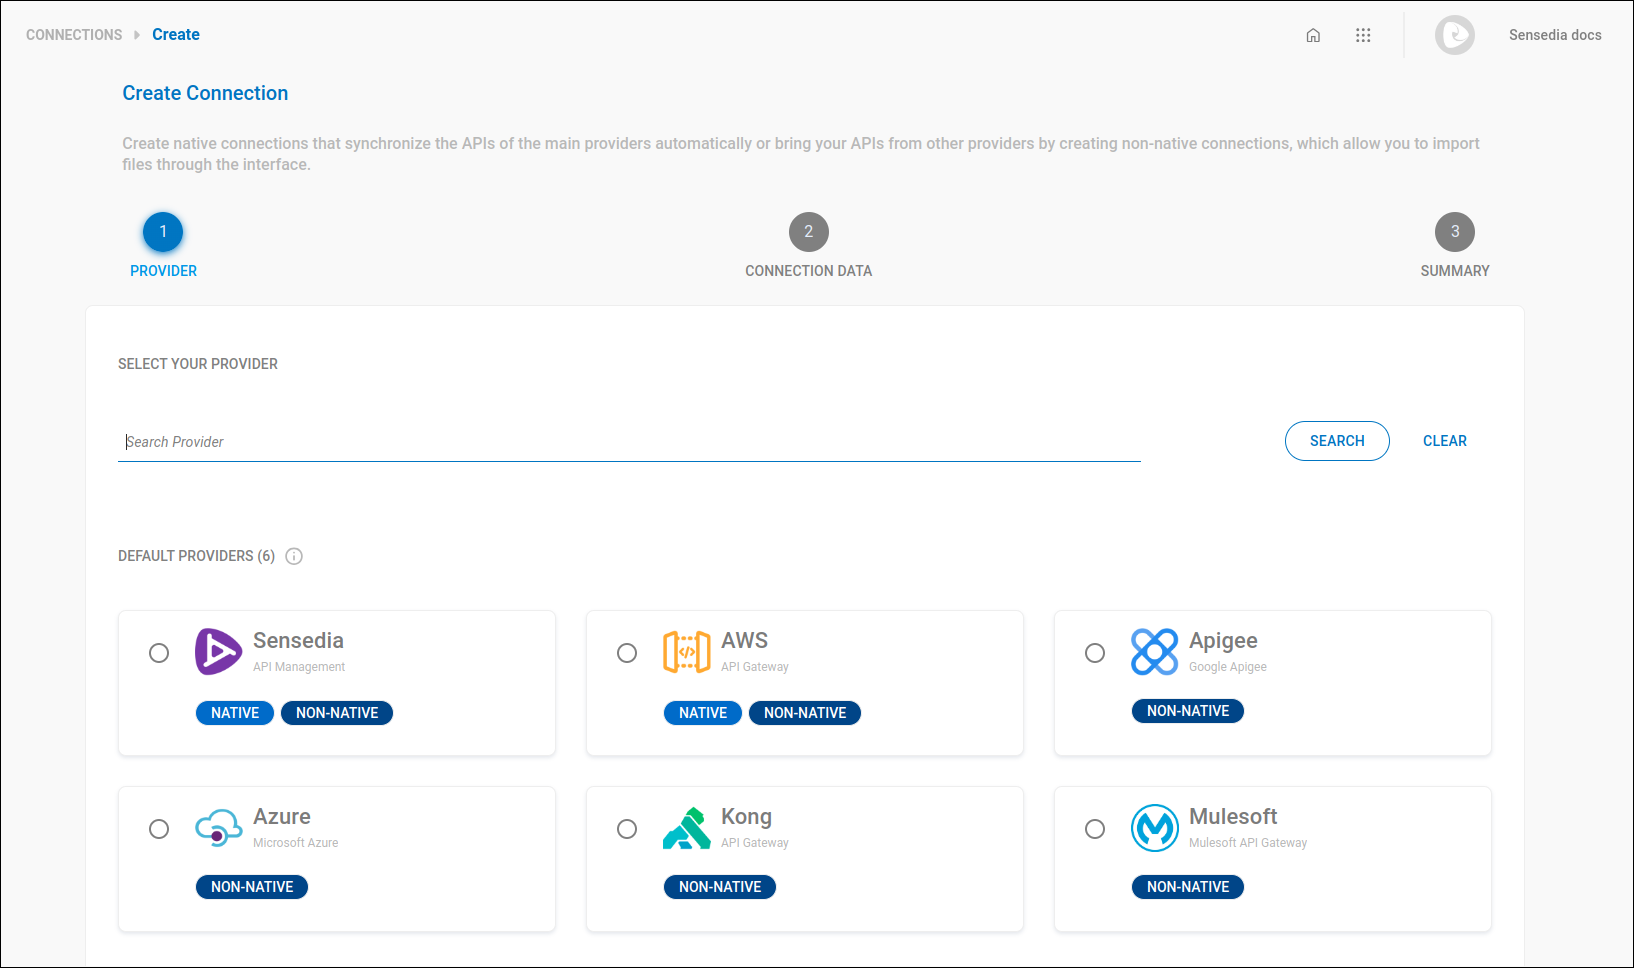
  3. Select the connection provider and click CREATE CONNECTION.
    screenshot of the connection creation screen step 1

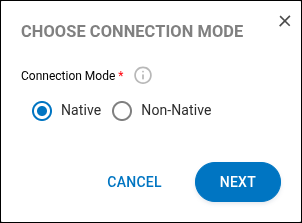
  4. Select the connection mode: whether it is native (data updated directly with the provider) or not (manual upload).
    screen with connection options

Non-native connection:

  • Define a name for the connection and click NEXT.
    screen with field for connection name

  • Confirm the information and click SAVE.

Native connection:

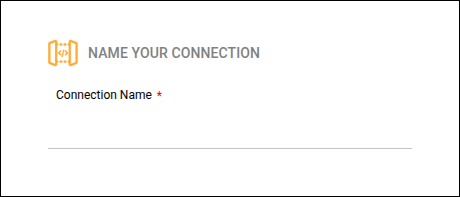
  • Define a name for the connection and click NEXT.
    screen with field for connection name

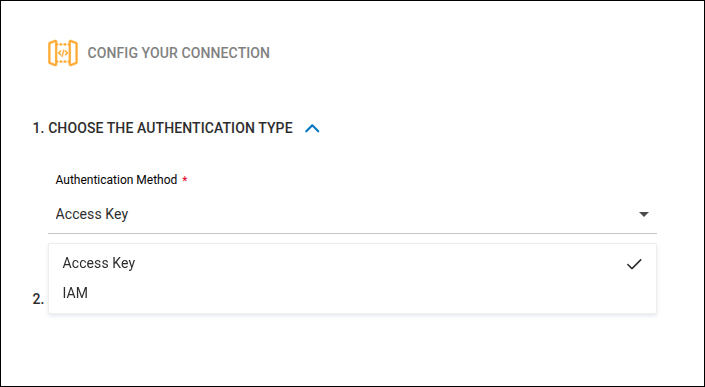
  • Select a connection mode: Access Key or IAM (Role ).
    screen with authentication options

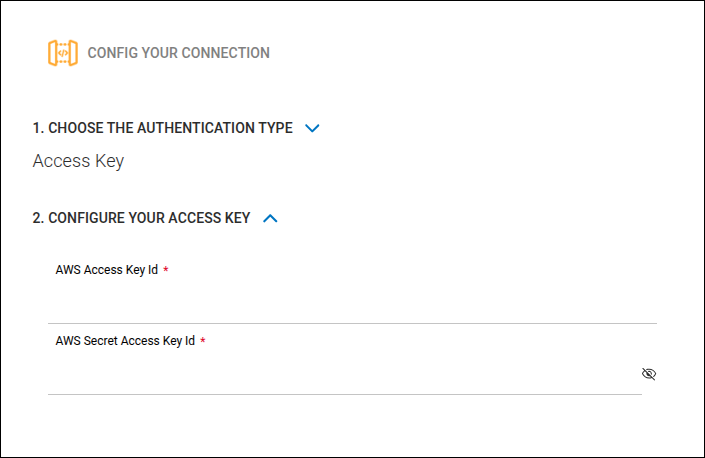
    • For Access Key, provide:

      • AWS Access Key Id: the key for your AWS resource.

      • AWS Secret Access Key Id: the AWS key secret.
        detail of the configuration screen with fields for AWS Access Key Id and AWS Secret Access Key Id

      • Review the information and click SAVE.

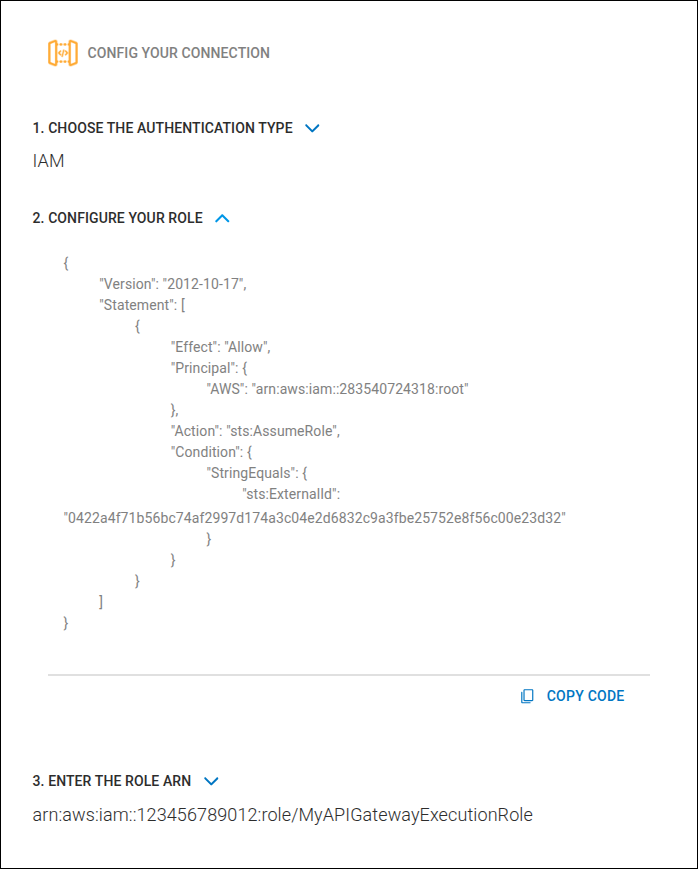
    • For IAM:

      • Configure your role: copy the example code shown in this section and use it in your AWS provider to create a role:

        • Steps in the AWS Console:

          • Go to IAM > Roles and click the "Create role" button.

          • Select "Custom trust policy" and paste the copied code.

          • Add the policy generated in the Adding an access policy step.

          • Complete the role creation, adding the necessary information, such as tags.

          • After creating the role, copy the Role ARN generated by AWS.

      • Role ARN: paste the generated Role ARN here.

      • Review the information and click SAVE.

        detail of the configuration screen with fields for Configure your role and Role ARN

Importing APIs

To import APIs, follow the steps below:

  1. Access the Connections screen by clicking the left-side menu or the card on the home screen.

  2. Find the connection you want to edit and click the icon icon view 2.
    If necessary, use the search bar to locate the desired connection.

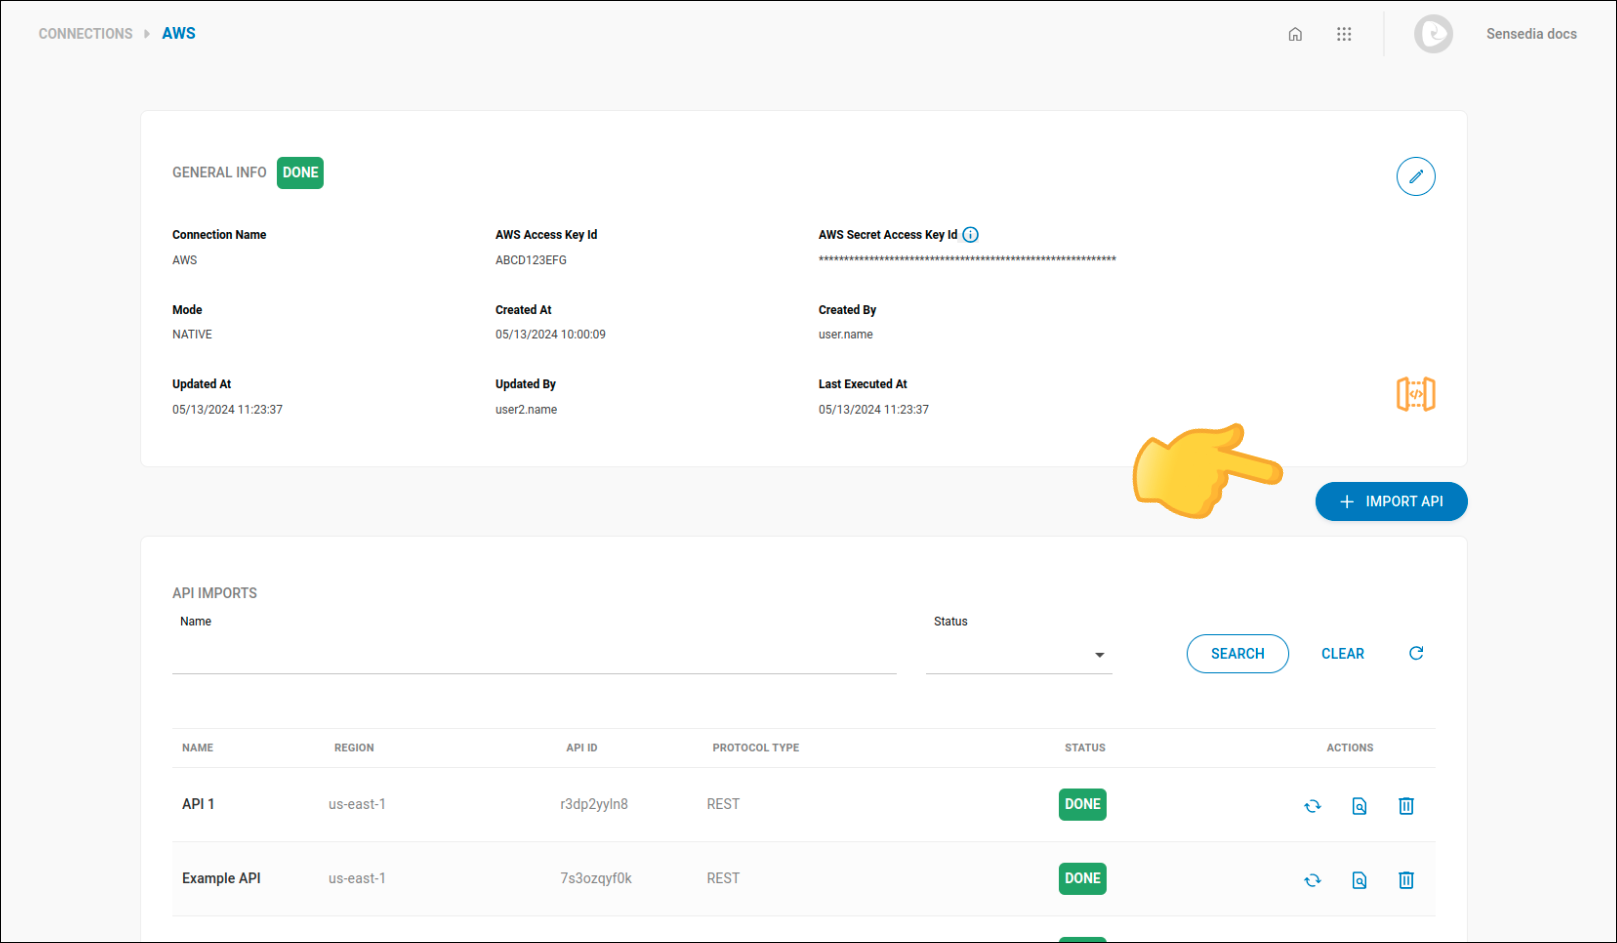
  3. In the API Imports screen, click the + IMPORT API button located just below General Info and above API Imports.
    screenshot of the API import screen

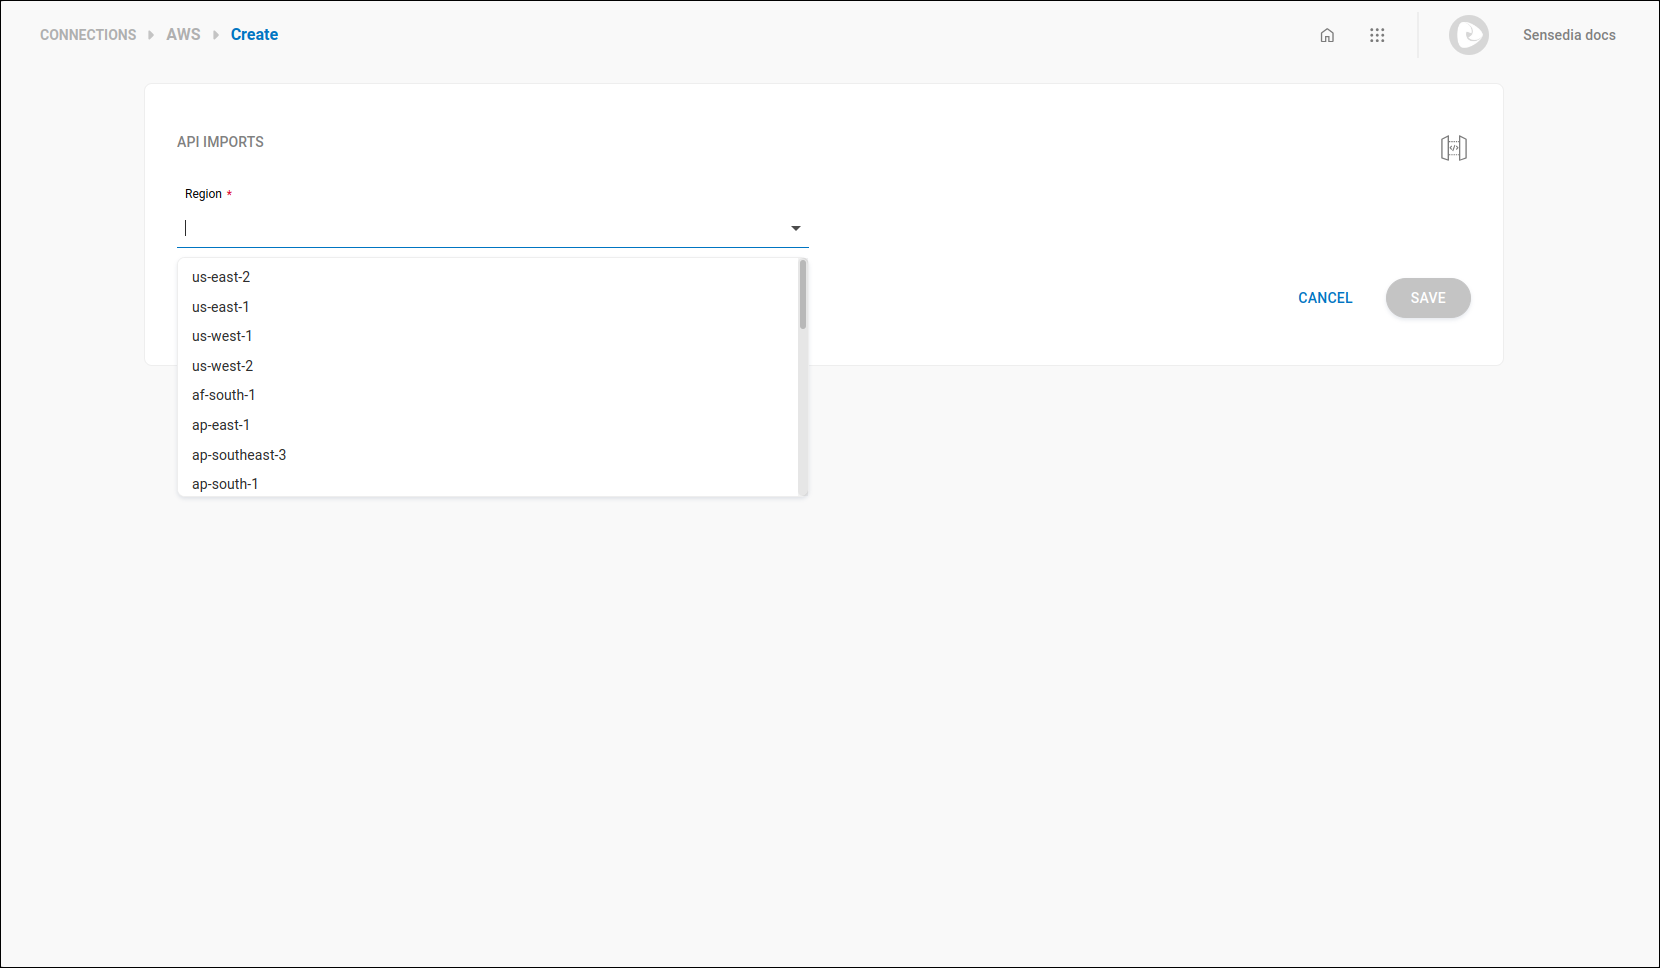
  4. Select the region of the APIs you want to import.
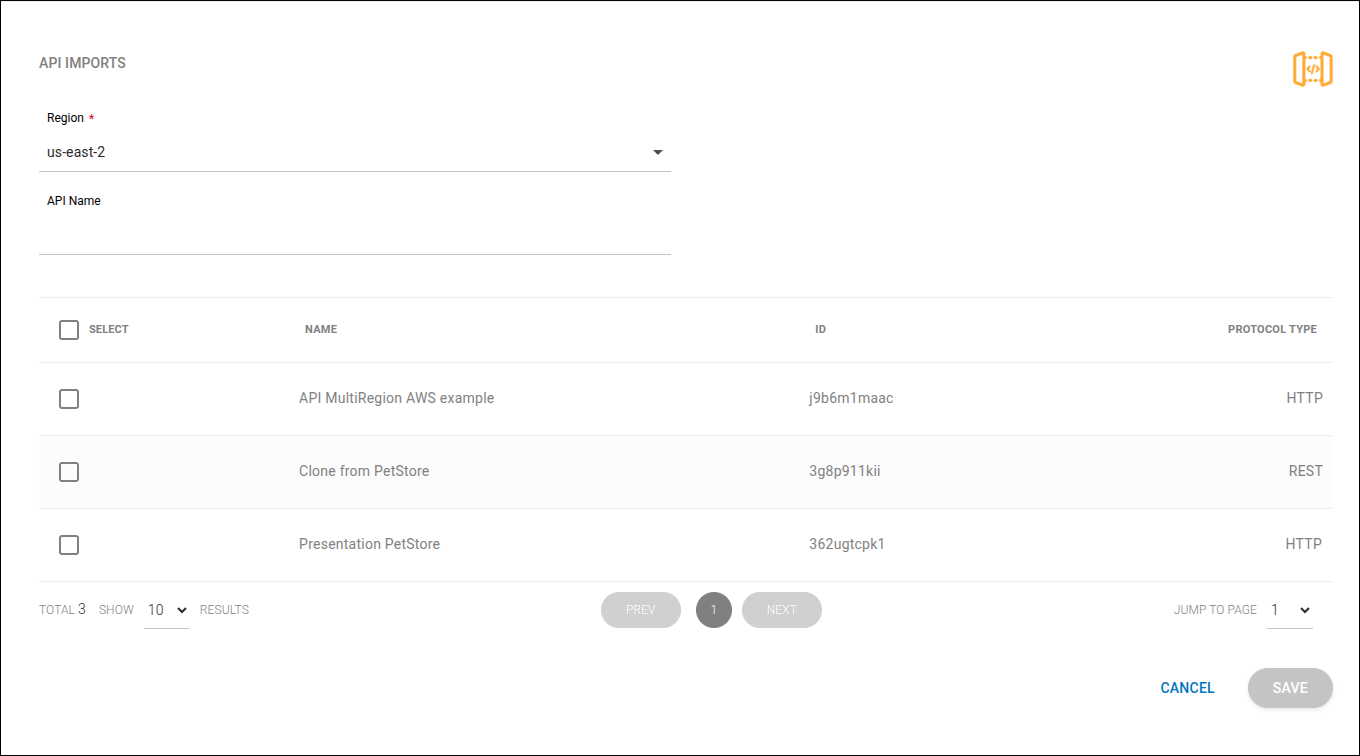
    screenshot of the API import screen for AWS gateways

  5. Select the APIs you want to import and click SAVE.

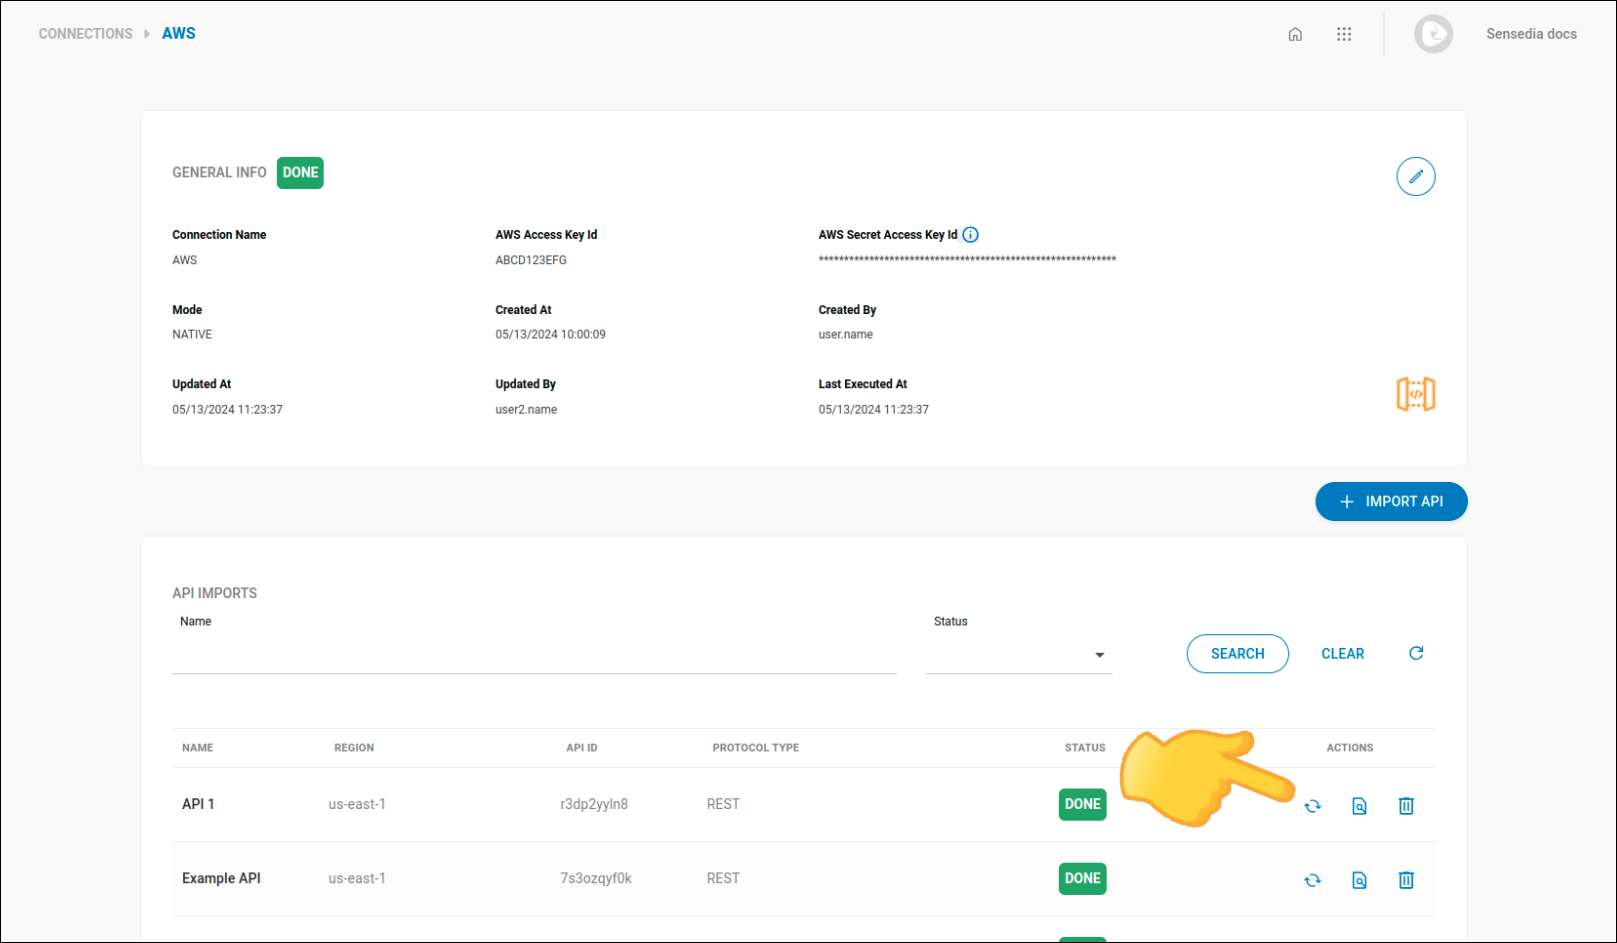
Whenever an API is updated, click refresh icon.
detail with the refresh imported APIs button

Thanks for your feedback!
EDIT

Share your suggestions with us!
Click here and then [+ Submit idea]