Generating a .jar from a Custom Java Interceptor
The first step to create a custom Java interceptor is to create a new Java project.
Here, we’ll create a Maven project.
Inside it, we are going to configure and install the dependency interceptor-java-spec, which can be downloaded on this page.
|
Can I upload any external library? No, but you can use any lib among the dependencies the API gateway supports. You can see the list of supported dependencies here. |
pom.xml
This is an example of a pom.xml from one of the Github repositories with Custom Java examples.
<project xmlns="http://maven.apache.org/POM/4.0.0" xmlns:xsi="http://www.w3.org/2001/XMLSchema-instance"
	xsi:schemaLocation="http://maven.apache.org/POM/4.0.0 http://maven.apache.org/xsd/maven-4.0.0.xsd">
	<modelVersion>4.0.0</modelVersion>

	<groupId>com.sensedia</groupId>
	<artifactId>custom-java-example</artifactId>
	<version>1.0.0</version>
	<packaging>jar</packaging>

	<name>custom-java-example</name>
	<url>http://maven.apache.org</url>

	<properties>
		<java.version>1.8</java.version>
		<maven.compiler.source>${java.version}</maven.compiler.source>
		<maven.compiler.target>${java.version}</maven.compiler.target>
		<project.build.sourceEncoding>UTF-8</project.build.sourceEncoding>
		<project.reporting.outputEncoding>UTF-8</project.reporting.outputEncoding>

		<interceptor-java-spec.version>3.0.1</interceptor-java-spec.version>
		<maven-install-plugin.version>3.0.0-M1</maven-install-plugin.version>
	</properties>

	<dependencies>
		<dependency>
			<groupId>com.sensedia</groupId>
			<artifactId>api-interceptor-java-spec</artifactId>
			<version>${interceptor-java-spec.version}</version>
			<scope>provided</scope>
		</dependency>
	</dependencies>

	<build>
		<plugins>
			<plugin>
				<groupId>org.apache.maven.plugins</groupId>
				<artifactId>maven-install-plugin</artifactId>
				<version>${maven-install-plugin.version}</version>
				<configuration>
					<groupId>com.sensedia</groupId>
					<artifactId>api-interceptor-java-spec</artifactId>
					<version>${interceptor-java-spec.version}</version>
					<packaging>jar</packaging>
					<file>${basedir}/src/main/resources/api-interceptor-java-spec-${interceptor-java-spec.version}.jar</file>
					<generatePom>true</generatePom>
				</configuration>
				<executions>
					<execution>
						<id>install-jar-lib</id>
						<goals>
							<goal>install-file</goal>
						</goals>
						<phase>validate</phase>
					</execution>
				</executions>
			</plugin>
		</plugins>
		<resources>
			<resource>
				<directory>src/main/resources</directory>
				<excludes>
					<exclude>**/*.jar</exclude>
				</excludes>
			</resource>
		</resources>
	</build>

	<developers>
		<developer>
			<name>Claudenir Freitas</name>
			<email>claudenir.machado@sensedia.com</email>
			<organization>Sensedia</organization>
			<organizationUrl>https://sensedia.com</organizationUrl>
		</developer>
	</developers>

</project>
The dependency interceptor-java-spec must be inside the folder src/main/resources, and its version must be informed in the file pom.xml with the tag <interceptor-java-spec.version>.
|
Install the dependency with the following command:
mvn validateCustom Interceptor
With the project and dependencies configured, the interceptors can be coded and compiled. This is an example:
package com.sensedia.CustomJavaExample;

import com.sensedia.interceptor.externaljar.annotation.ApiSuiteInterceptor;
import com.sensedia.interceptor.externaljar.annotation.InterceptorMethod;
import com.sensedia.interceptor.externaljar.dto.ApiCallData;

@ApiSuiteInterceptor
public class Fluxo01 {

	@InterceptorMethod
	public void setHeaderRequest(ApiCallData apiCallData) {
		apiCallData.request.addHeader("exec01", "añadido a la petición");
	}

	@InterceptorMethod
	public void setHeaderResponse(ApiCallData apiCallData) {
		apiCallData.response.addHeader("exec02", "añadido a la respuesta");
	}

}
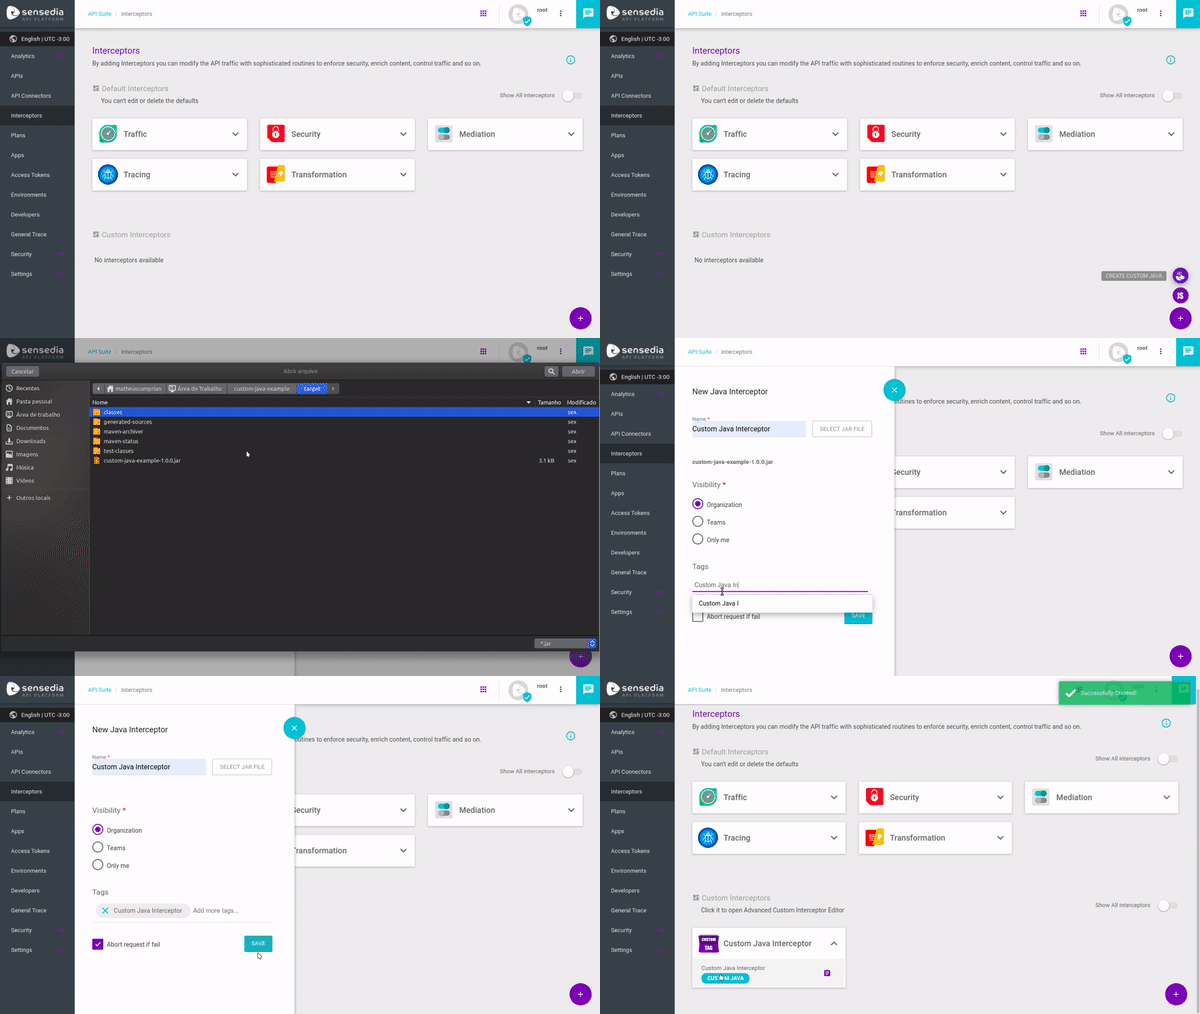
Once the interceptor is coded, we can compile it, upload it to the API Platform and then start using it on API flows.
To compile the interceptor into a .jar file, you can use the following command:
mvn packageAfter the command runs, a .jar file will be generated inside the /target folder.
Then, you can upload the interceptor to the Platform and start using it.

Share your suggestions with us!
Click here and then [+ Submit idea]