Thanks for your feedback!
EDIT
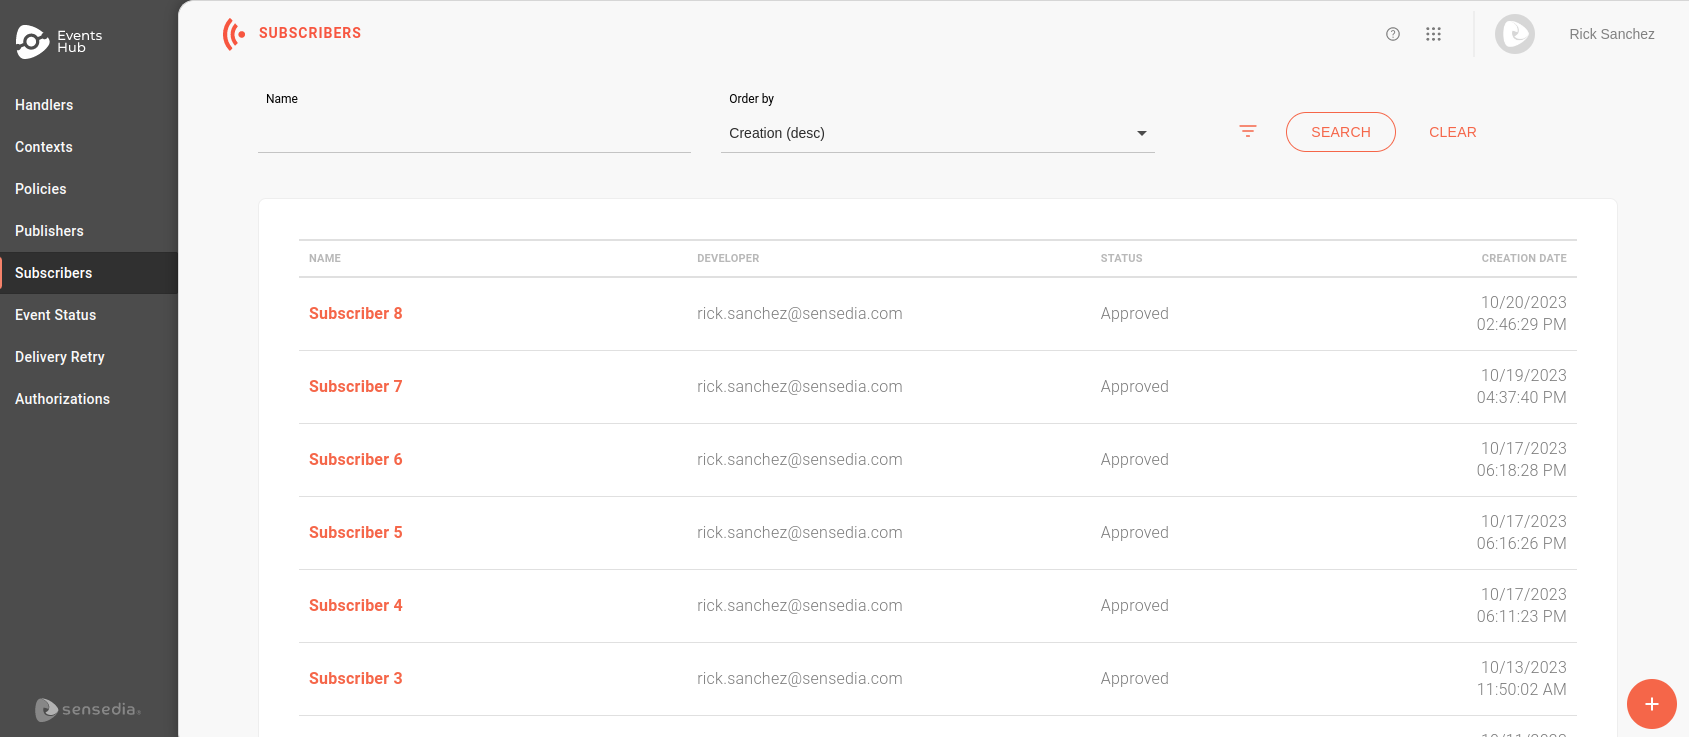
Subscribers are the applications/partners that receive the events that are distributed by Events Hub.
To receive events, subscribers must be connected to topics, which are grouped within handlers. Each topic can have different contexts available to the subscriber. Therefore, when events are sent to a topic with a context setting, only the subscribers of that topic with that context enabled will receive the events.
The Events Hub takes care of all the security, ensuring subscribers a reliable source of messages.
The Subscribers screen lists all registered subscribers and allows you to create new ones:
|
You can search for a specific subscriber using the filters at the top of the page. They allow you to search by:
Use the Order by field to define the ordering of the list. You can choose to view by the most recent or oldest creation date, or in alphabetical order. |
To view the information of a specific subscriber, click on their name in the list. You will be directed to the Topics screen where you can edit the subscriber’s information and enable or disable the topics they receive events from.
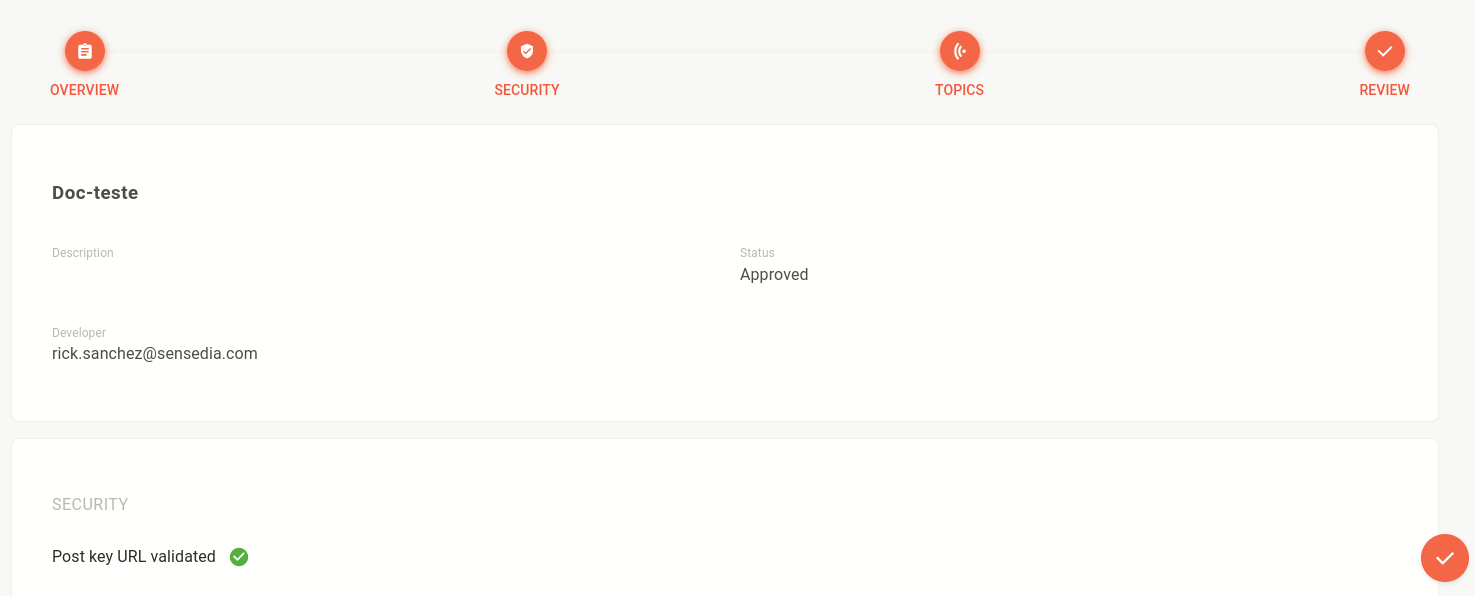
To create a subscriber, click on the + button in the bottom right corner of the screen. The registration happens in four stages:

To start registration, fill in the fields:
Name: which must be unique.
Status: either approved, pending, rejected, or cancelled.
Description: non-required field to help identify the subscriber.
Developer: email address of the developer responsible for the subscriber.
In this step, you ensure the security of the connection between subscribers and the Events Hub.
| Access the documentation of Security and Keys to understand how it works. |
We have implemented two layers of security:
When distributing events to subscribers, we include a digital signature that allows the subscriber to validate the request’s origin. To generate this signature, you need to validate a shared key between the Events Hub and the subscriber. To do this, follow these steps:
Register a key in the field Key.
If the validation time expires, click the ![]() icon to restart time count.
icon to restart time count.
To validade the key, click VALIDATE KEY.
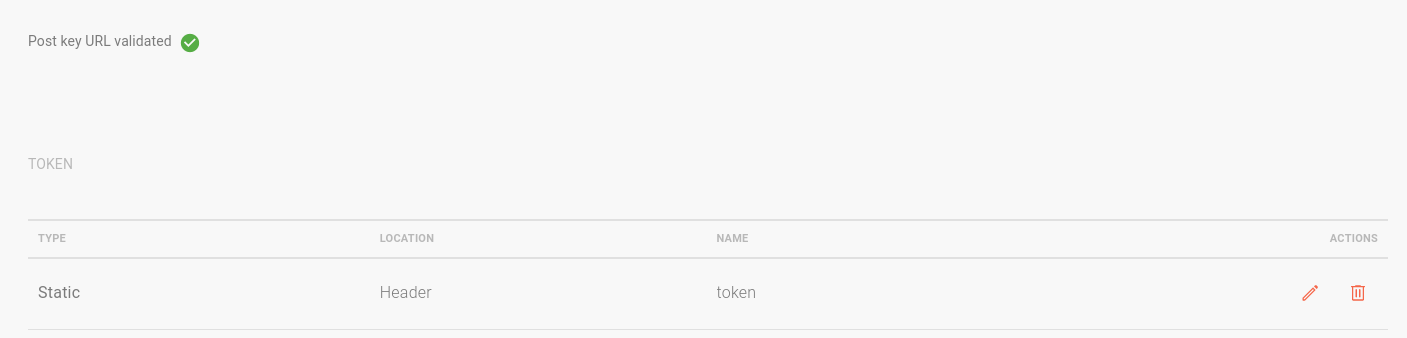
If the validation is successful, you will see the message Post key URL validated  on the Security screen.
|
If you register a subscriber without validating the shared key, you won’t be able to link it to any topics. You can only do this after validating the key, following the steps described above. |
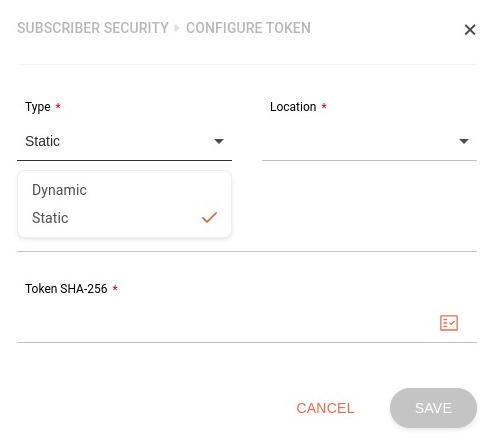
After sending the shared key, you can also include a static or dynamic token to be passed on in requests to subscribers.
| Token configuration is not mandatory. Understand how they work and the differences between static and dynamic in the documentation of Tokens. |
To set up a token, follow these steps:
Click on the CONFIGURE TOKEN button;
Select the type between Static and Dynamic;
In the Location field, select where the token should be passed in the request. The options are header or query param;
In the Name field, enter the name by which the token value will be passed;
Depending on the token type you selected, configure:
Token SHA-256: token value. You can generate a random token using the ![]() icon.
icon.
After saving, the token will be displayed only once in a modal window. Copy it and save it to a file on your computer.
OAuth URL: URL for token value generation.
After saving, a request will be sent to the subscriber’s URL to generate the token and validate the configuration.
| Access the documentation and check the details of the request sent and the expected response. |
If a token is configured, the screen will show its details:
| You can only configure one token by subscriber. |
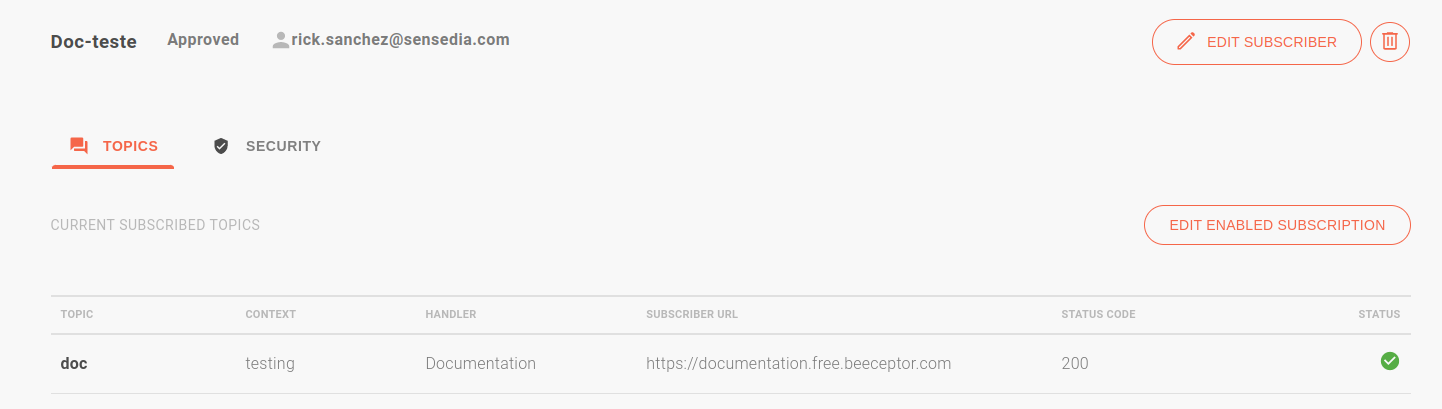
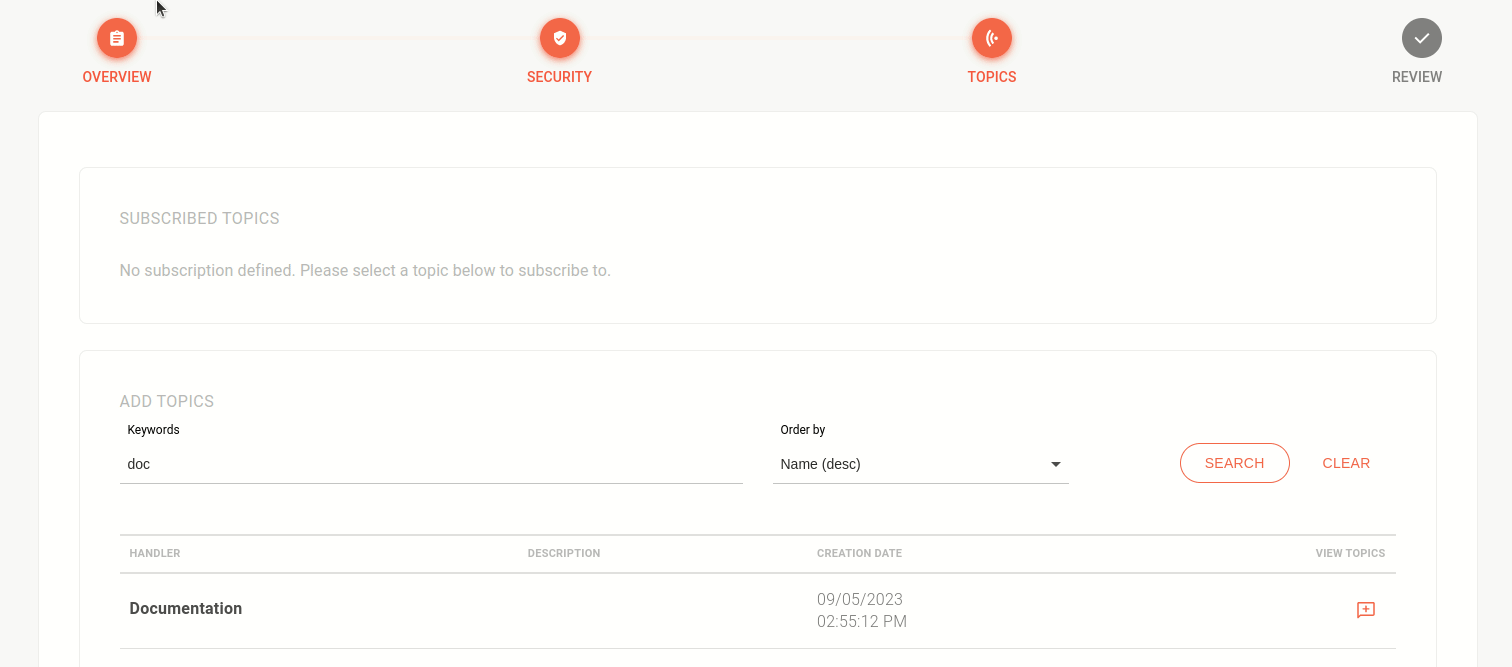
In the TOPICS tab, you link the subscriber to the topics they will receive events from. Registered topics are displayed using handlers.
You can search for specific handlers using the Keywords field, which searches for terms used in the handler’s name or description. In addition, you can reorder the list by name or creation date using the Order by field.
To link topics to your subscriber, follow these steps:
When choosing a handler, click on the ![]() icon in the View Topics column;
icon in the View Topics column;
On the screen that opens, click on the ![]() icon and also enable the context for the subscriber.
icon and also enable the context for the subscriber.
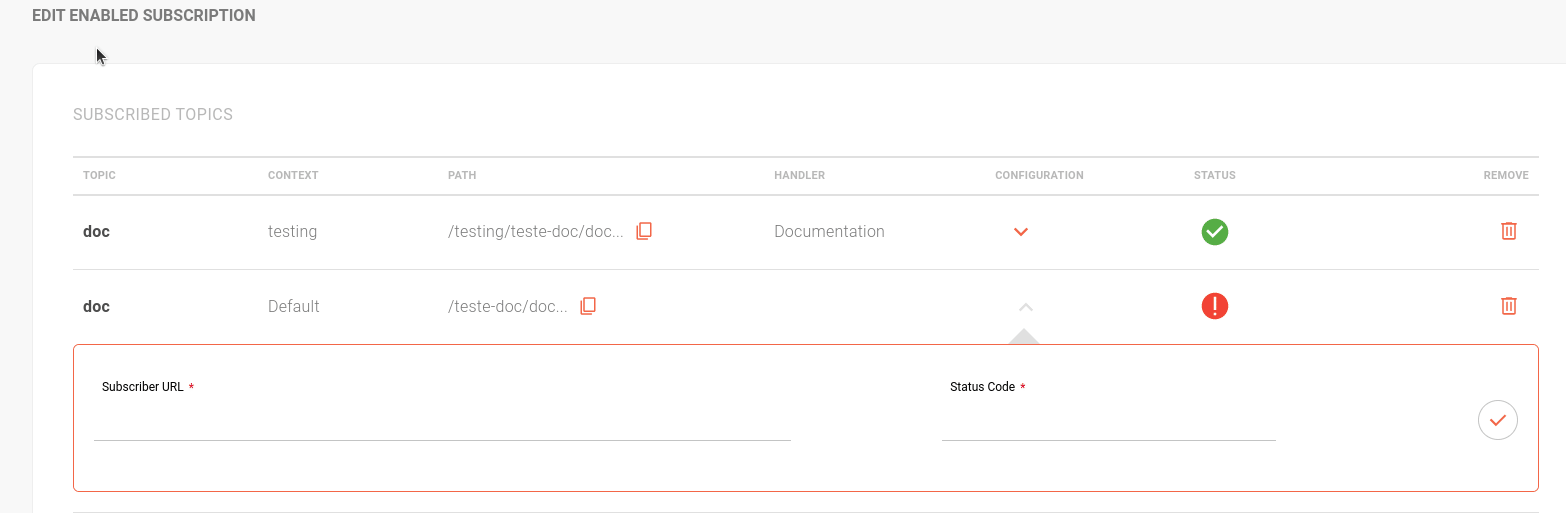
In the Subscriber URL field, enter the URL that will receive the events;
In the Status Code field, enter the success status code that should be returned.
This field only accepts codes from 200 to 299. You can enter 2xx to cover the whole family.
The Events Hub will make a request to validate the URL by waiting for the code entered.
| If the URL is not validated, the subscriber will be registered but will not receive events. |
|
When sending events to the subscriber, the Events Hub will wait for the code you set as success in the Status Code field.
If you specify the code |
Each selected topic will be listed in the SUBSCRIBED TOPICS section. To remove the association, click on the ![]() icon.
icon.
The STATUS column indicates whether the URL has been validated successfully or not. The green icon represents success. The gray icon means that the URL was registered, but validation failed.
Share your suggestions with us!
Click here and then [+ Submit idea]