GSuite
Configuring a connection with GSuite
There are three steps to set up a connection with GSuite:
|
Client Credentials cannot be generated using federated logins. |
|
When a federated login provider is deleted, all users associated with it are permanently deleted automatically and without prior notice. It is not possible to recover this data after deletion. |
To configure a connection with GSuite, follow the steps below:
Create a federated login in Access Control
-
Access the Federated Login screen from the left menu.
-
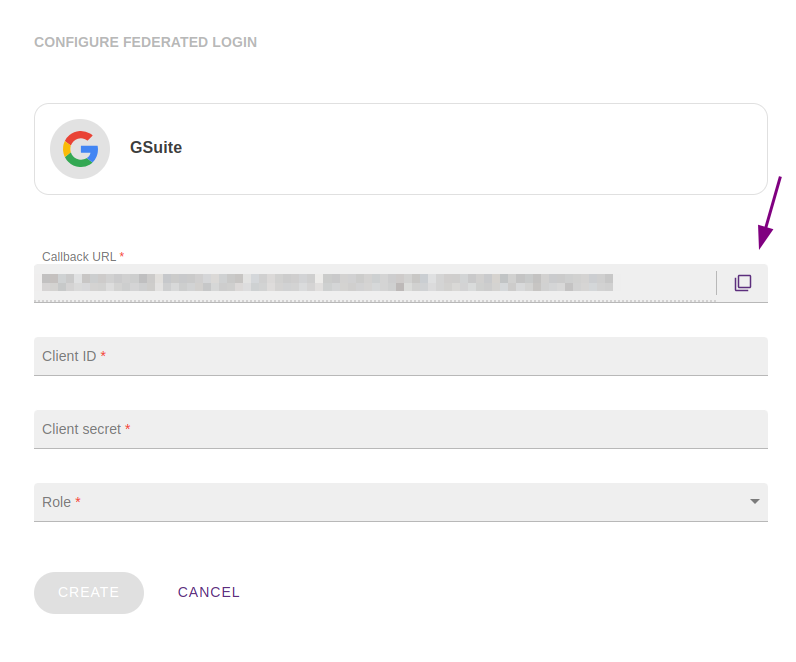
Select the federated login type GSuite and click CONFIGURE FEDERATED LOGIN.
-
Copy the URL from the Callback URL field.
This is the URL to which the user should be returned after authentication and will be used later in the Google Cloud Console setup.
Create a client app in Google Cloud Console
-
In a new tab, go to Google Cloud Console.
-
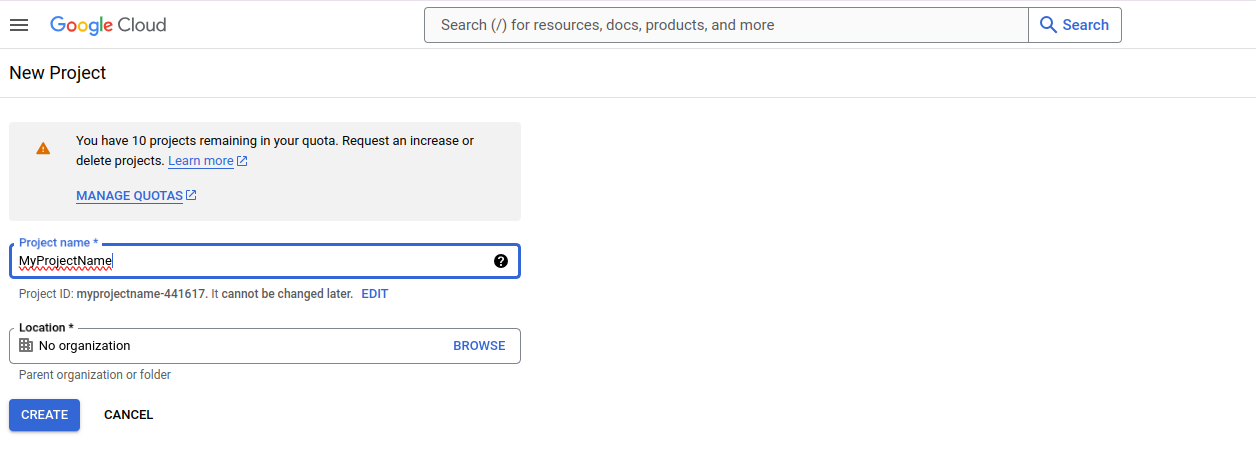
Create a new project by clicking + CREATE PROJECT at the top-left corner of the screen.
-
Enter the project name and location, then click CREATE.
-
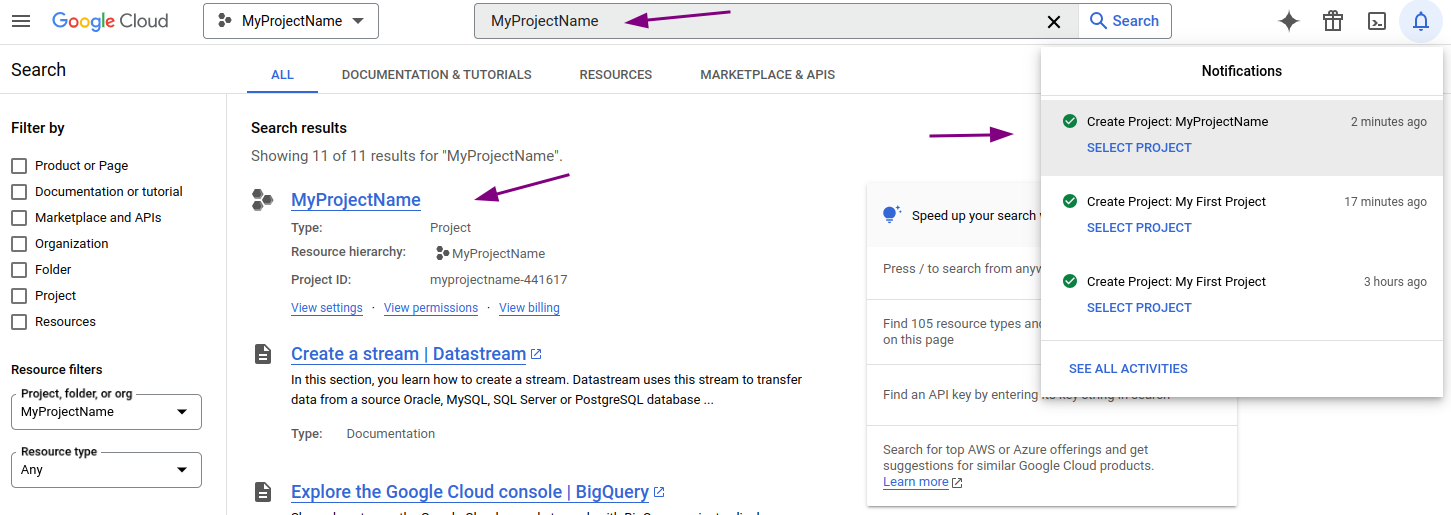
Wait for your project to be created. A message will appear in the notification icon
 .
. -
Click the notification icon and select the newly created project. You can also use the search bar to locate and select it.
-
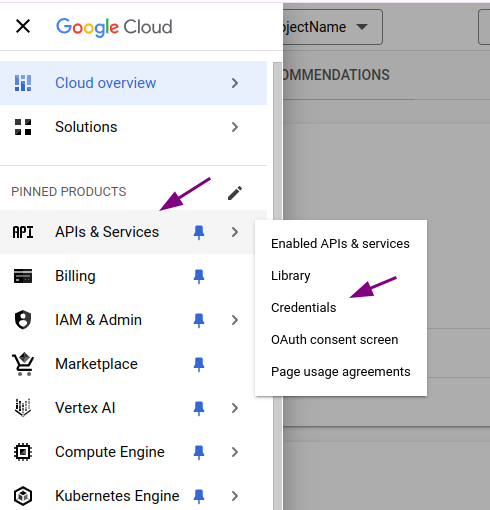
After selecting the project, click the menu icon
 in the top-left corner of the screen.
Select .
 -
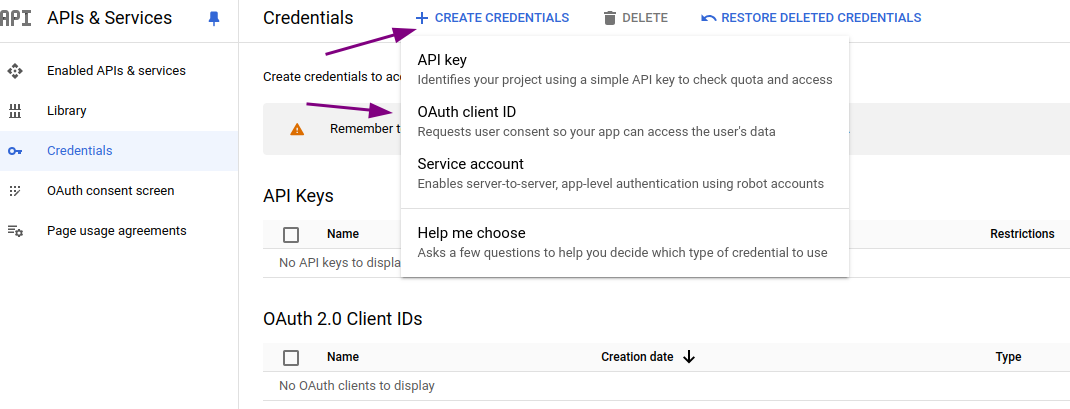
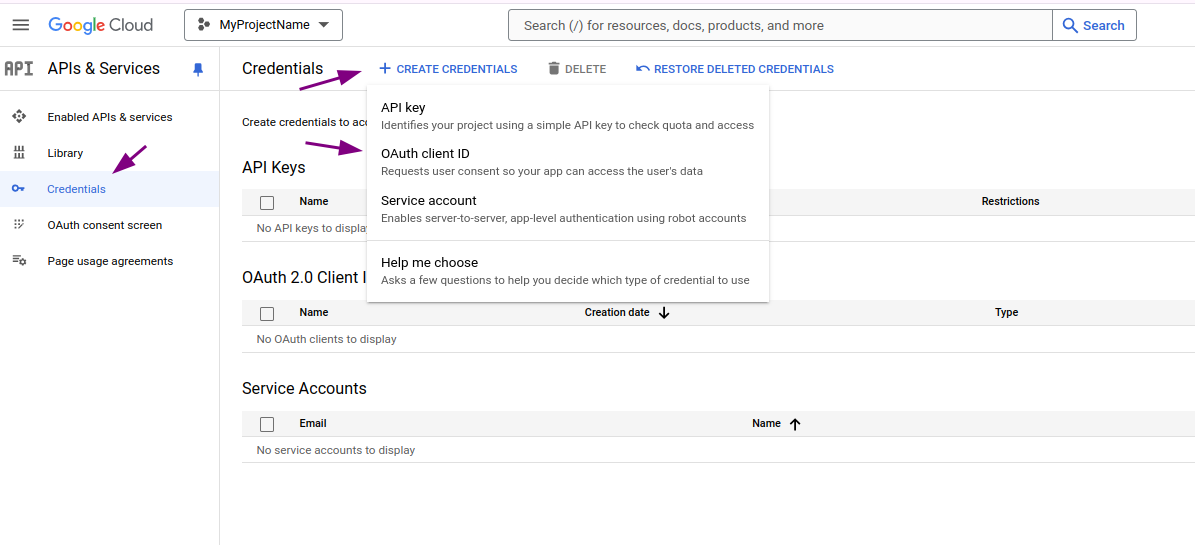
On the Credentials screen, click + CREATE CREDENTIALS and select OAuth client ID.
-
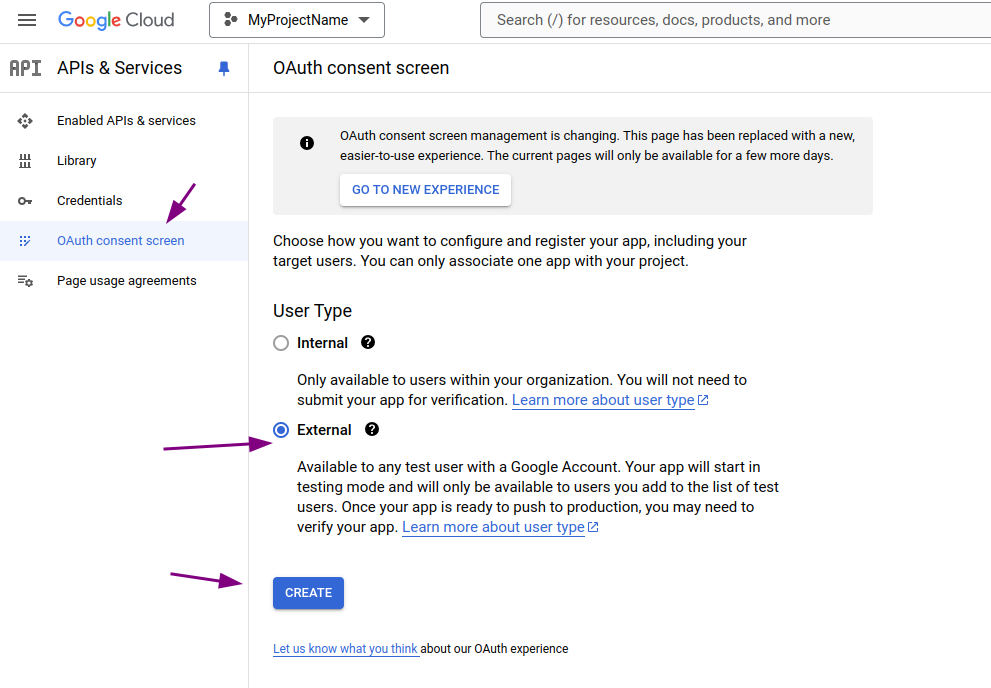
Then, click CONFIGURE CONSENT SCREEN.
-
Select External and click CREATE.
-
You will then go through a series of steps to edit the app registration.
-
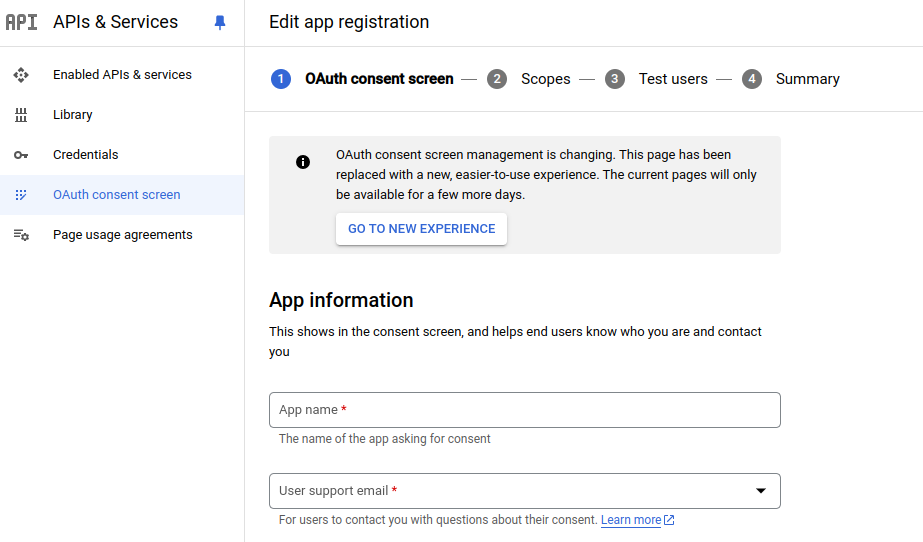
STEP 1: OAuth consent screen
-
Fill in the fields in the App information section:
-
app name and
-
user support email.
-
-
Scroll down to the Developer contact information section and fill in the email address field.
-
Click SAVE AND CONTINUE.
-
-
STEP 2: Scopes
-
Scroll down and click SAVE AND CONTINUE.
-
-
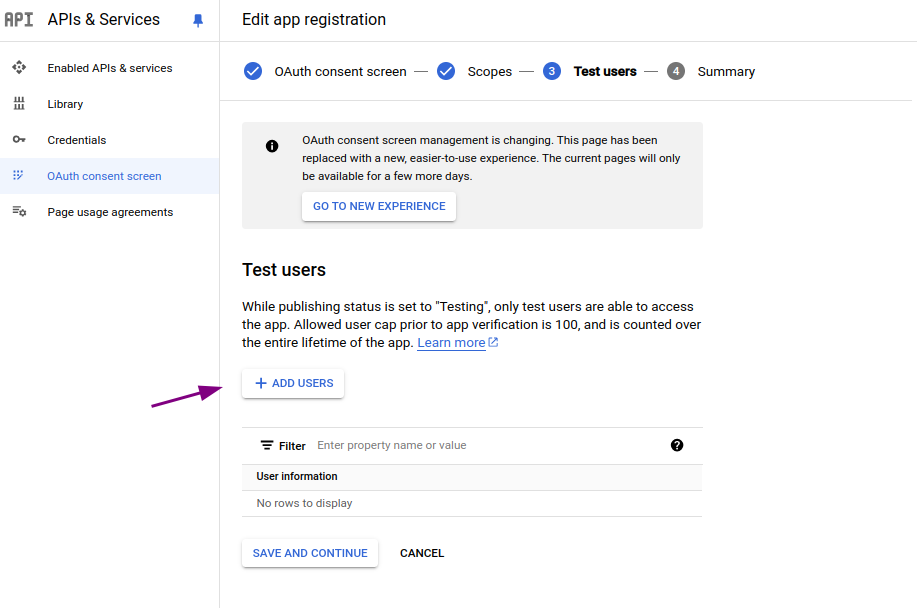
STEP 3: Test users
-
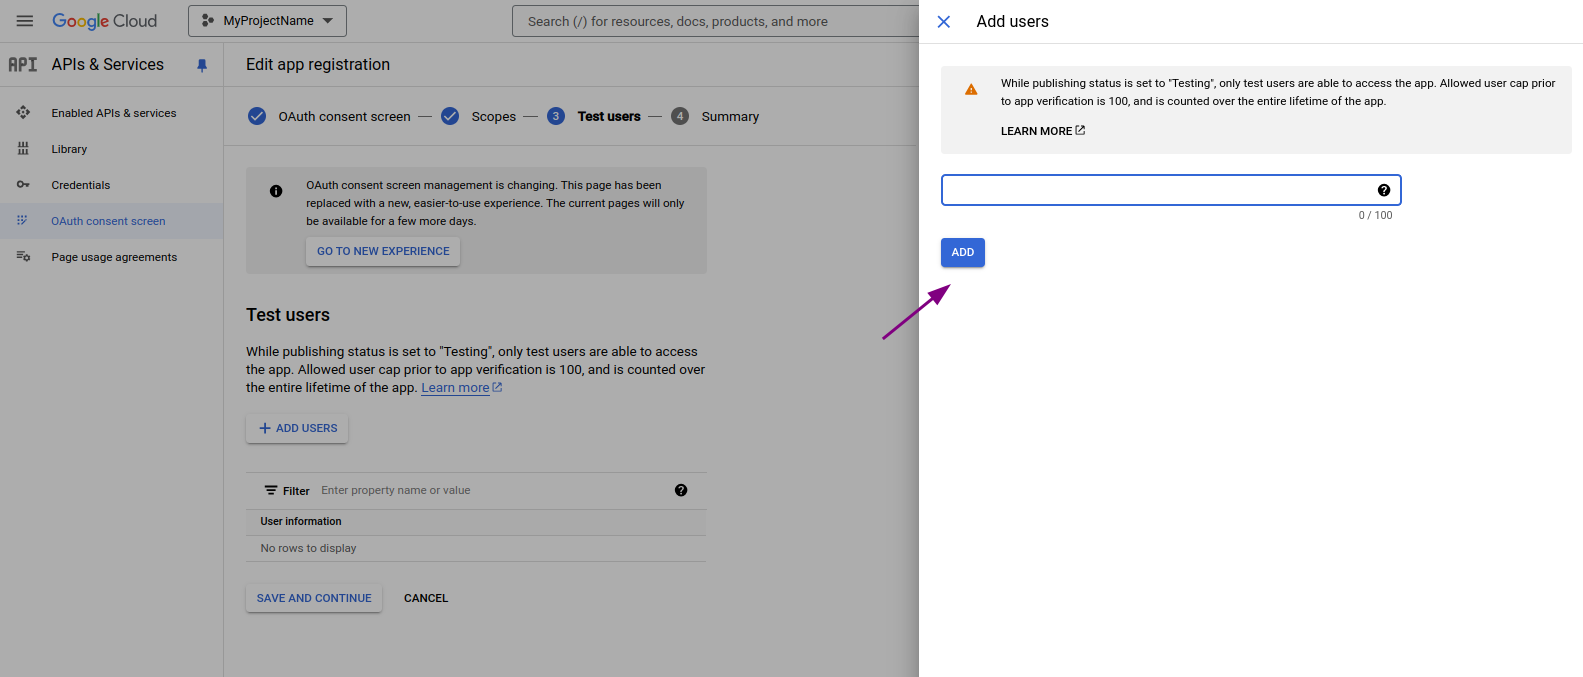
Click ADD USERS.
-
Enter a valid email managed by Google and click ADD.
-
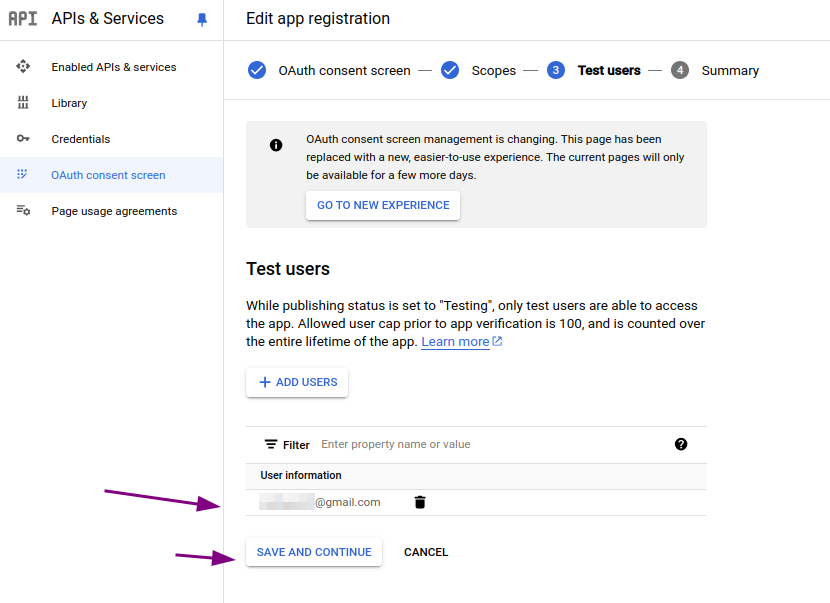
Check if the user was added and click SAVE AND CONTINUE.
This user will be used to access Access Control.
-
-
STEP 4: Summary
-
Check if the user information is correct.
-
Scroll down and click BACK TO DASHBOARD.
-
-
-
In the left menu, go to the . In the top bar, click + CREATE CREDENTIALS and select OAuth client ID.
-
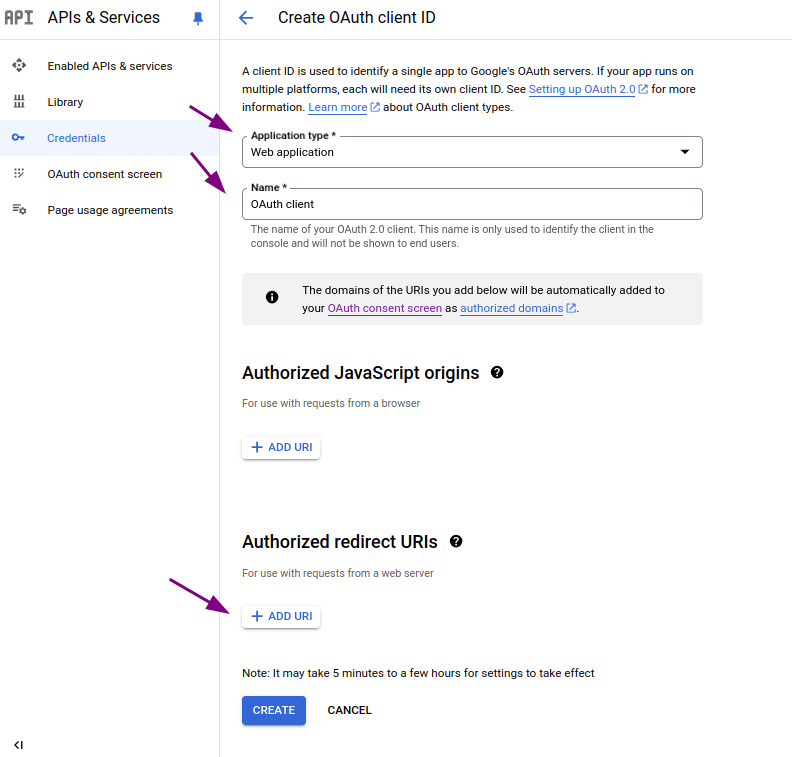
On the Create OAuth client ID screen, fill in the fields:
-
Application type: select Web application.
-
Name: enter the OAuth client name.
-
-
In the Authorized redirect URIs section, click ADD URI. Enter the address (callback URL) you copied in step 3 when creating the integration in Access Control.
-
Click CREATE.
-
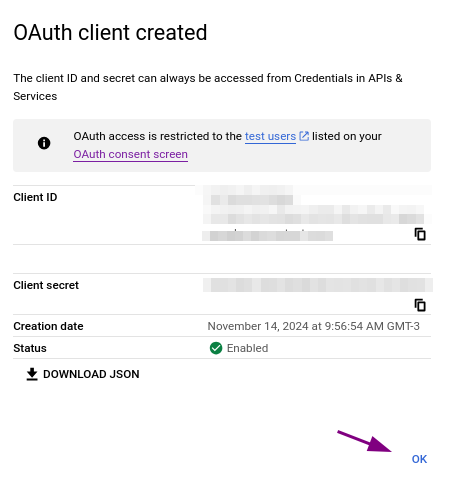
Your OAuth client will be created, and the Client ID and Client secret will be displayed.
-
Click OK.
| Keep this information, as it will be used in the next step in the Access Control configuration. |
Configure the federated login in Access Control
-
After creating the app in the Google Cloud Console, return to Access Control and fill in the fields below with the obtained data:
-
Client ID: Information obtained in step 15 during the creation of the client app in Google Cloud Console.
-
Client secret: Similarly to the Client ID, enter the Client secret obtained in step 15 during the creation of the client app in Google Cloud Console.
-
Role: Select the role to be applied with this access.
-
| In case you have roles configured on your identity provider, they will override this one. |
Disabling or editing a connection with GSuite
Once active, the connection to GSuite can be updated at any time. To do so, click on any field you want to edit, make the necessary changes and click on UPDATE.
To disable a connection, click the DISCONNECT button.
|
The DISCONNECT button will disable the access of all users from that federated login. To reconnect, follow the steps above (Configuring a connection with GSuite). The DISCONNECT button does not change your settings in your Identity Provider. |
User login and control
Contrary to what used to happen with the Sensedia Platform login, now the login with username and password is still possible even after configuring the GSuite.
A user will be able to log into Sensedia products either through GSuite or separately.
Share your suggestions with us!
Click here and then [+ Submit idea]
