Thanks for your feedback!
EDIT
Multi-Factor Authentication offers the option of defining a second authentication factor — in addition to login and password.
To configure Multi-Factor Authentication (MFA) for the user you are logged in with:
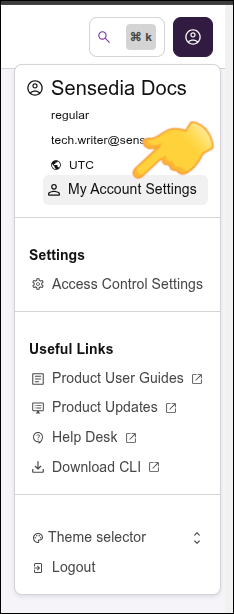
Click the icon in the top right corner of the screen.

Next, click My Account Settings.
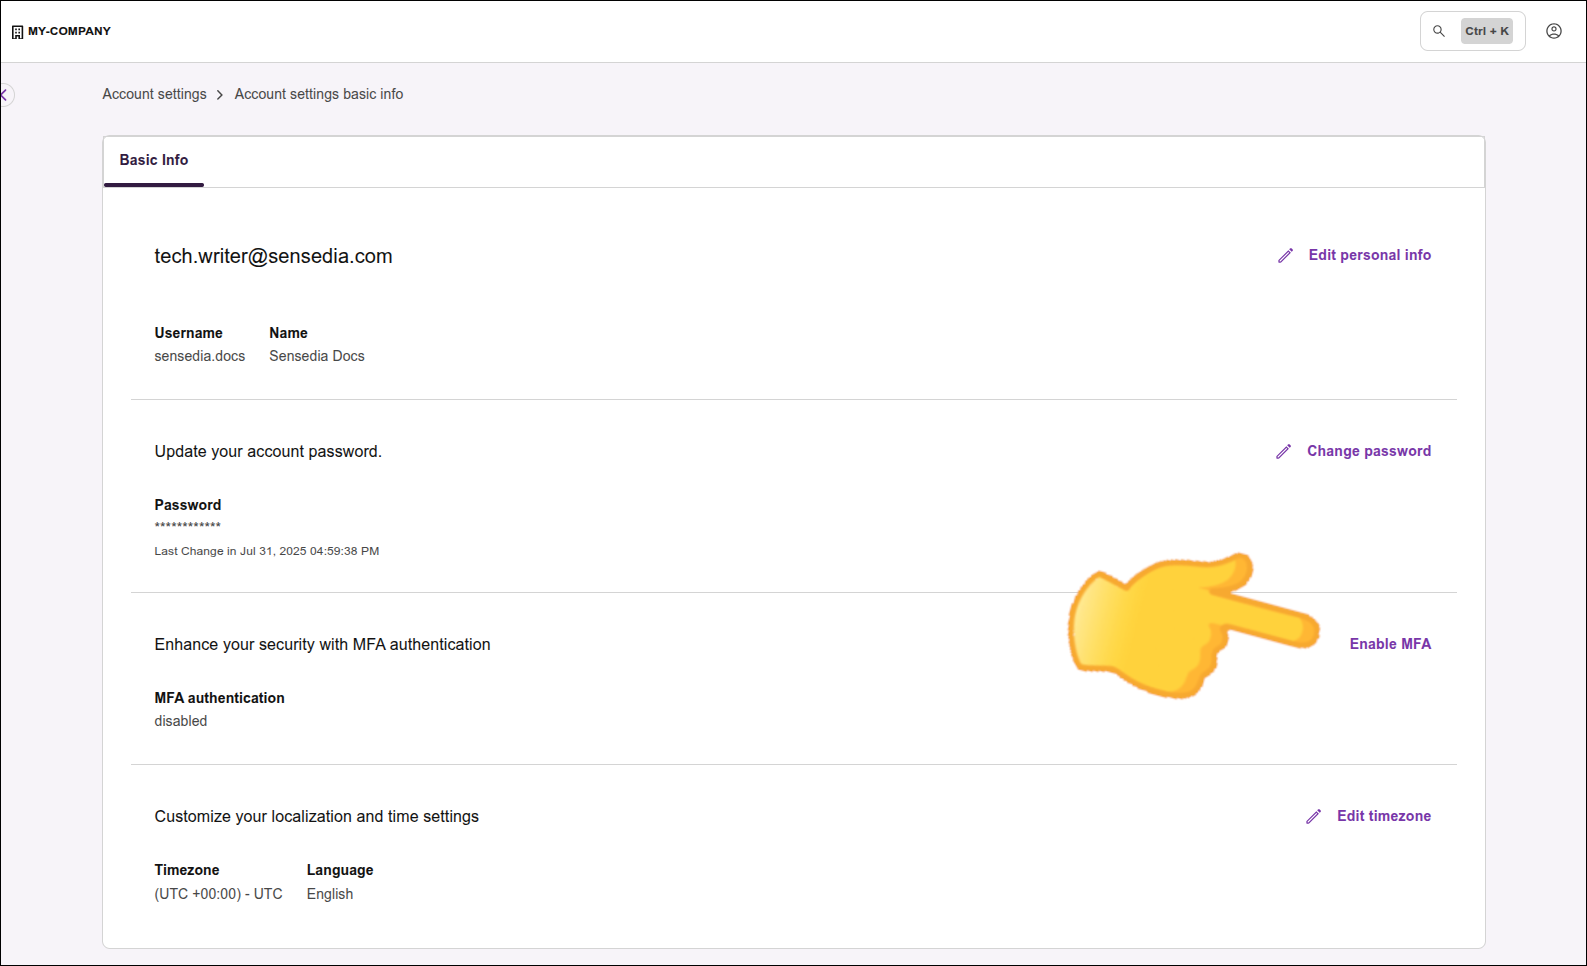
On the screen that opens, click Enable MFA.
Have your cell phone ready to manually enter the code that appears on the screen or scan the QR Code.
You can use the authentication application of your choice.
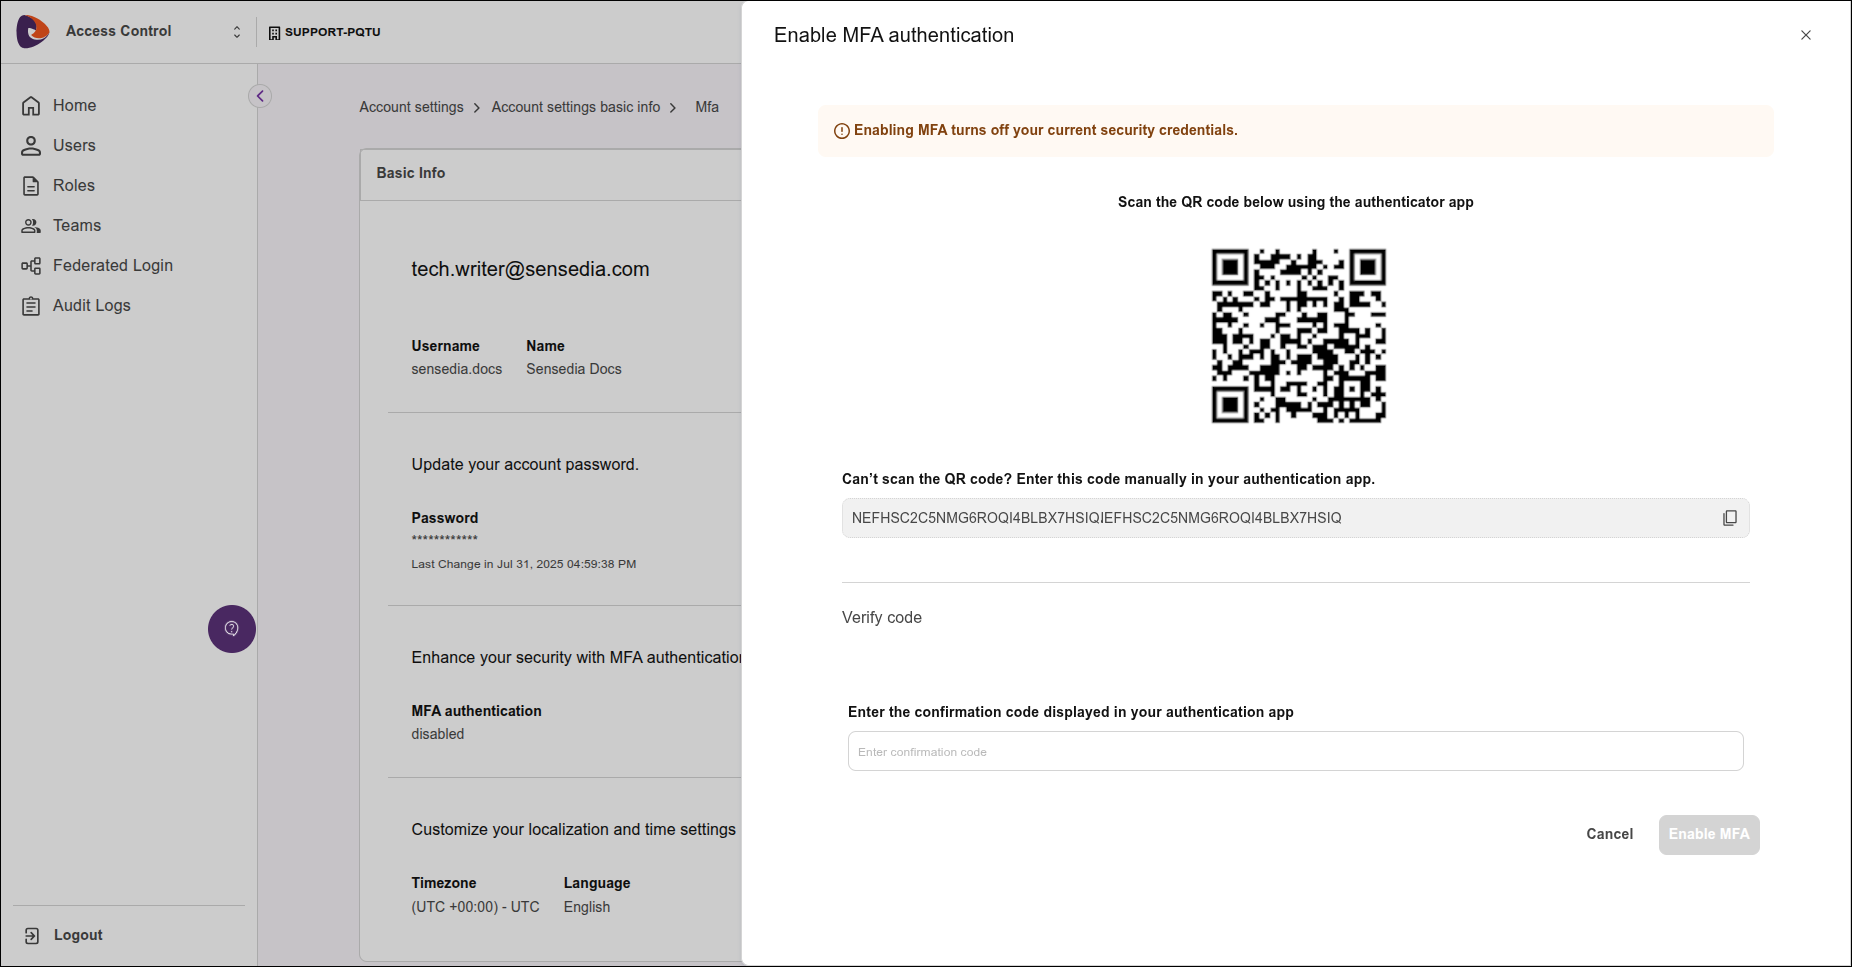
Enter the code generated by the authentication application and click Enable MFA.
Once activated, in addition to your password, you will need to enter the code provided by the chosen authentication application to log in.
| MFA usage is not available for federated users. |
By disabling MFA, you will go back to accessing with only your login and password, without needing to enter the security code.
To disable MFA for your user, repeat the process described above, clicking the top right corner of the screen, then My Account Settings and Disable MFA.
Any user can enable and disable their own MFA.
By disabling another user’s MFA, you allow the user to go back to accessing with only their login and password, without needing to enter the security code.
|
Your user needs to have permission to disable another user’s MFA. |
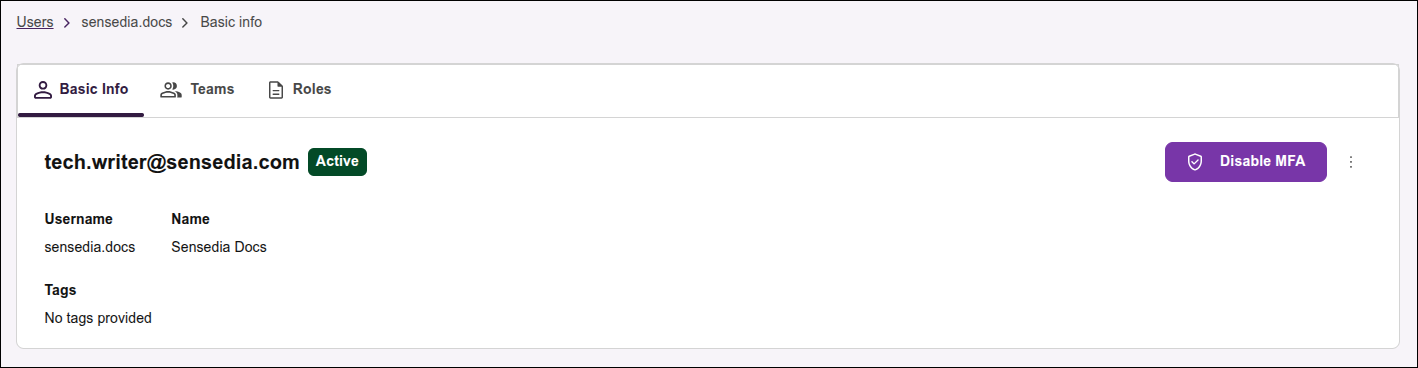
To disable another user’s MFA, follow these steps:
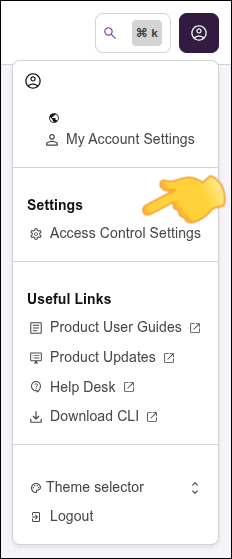
Click the icon in the top right corner of the screen and then Access Control Settings.
On the card in the center of the screen or in the left side menu, click Users.
In the user list, click >, in the Actions column of the desired user.
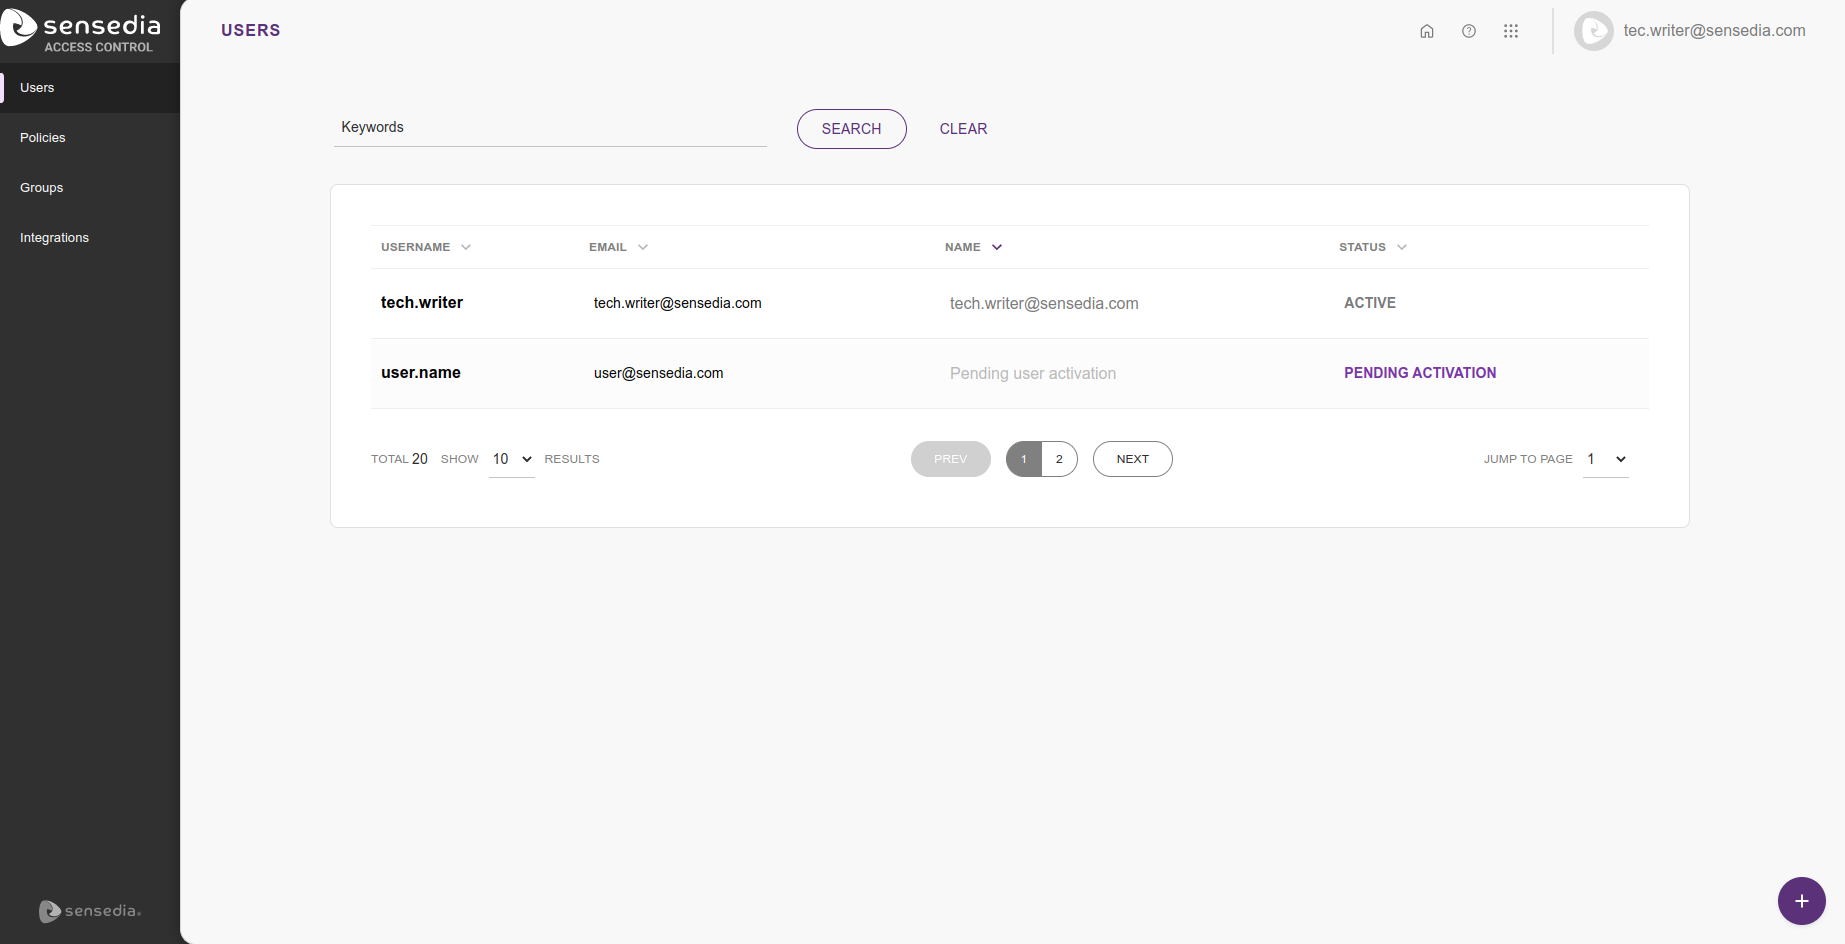
Click Disable MFA.
MFA cannot be enabled on this screen.
Share your suggestions with us!
Click here and then [+ Submit idea]