API Identity

API Identity is a type of API that we created just to facilitate authentication via the OAuth Password flow.

First, let’s understand what the Password flow is:

OAuth Password flow

In the Password flow, an end user’s username and password, stored in an external service, are used to generate the access token necessary to send requests to an API.

The operation follows the diagram below (source: The OAuth 2.0 Authorization Framework):

+----------+
| Resource |
|  Owner   |
|          |
+----------+
     v
     |    Resource Owner
    (A) Password Credentials
     |
     v
+---------+                                  +---------------+
|         |>--(B)---- Resource Owner ------->|               |
|         |         Password Credentials     | Authorization |
| Client  |                                  |     Server    |
|         |<--(C)---- Access Token ---------<|               |
|         |    (w/ Optional Refresh Token)   |               |
+---------+                                  +---------------+

That is, the user informs their username and password to the client, who passes them on to the authorization server in a POST request that leads to the generation of an access token. In response to this, the authorization server sends an access token that can now be used to send requests to the API.

When to use it?

Since the Password flow establishes that the user’s username and password are shared with the client, it’s more common to use it to allow access to other applications of the same service, but not to third-party applications (in this case, more secure flows, such as Authorization Code, are preferable).

Now, the central question:

How does the API Identity fit into the flow we just described?

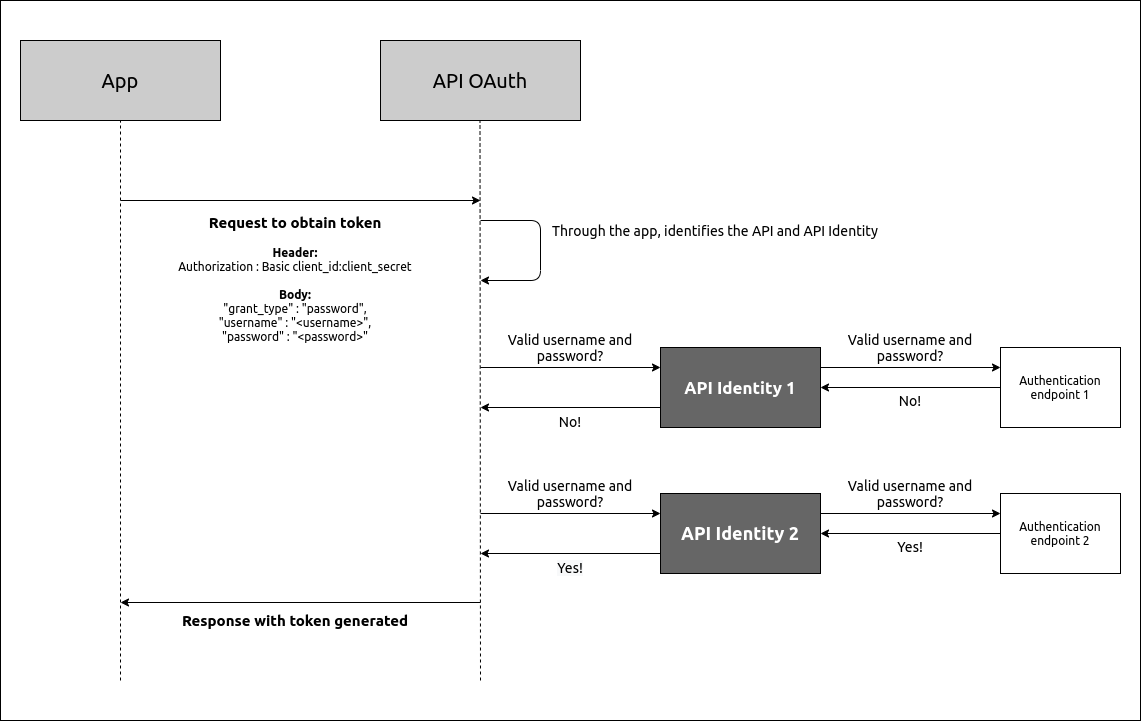
When a POST call is made the API OAuth requiring the generation of a token, the API OAuth identifies the API Identity linked to the API through the app informed in the header Authorization. The username and password must be included in the request body. Then, the API OAuth calls the API Identity to validate the username and password, which the Identity does by calling the authentication endpoint registered in it. If the information is validated, the API Identity answers positively to the API OAuth, which generates the token. Otherwise, the token is not generated.

One important detail: you can link several APIs Identity to the same API. So, in this authentication flow, OAuth will call each of the linked APIs Identity, from the newest to the oldest, and as soon as the username and password are validated, it stops the validation process and responds positively to OAuth. If all APIs Identity are called and the username and password are not validated, the token is not generated. This behaviour of the API Identity allows the Manager to concentrate the internal authentication servers for your APIs.

Briefly, then, we have this flow (with an example in which two APIs Identity are called):

api identity en

Every API that requires the Password flow to generate and validate access tokens must be linked to an API Identity (this link is made in the registration of the API Identity). This API and the API Identity must be deployed to the same environment. Other than that, for the API Identity to be able to handle calls for token generation, it must be deployed in the same environment as the POST / access-token flow (that is, in the same environment as the API OAuth, which comes with your Manager).

An API Identity must be registered if you want to use the OAuth Password flow. You can see more about this flow here.

How it works

When an app calls an API linked to an API Identity, this is what happens: when the API requires an access token generated with the Password flow, a request is made to the API Identity, which handles the call and sends it to the authentication endpoint.

If the backend that validates the credentials requests more information than username and password, you can use interceptors in the API Identity flow to compose a body with the requested information. For example, you can retrieve data from an app’s extra fields and include it in the body.

A regular API can be associated with more than one API Identity, and an app may be associated with more than one API. In these cases, the authorisation service will make requests for each associated API Identity, one at a time. If the password is valid for a given API Identity, the authorisation service will stop executing the remaining requests. In case the password isn’t valid for any API Identity, the access token won’t be generated.

When the API Identity makes a request to the authentication endpoint, the content that is returned will be passed to the access token request in the Password flow, allowing more possibilities in password authentication. If the call to the API Identity returns a field in the body with the key extralnfo, the content of that field will be present in the extralnfo of the access token generated.

Creating an API Identity

To create a new API Identity, select the option CREATE API IDENTITY in the bottom right corner of the APIs page (in the menu that opens up when you hover the cursor over the +) floating button).

criaidentity1

The API creation page will open and you must fill out the required information along the different steps, as in the case of creating a regular API:
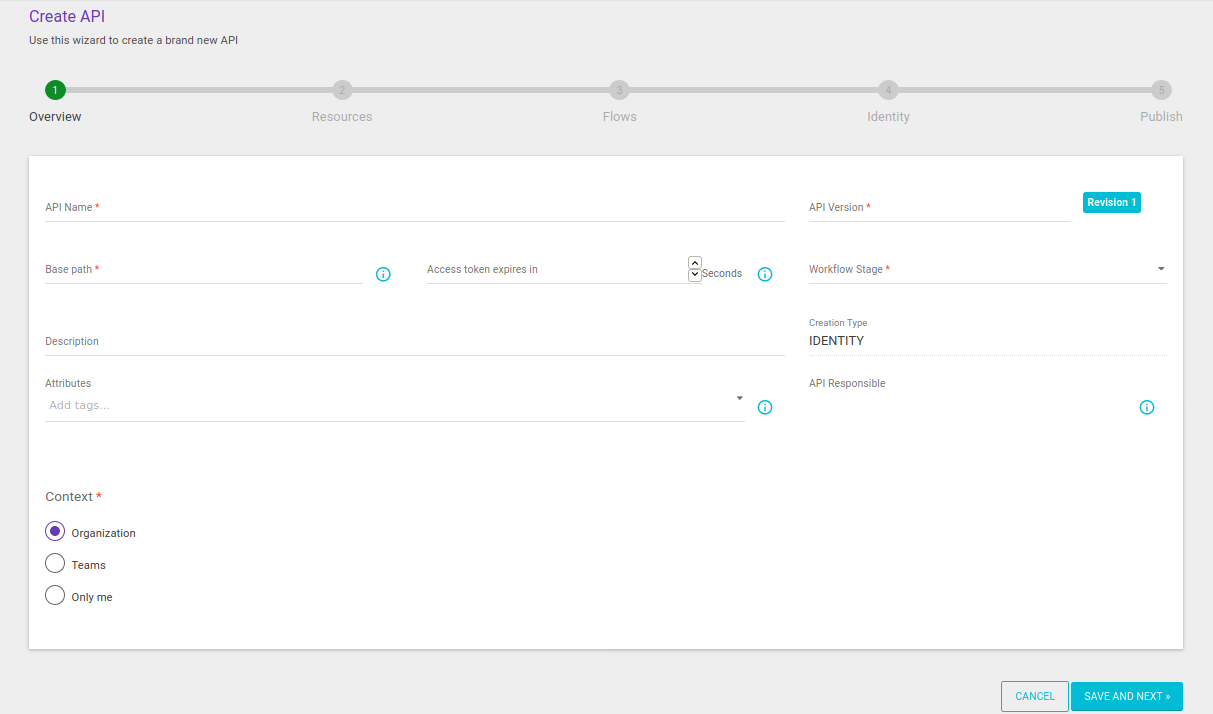
createIdentity2
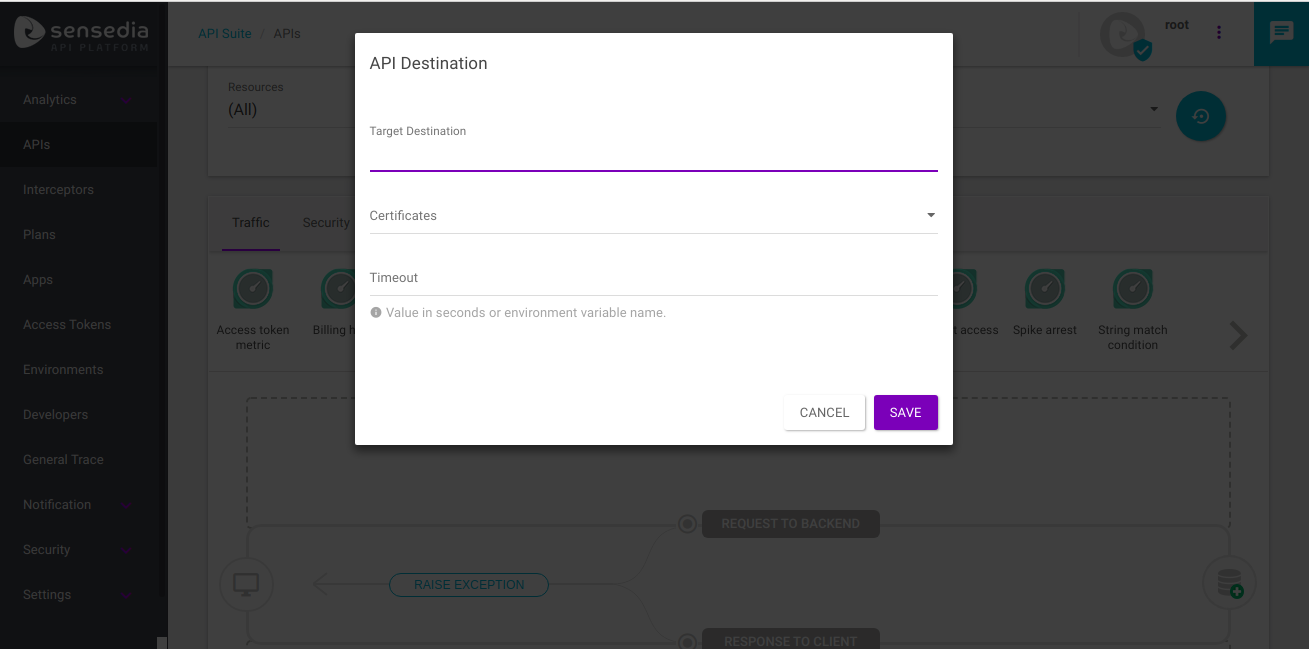
The API Destination (which you can configure clicking on the icon backend icon on the Flows creation step) should be the endpoint where the username and password will be verified.
criaidentity2 2

Unlike regular APIs, API Identities have the “Identity” field, which enables users to select APIs that use the OAuth and/or Access Token Validation interceptors, with the Password option enabled.
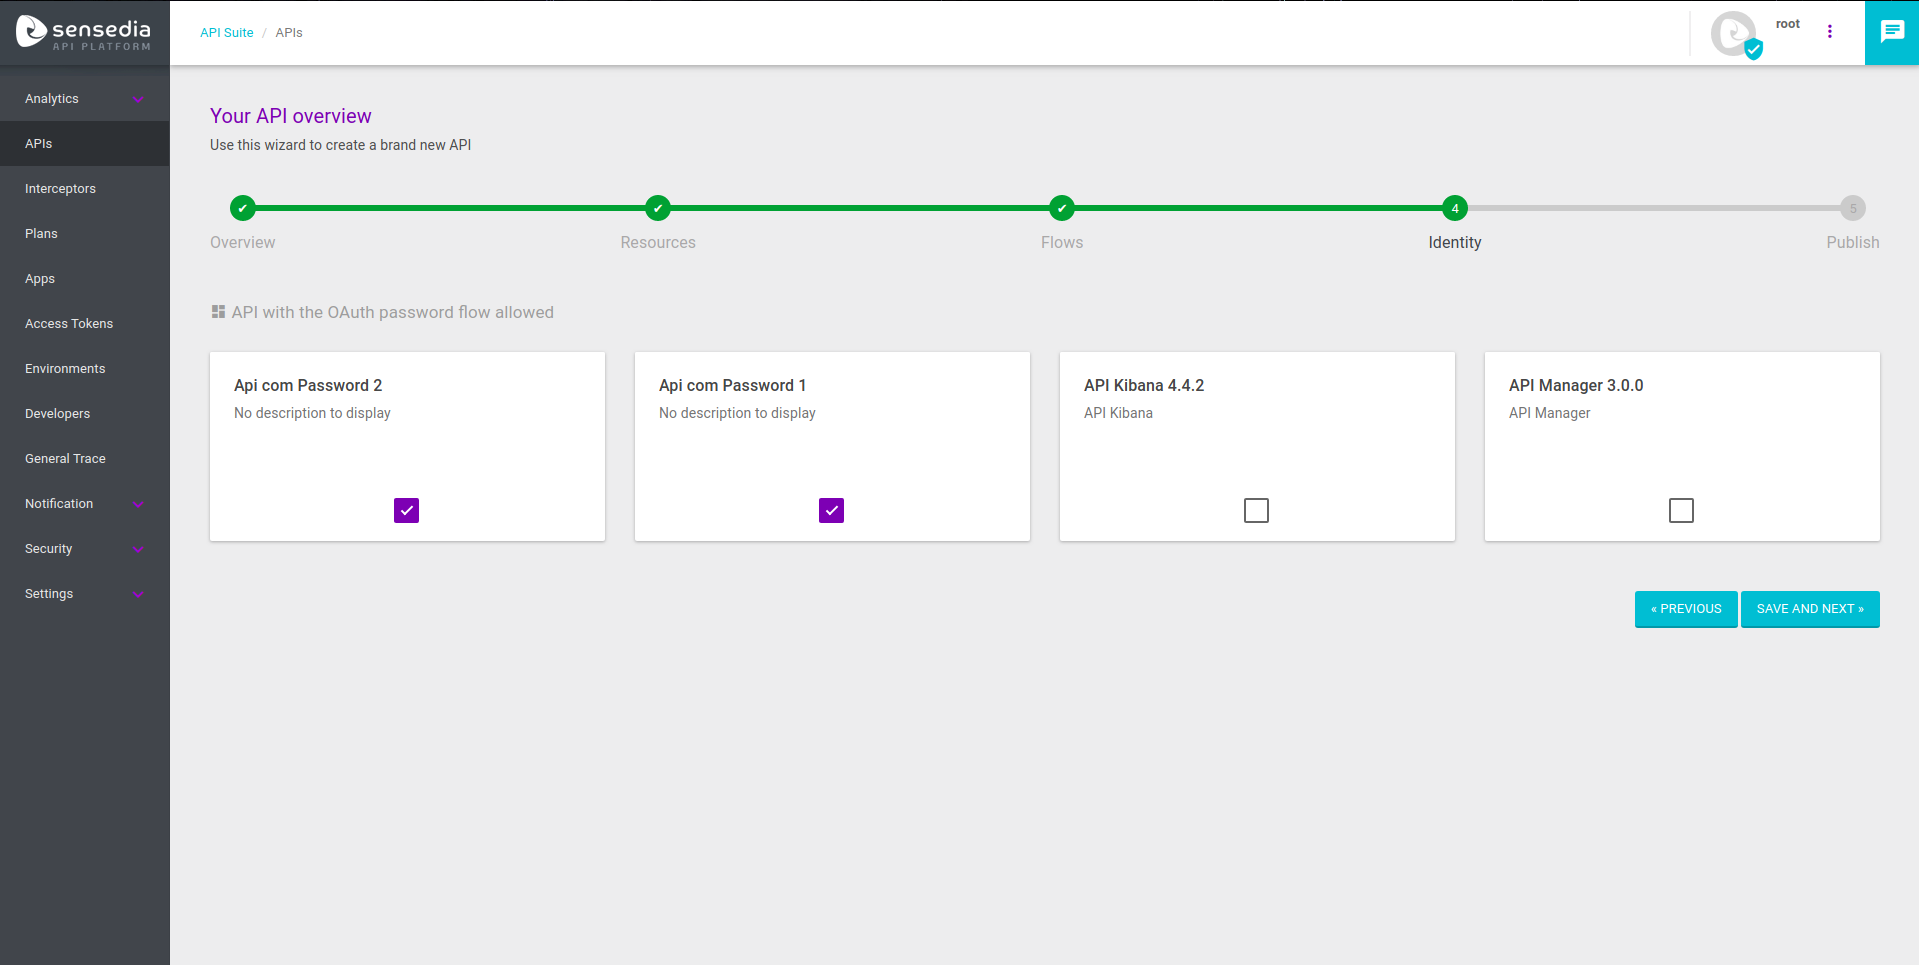
criaidentity3

Once this is done, you can publish your API after the creation steps and it will be ready to be used.

Configuration and Usage Example

To make the process of setting up and using the API Identity easier, our Support team has created an article with an example. You can access it here.[1]


1. This article will be made available in English soon.
Thanks for your feedback!
EDIT
How useful was this article to you?