Thanks for your feedback!
EDIT
The Source screen is where you create your Source-type integration flows. You can build integrations in two ways:
Visually, in the Diagram tab: add steps to the canvas and fill out the configuration forms to define the integration flow.
Via code, in the Source Code tab: use CAMEL YAML DSL to write the integration script directly in the main.yaml file.
While building the integration in the Diagram tab, you can switch to the Source Code tab to view the corresponding code, and vice versa.
| In the Diagram tab, you can only create and edit flows that use components and EIPs with simple parameters. |
The animation below demonstrates the features of each tab.
Below, see how to:
Create an integration flow: follow our step-by-step guide to create a Source-type integration.
Deploy an integration flow: after completing the integration, see how to deploy it.
Next, follow a step-by-step guide to create a Source type integration flow.
Create a new flow
Go to the Integration Flows screen.
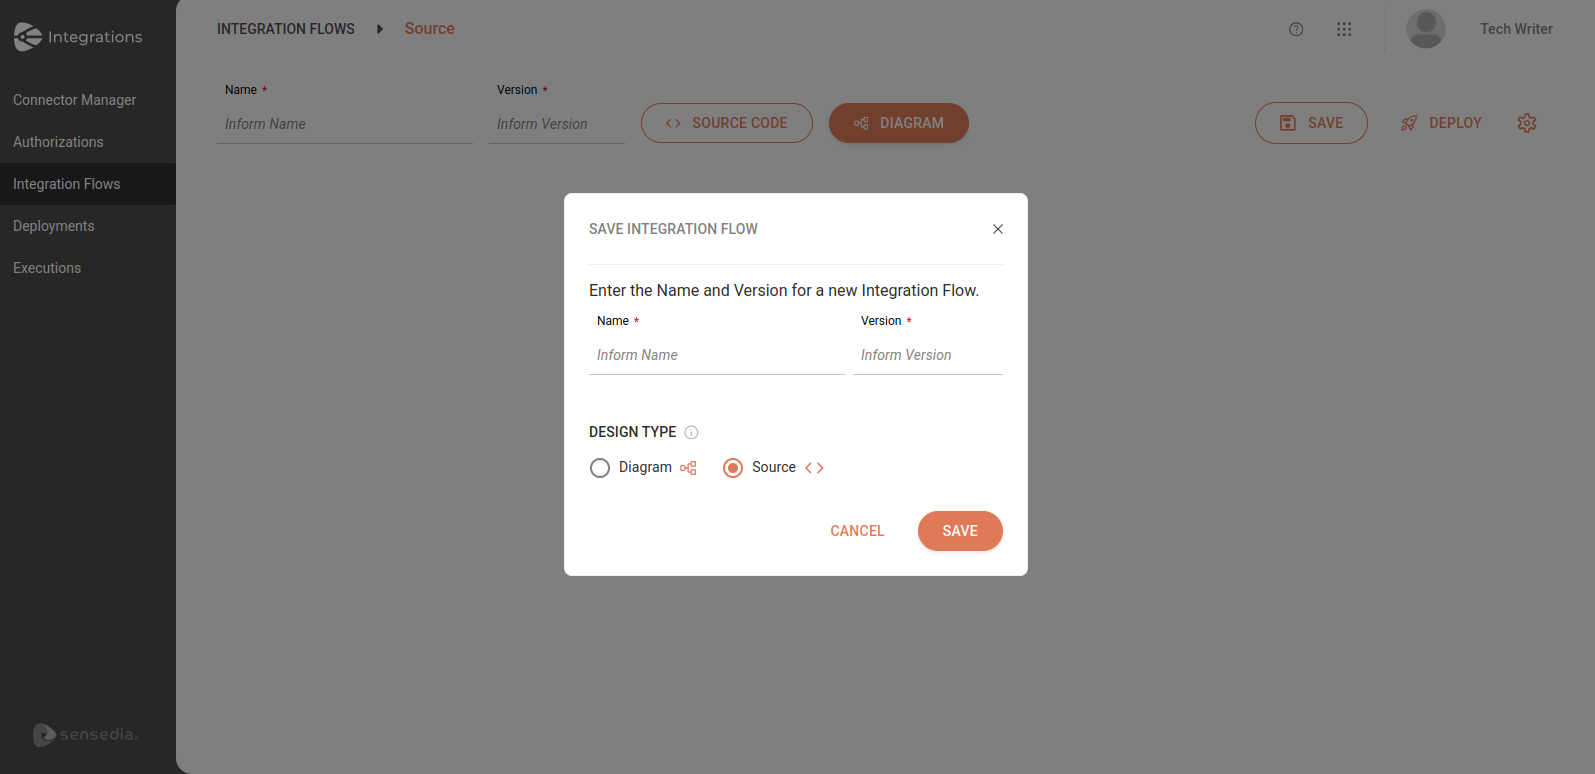
Click on + NEW FLOW.
In the modal window that opens, enter the name and version of the integration flow. You can edit them later.
Select the design type Source.
Click on SAVE.
Go to the Source screen
After creating the flow, you will see the Source screen with the Diagram tab selected by default.
In the main.yaml, you will see the canvas with the empty trigger step as the first step of the integration.
If you prefer, you can insert the integration script directly into the main.yaml, in the Source Code tab, and view or edit it in the Diagram tab.
|
The image below shows the Source screen displaying the Diagram tab.

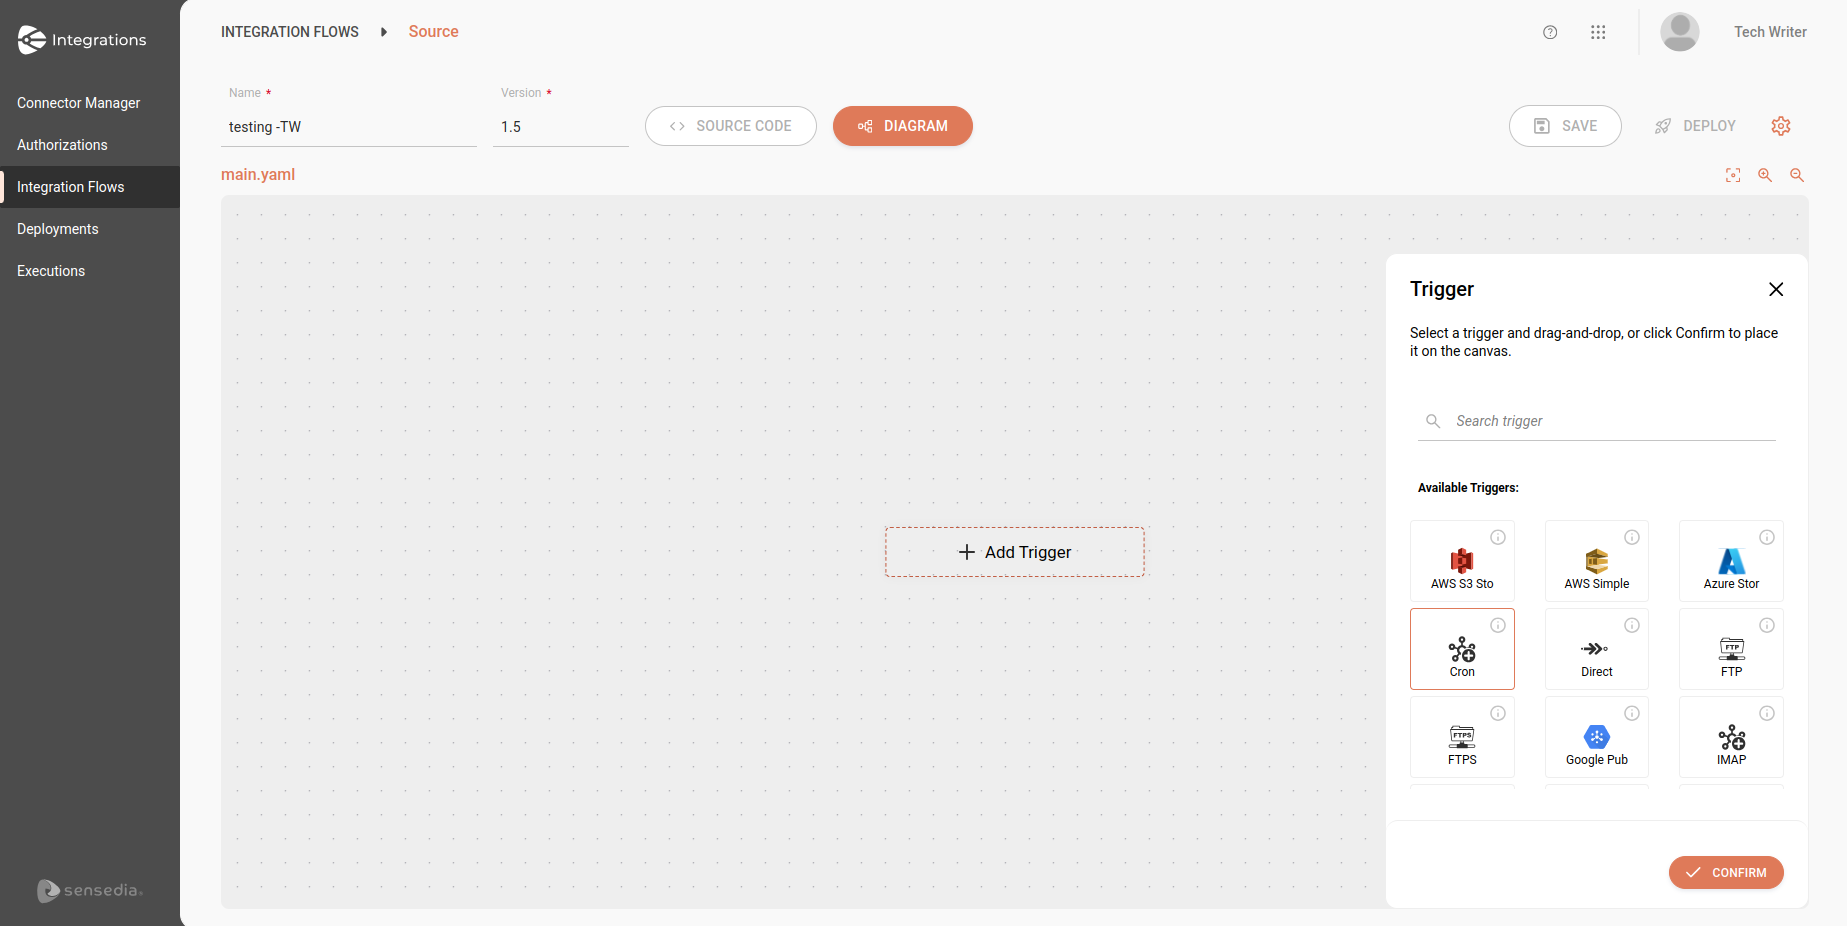
Add the trigger to the canvas
By clicking the + Add Trigger button, you will see a menu on the right side of the screen with the options for available triggers.
Select a trigger and click CONFIRM to add it to the canvas. If necessary, use the search tool to locate it.
After adding the trigger to the integration, the configuration form will automatically open. However, you can continue adding steps and configure it later.
| The CONFIRM button will only be active when a trigger is selected. |
Add a connector or EIP to the integration flow
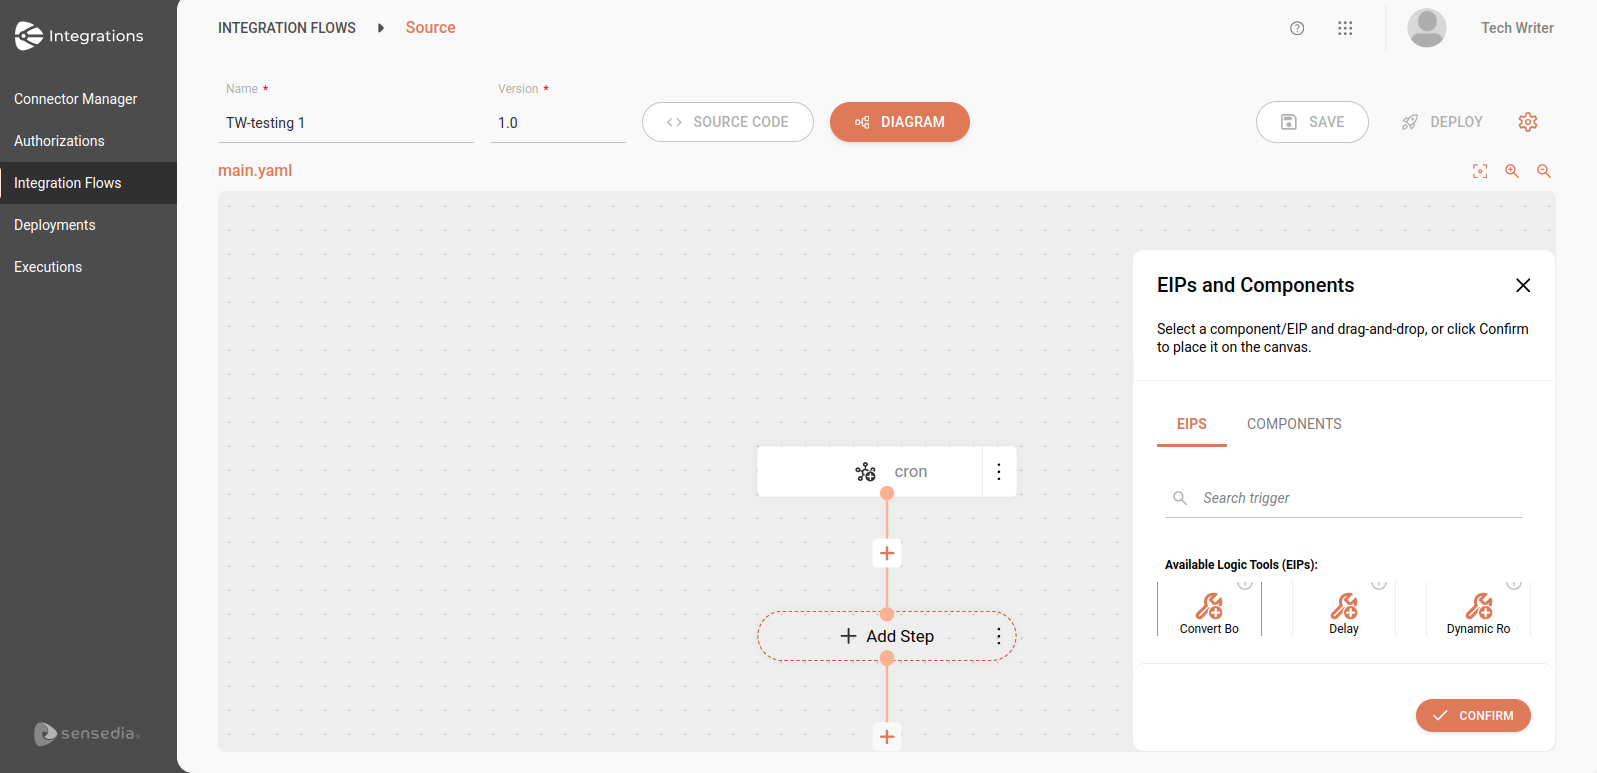
After adding the trigger, you will see a plus sign +, indicating the addition of a new step.
Click the plus sign to view the + Add Step button.
When clicking + Add Step, you will see the components (connectors) and EIPs available on the right side of the screen. Click on the tab corresponding to each of them. If necessary, use the search tool to locate a specific component or EIP.
After selecting a component/EIP, click CONFIRM.
After adding a step to the canvas, the configuration form will automatically open. However, you can continue adding steps and configure them later.
Add as many steps as necessary for your integration flow.
| EIPs that create branches in the route, such as Choice, cannot yet be added directly through the Diagram. To include them in the integration, use the Source Code tab. |
Save the entire project in the Source Code tab
When finished configuring the flow, click Save All.
|
To enable sending and viewing execution logs (logs) in Sensedia Analytics, add the EIP Log. When viewing the logs, you will not be able to select the Trace and Debug levels. |
In the Source Code tab, you can (if necessary):
To edit a step’s parameters:
Click the three-dot icon on the right corner of the step.
Select Edit.
Edit the information in the step’s configuration form and click Confirm.
To delete steps from an integration flow:
Click the three-dot icon on the right corner of the step.
Select Delete.
Click YES.
The trigger is the only step that cannot be deleted from the integration. However, you can replace it:
Click the three-dot icon on the right corner of the step.
Select Replace.
Select the new trigger you want to implement in the integration.
Click CONFIRM.
Click YES.
Fill in the new trigger’s configuration form.
| When replacing a trigger, all configurations of the original trigger will be lost. |
Parameters are the fields in the form that you need to fill in to configure each step of the integration. The form can be filled when adding the step to the canvas or later.
They are organized in "sections" or "tabs" that can be expanded/collapsed, making navigation and configuration easier.
Components
Here are the most common sections:
Basic: typically contains information like the ID and description of the component.
Common: gathers standard and widely used options, applicable to most scenarios.
Consumer: focused on settings specific to using the component as a trigger, allowing the consumption of messages or events.
Producer: includes parameters for using the component as a connector, to send messages or data to other systems.
Advanced: offers more advanced configuration options, with detailed adjustments that can be applied as needed.
Health: provides settings for monitoring the health and performance of the component.
Security: includes security-related settings, such as authentication and encryption.
Scheduler: covers settings related to intervals, delays, and cron expressions.
EIPs
EIPs only have the Basic and Advanced sections.
Some EIPs, such as Split, generate subflows.
To access a subflow:
Click the three-dot icon on the right side of the EIP that generated the subflow.
Select Go to xx.
The first step of the subflow will be automatically filled with the step that initiated the subflow in the main route. In the example, this is the Split.
Next, you will see the plus icon + and can continue adding steps in the same way as in the main route.
The animation below demonstrates how to access a subflow:
| If you delete the first step of the subflow, that is, the one that originated the subflow in the main route, all steps of the subflow will be removed automatically. |
| The validation feature is only available in the Source Code tab. |
To validate the integration script before deploying it, click on the ![]() (Full Validation) icon in the top right corner of the script editor.
(Full Validation) icon in the top right corner of the script editor.
If inconsistencies are found, such as structural or syntax errors, they will be listed in the Errors section at the bottom of the screen. Additionally, the main.yaml file will be automatically checked, and inconsistencies will be displayed in the following cases:
When clicking on the Save All button in the top right corner of the screen.
When clicking on the save icon in the top right corner of the editor.
Although you cannot deploy a flow with inconsistencies, you can save it even with errors.
It is important to note that script validation can only be performed in the Source Code tab.
Click DEPLOY
After finishing and saving the project, click DEPLOY in the upper right corner.
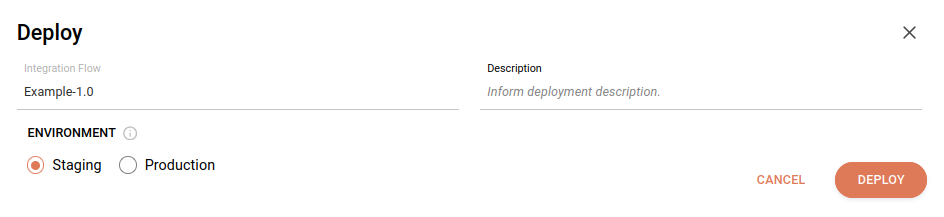
Write a deployment description
In the modal window that opens, write a description in the Description field. After deployment, the description will be available on the Deployments screen under the Deployment History item in the Actions column.
Select the deployment environment
In the Environment field, select the environment where you want to deploy the flow.
Click DEPLOY
| If there are variables in the integration script, their values will be automatically applied according to the selected environment (Staging or Production) during deployment. |
| You cannot delete a flow with Undeployed status, only edit it. |
| To see examples of Source type flows, access Tutorials and Examples. |
Share your suggestions with us!
Click here and then [+ Submit idea]