Source Code
On this page, you will find:
-
Script editor: learn how to add a script in the editor and perform other actions.
-
Source folder structure: learn which files make up the Source project and how an integration can include multiple files.
Script editor
Here you should add the integration scripts.

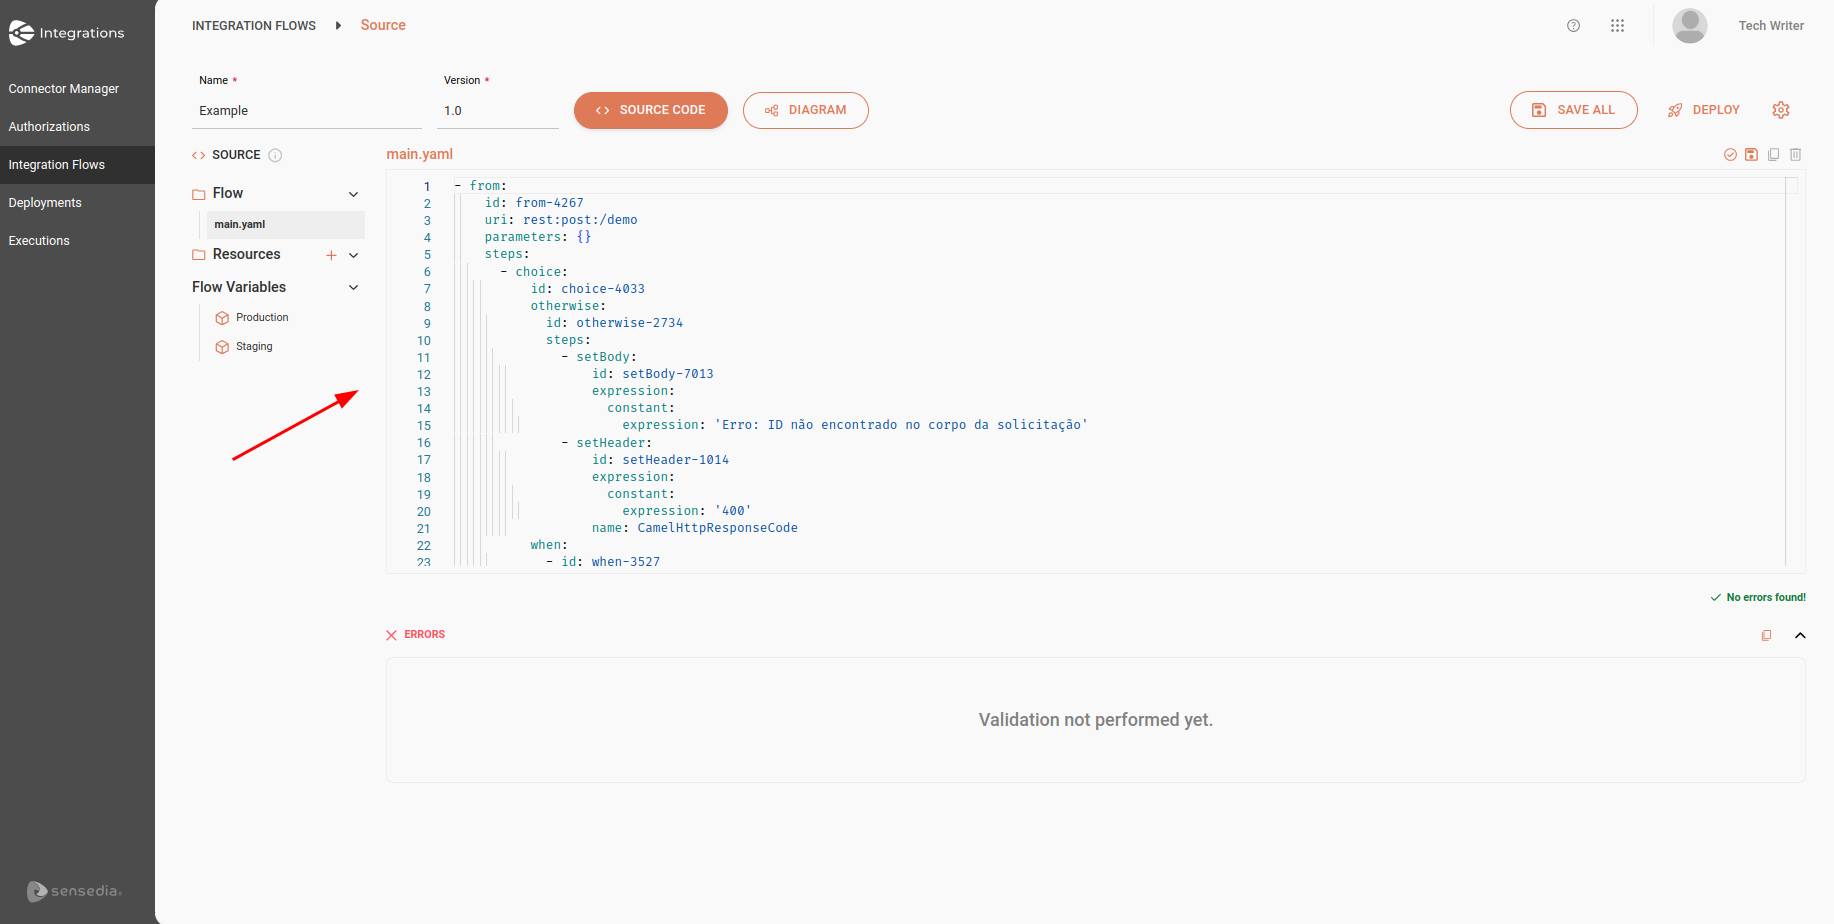
The label displayed above the editor varies according to the file you are working on.
If you are editing the main flow file, you will see the name main.yaml, as shown in the image.
If you are working on a file in the Resources folder named as transformation.jsonata, that name will be displayed.
|
In the upper right corner of the editor, you will find some icons that perform actions on the current file’s script:
-
 (Full Validation): checks the structure of your script before deploying the integration flow.
Any errors in the flow structure or the use of restricted components or EIPs will be identified and listed at the bottom of the page in Errors.
This feature is only available for the main.yaml script file.
|
-
 (Save File): saves the current file’s script.
 -
 (Duplicate): duplicates the current file’s script.
 -
 (Delete): deletes the current file’s script.
Source folder structure

The main.yaml file is just one part of your Source project, which can contain other important files.
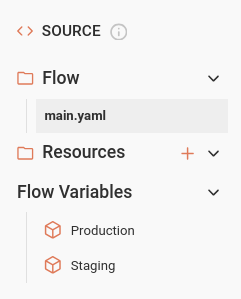
You can view the folder structure on the left side of the editor:
Flow
The Flow folder contains the main integration flow file: main.yaml.
Only one main.yaml file is allowed per project.
This file cannot be renamed or deleted.
Resources
For some Apache Camel components, such as "JSONata", it is necessary to use scripts stored in separate files. These files can be created in the Resources folder, regardless of the file extension. This way, you can reference them directly within the main flow, ensuring they are used during the execution of the integration flow.
|
All the files added to the Resources folder are automatically added to the integration’s |
Creating a file
To create a file, follow the steps below:
-
Click on the + button, to the right of the folder’s name.
-
Specify the file name and extension: for example,
jsonata.yaml,test.txt, etc.
A  on the right side of the file name indicates that the file has not been saved. on the right side of the file name indicates that the file has not been saved.Whereas a  indicates that there are errors in the file. indicates that there are errors in the file.
|
File name requirements
The file name must meet the following criteria:
-
Maximum size: 100 characters.
-
Allowed characters: alphanumeric,
-,_, and.. -
Uniqueness: each file name must be unique, but you can have, for example,
test.yamlandtest.json.
Extension Types
-
If the file extension is
.yaml,.jsonor.xml, it will be formatted with colors and layout. If the structure is incorrect, a notification will be displayed. -
If the file extension is different from those mentioned, the file will not be validated. However, you can create your script normally.
Limits
-
There is no limit to the number of files the folder can contain.
-
A file can have a maximum size of 1 MB.
Flow variables
In this folder, you can create and manage the variables for your integration flow. These variables allow for a customized flow configuration and environment parameterization, eliminating the need to create a separate integration flow for each environment.
| If your flow has a REST trigger, it will not be possible to use environment variables in the URI. |
Creating a variable
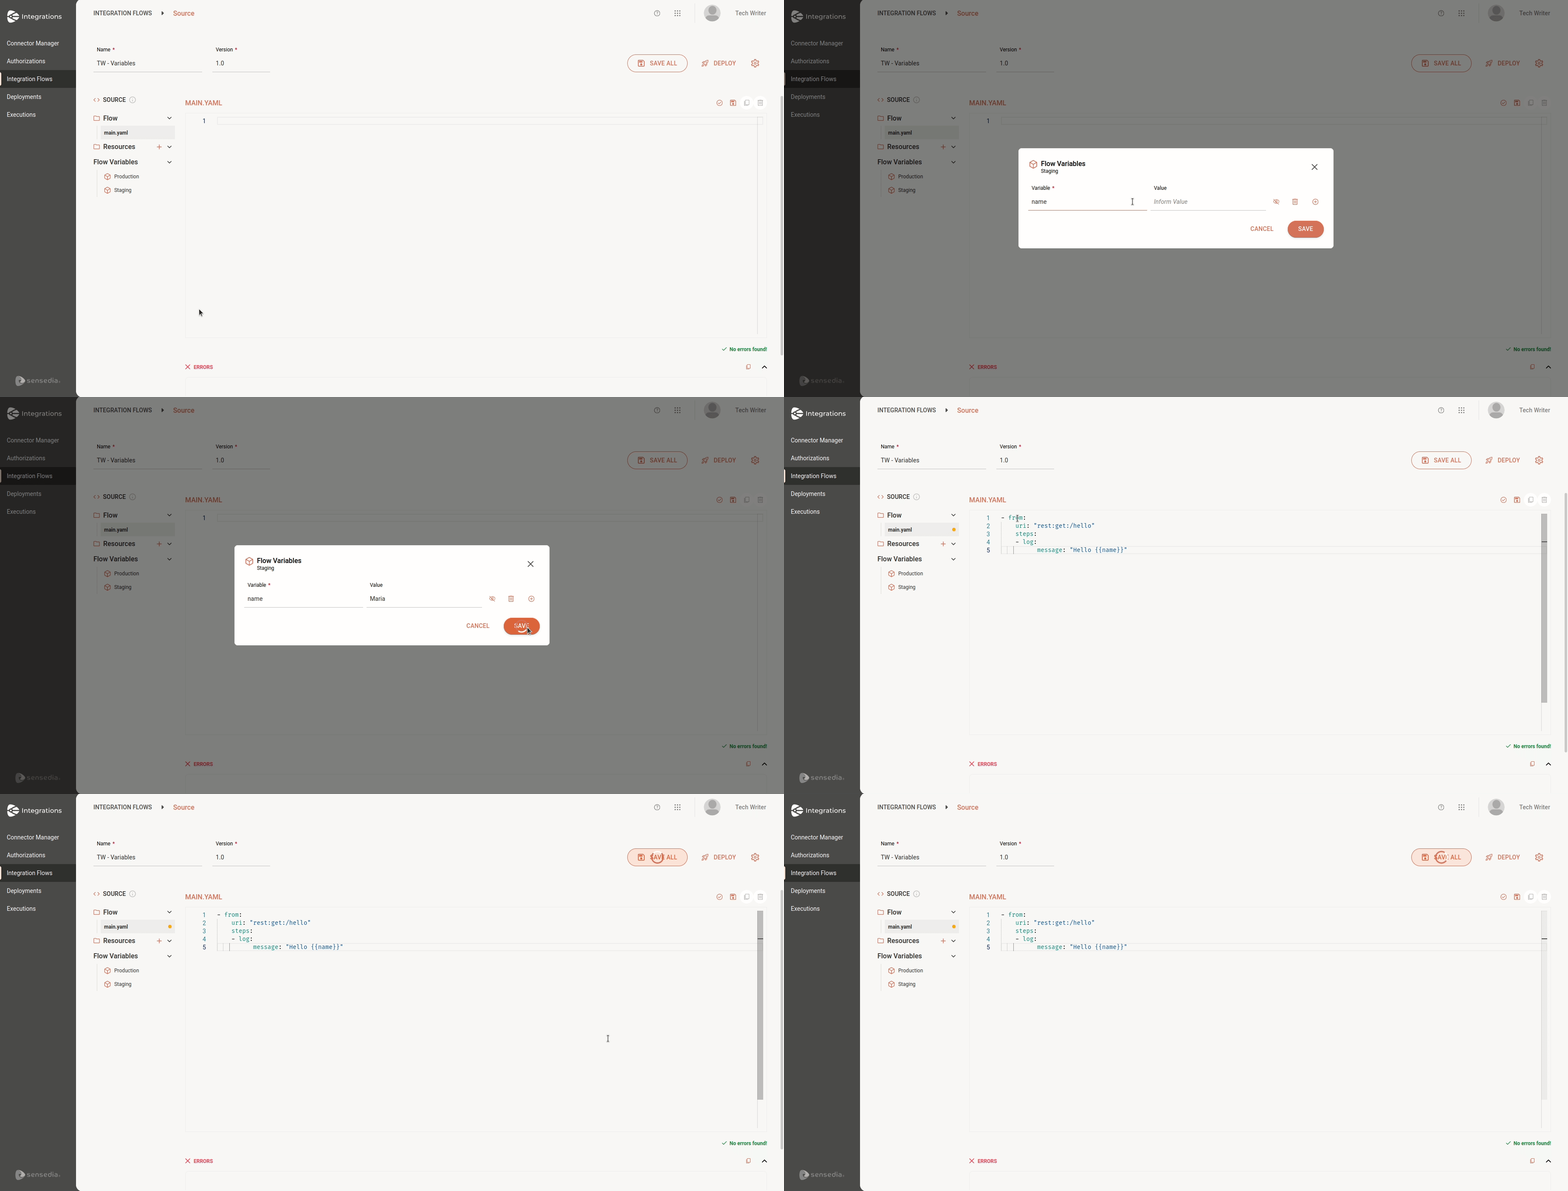
To create a variable, follow the steps below:
-
Select the environment: click the name of the environment in which the variable will be applied: Production or Staging.
-
A modal window will open with a registration form.
-
-
Fill in the fields:
-
Variable: variable name. Alphanumeric field. You can use the characters
.and_. -
Value: value assigned to the variable, which will be deployed automatically according to the environment you selected.
-
-
Save the variable: click SAVE.
-
Reference the variable: in the flow script, in the
main.yamlfile, reference the variable you created.
|
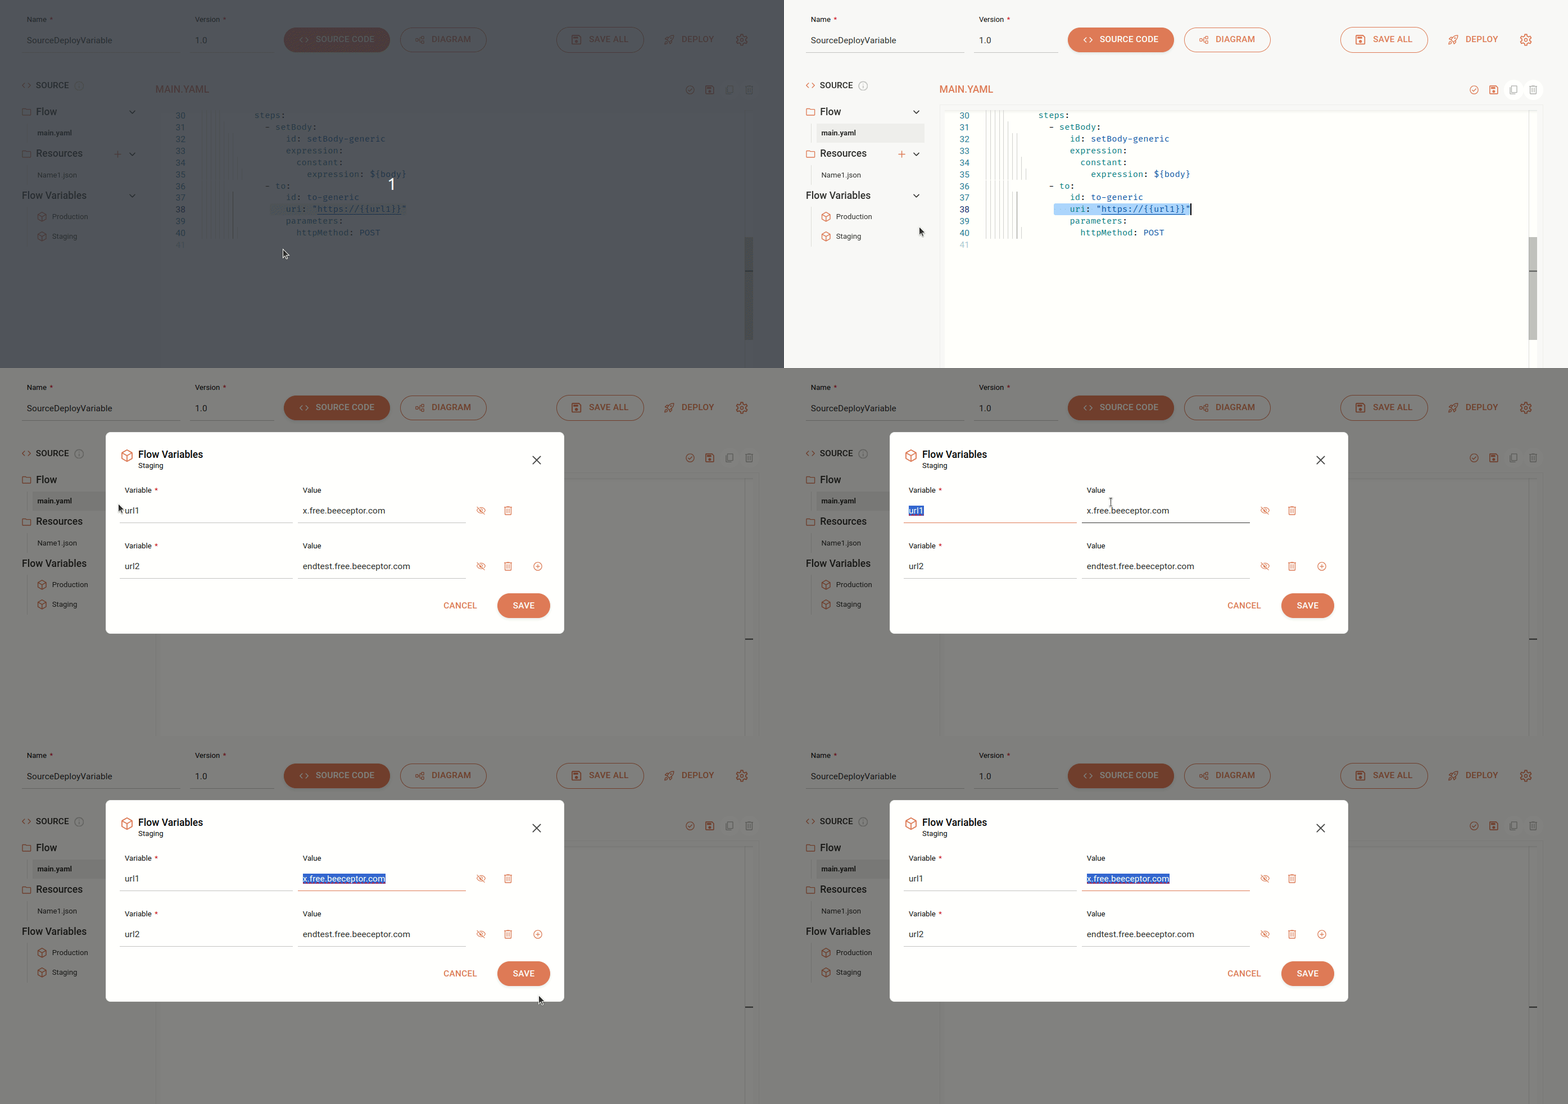
To apply the registered variables, reference them in the integration flow script by entering the name of the component, as in the examples below:
|
Managing variables
-
To add more than one variable, click the + button in the right corner.
-
To delete a variable, click the trash icon.
-
To hide a variable, click the eye icon.
| You cannot change the variables of a deployed flow with a Deployed status. To change them, you must deploy the flow again. |
Blocked variables
The variables listed below are reserved for internal use and cannot be assigned:
AWS_ACCESS_KEY_ID
AWS_SECRET_ACCESS_KEY
AWS_REGION
AWS_DEFAULT_REGION
RESOURCES_DIR
CAMEL_* (any variable that begins with CAMEL_)
Examples
The example below references the variable "name". During the execution of this integration, the variable will be replaced with the registered name.
- from:
    uri: "rest:get:/hello"
    steps:
    - log:
          message: "Hello {{name}}"

In this other example, we reference a variable in a URL.
- to:
                id: to-generic
                uri: "https://{{url1}}"
                parameters:
                  httpMethod: POST

Share your suggestions with us!
Click here and then [+ Submit idea]