Diagram
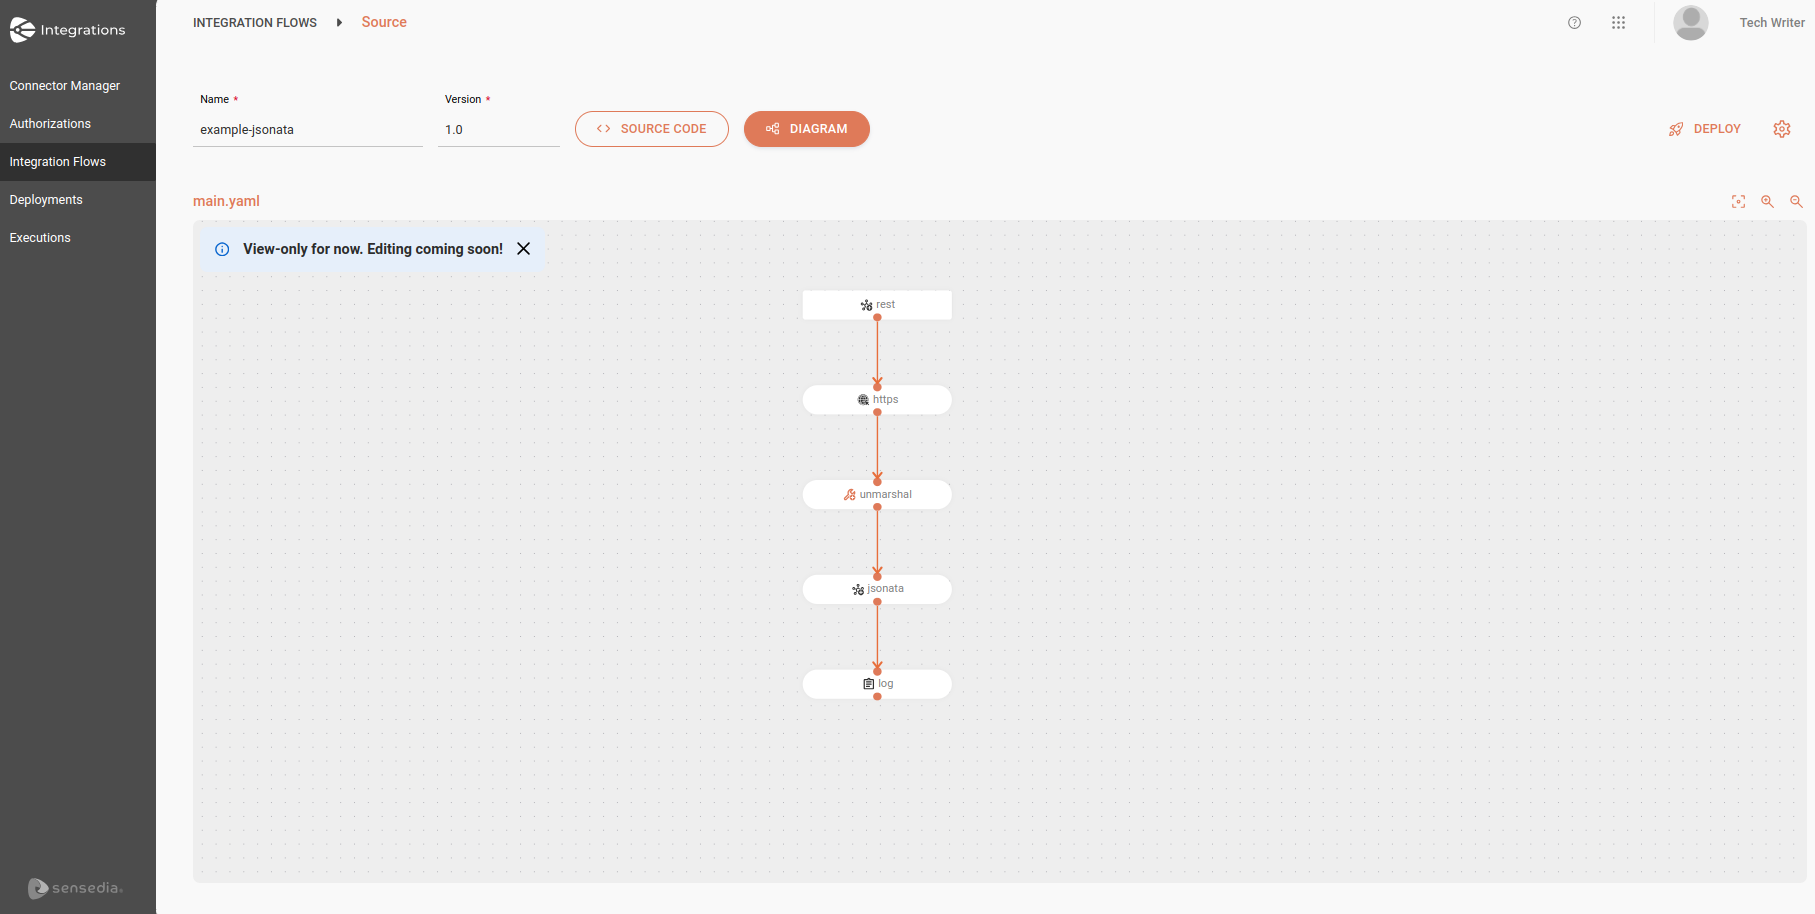
Clicking on Diagram at the top of the Source screen will display your flow in diagram format.
| Currently, it is only possible to edit simple parameters of EIPs and components in the Diagram view mode. To create new EIPs and components, go to the Source Code tab and make the changes directly in the script. |
This format provides a clear and intuitive visual representation of the integration flow, making it easier to understand the sequence and relationships between flow components compared to reading lines of code.
When switching to this view mode, you will see on the screen:
-
In the upper left corner: the fields Name and Version.
-
In the upper center: the two available view modes, Source Code and Diagram.
-
In the upper-right corner:
-
SAVE: save the integration flow.
-
DEPLOY: deploy the integration flow.
-
The gear icon with additional settings:
-
Description: add or edit a description for the integration flow.
-
Deployments: access the Deployments screen.
-
Delete: delete the current integration flow.
-
-
Options to zoom in and out and a button to fit the flow to the screen.
-
| The Save All option is only available in Source Code mode. |

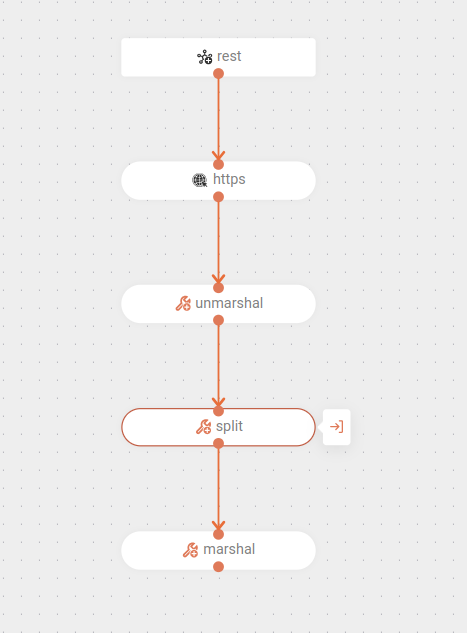
Each component and EIP used in the integration script will be displayed in the diagram with its corresponding icon and default name.
If the description field is provided in the step, this value will be presented as the name of the step.
| Components will be displayed in gray and EIPs in orange. |
If there is no script created or if the CAMEL YAML DSL syntax is incorrect, a message will inform you that the integration diagram cannot be displayed.
If there is an unrecognized component or EIP, or one that has an error, in the integration script, an "unknown" icon ![]() will be displayed in place of the step.
will be displayed in place of the step.
Viewing subflows
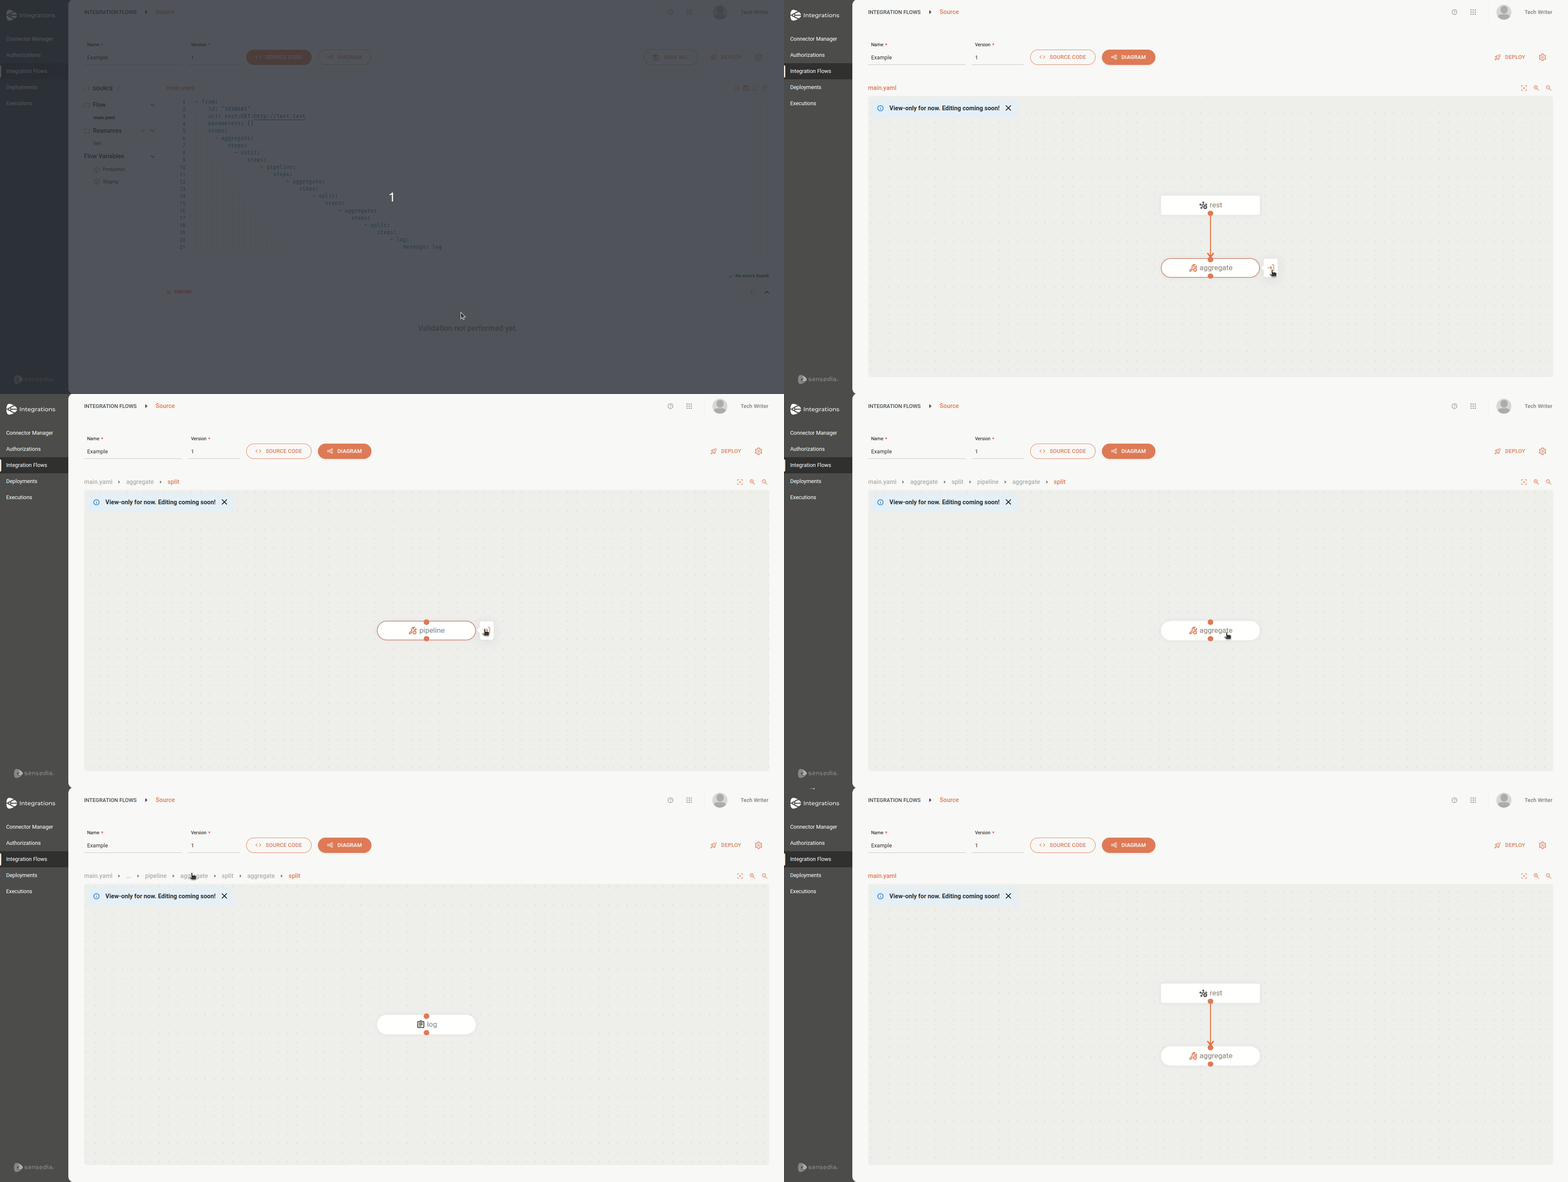
Some EIPs include subflows, allowing you to view them separately from the main flow to facilitate process organization and understanding.
To view a subflow, select the desired EIP and click the three-dot icon in the right corner of the step. You will have the option to access the subflow associated with the step or edit the selected EIP.

The visualization of subflows is applicable to the following EIPs:
-
Aggregate
-
Circuit Breaker
-
Filter
-
Idempotent Consumer
-
Loop
-
Pipeline
-
Policy
-
Resequence
-
Saga
-
Split
-
Step
-
Transacted
-
When Skip Send To Endpoint
If your integration has many subflows, use the breadcrumbs at the top of the diagram to easily identify the step currently being viewed.
The GIF below demonstrates the visualization of a subflow:

Editing components and EIPs in diagram mode
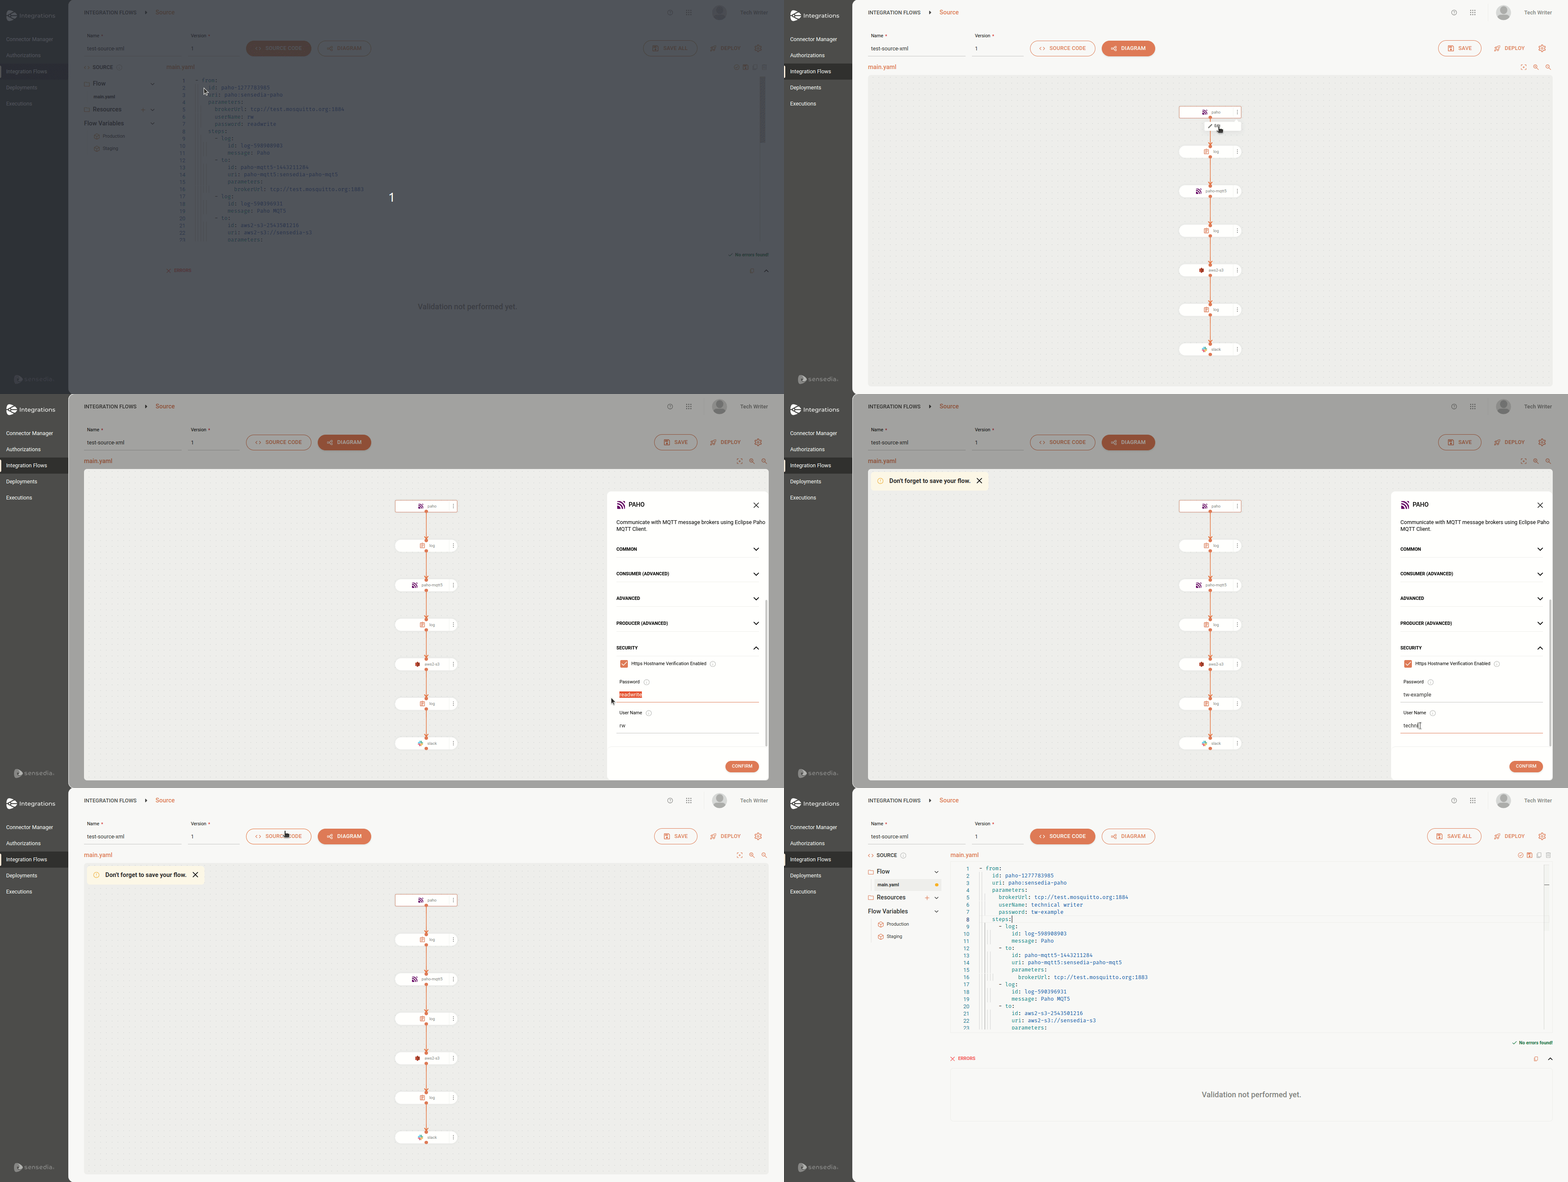
After creating the integration flow script in Source mode, you can edit parameters (options) of components and EIPs in diagram mode.
To do this, follow the steps below:
-
Go to the diagram mode display tab.
-
Select the component or EIP you want to edit.
-
Click the three dots icon
 .
.-
Then click on Edit to open the editing form.
-
If the selected component or EIP has a subflow (
 ), the option to access the subflow will also be displayed.
-
-
Fill in the required fields. Except for boolean fields, the other fields can be filled with flow variables.
-
Once you finish configuring the form, click on CONFIRM. The changes made will be automatically reflected in the integration flow script in Source mode.
You can click CONFIRM even if mandatory fields are incomplete. In this case, an alert icon will be displayed on the corresponding step. -
To save the information entered in the form, click on SAVE in the upper right corner of the screen.
The animation below demonstrates editing a component’s form and the changes reflected in the script in the Source Code:

Parameters (Options)
Component and EIP parameters are organized into "sections" or "tabs" that can be expanded/collapsed, making navigation and configuration easier.
Components
The following are the most common sections:
-
Basic: usually contains information such as the component’s identification (id) and description.
-
Common: gathers the standard and most widely used options, applicable to most scenarios.
-
Consumer: focused on specific configurations for using the component as a trigger, allowing the consumption of messages or events.
-
Producer: includes parameters aimed at using the component as a connector, to send messages or data to other systems.
-
Advanced: offers more advanced configuration options, with detailed adjustments that can be applied as needed.
-
Health: provides configurations that allow monitoring the component’s health and performance.
-
Security: includes configurations related to security, such as authentication and encryption.
-
Scheduler: covers configurations related to intervals, delays, and cron expressions.
EIPs
EIPs only have the sections Basic and Advanced.
You can only edit simple parameters.
Even though the URI parameter is a simple parameter, it cannot be edited directly in the form.
To change it, go to the Source Code tab and make the modification directly in the script.
|
Share your suggestions with us!
Click here and then [+ Submit idea]