Configuring and Validating the Route
Once you have added steps to the integration, you must configure and validate them.
To do this, open the step configuration form by clicking the three-dot icon in the right corner of the step (More options) and select the Edit option.
Configuring component and EIP parameters
Parameters (also known as options) are the fields in the form that you must fill out to configure each step of the integration. The form can be filled out when adding the step to the canvas or later.
They are organized into "sections" or "tabs" that can be expanded/collapsed, making navigation and configuration easier.
Components
Below are the most common sections:
-
Basic: usually contains information such as the component’s ID and description.
-
Common: gathers the default and most widely used options, applicable to most scenarios.
-
Consumer: focuses on specific configurations for using the component as a trigger, allowing it to consume messages or events.
-
Producer: includes parameters aimed at using the component as a connector to send messages or data to other systems.
-
Advanced: offers more advanced configuration options with detailed adjustments that can be applied as needed.
-
Health: provides configurations that allow monitoring the health and performance of the component.
-
Security: includes configurations related to security, such as authentication and encryption.
-
Scheduler: covers configurations related to intervals, delays, and cron expressions.
Viewing subflows
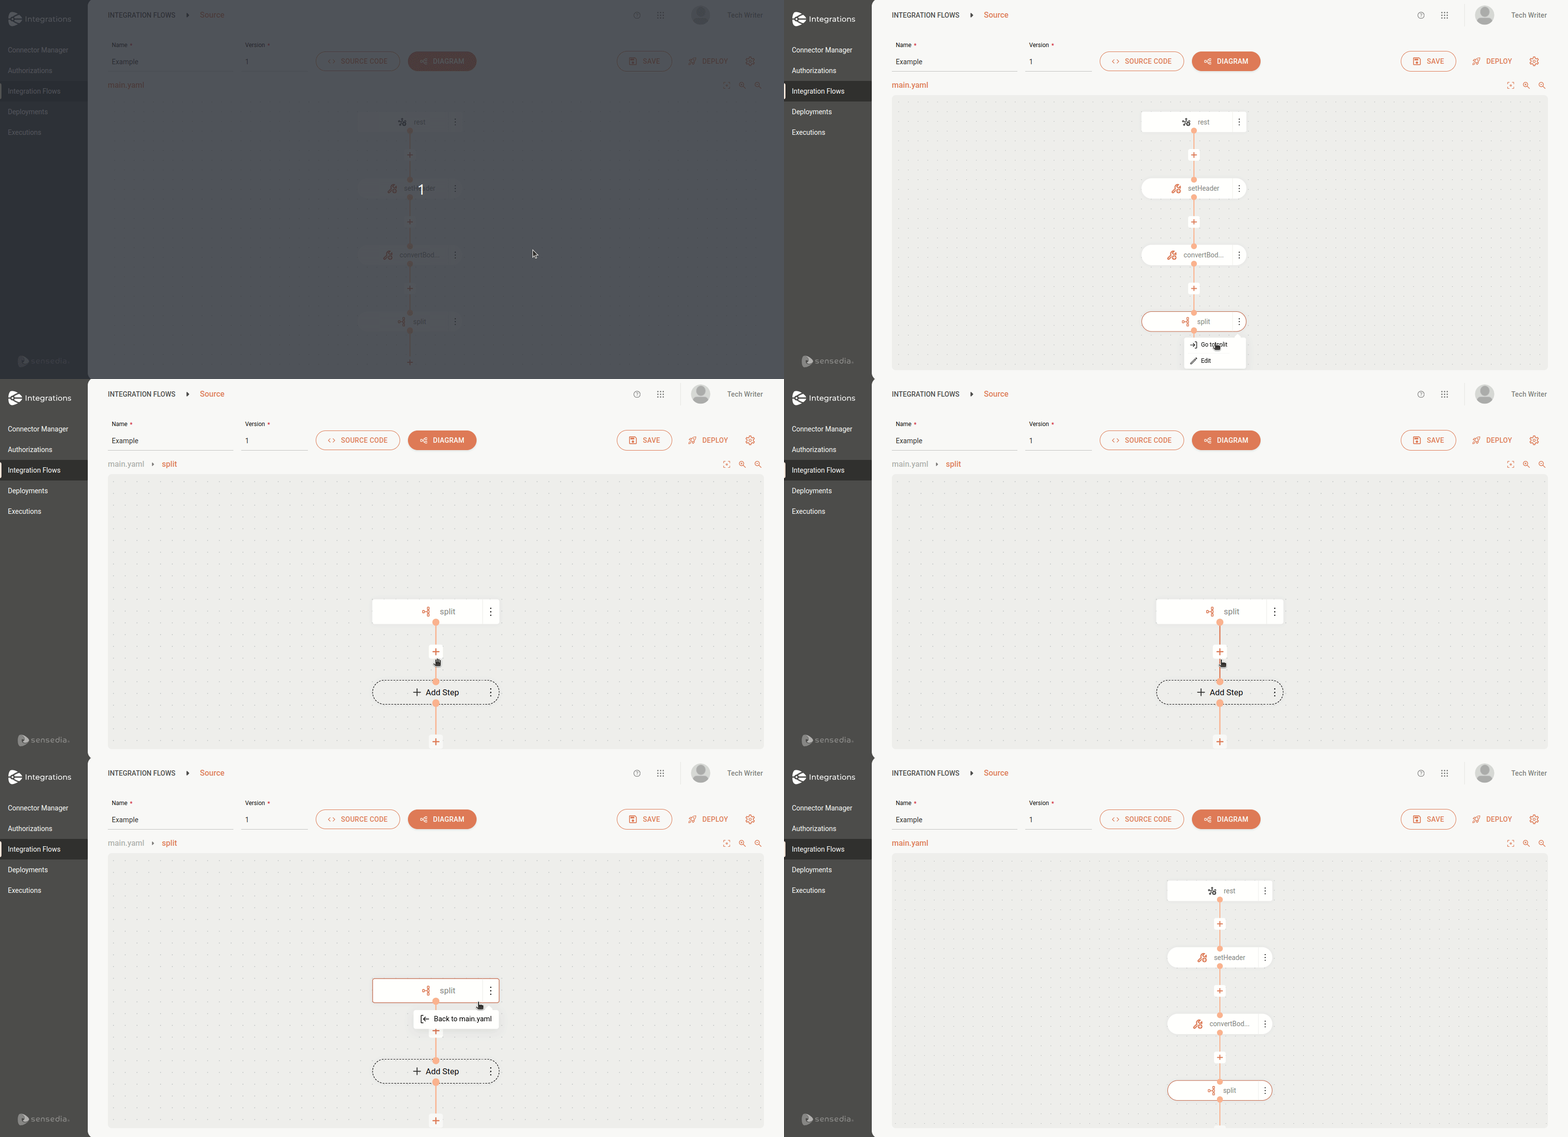
Some EIPs, such as Split, generate subflows.
To access a subflow:
-
Click the three-dot icon in the right corner of the EIP that generated the subflow.
-
Select Go to Split (in the case of the Split EIP).
The first step of the subflow will automatically be populated with the step that initiated the subflow in the main route. In this example, the Split.
Next, you will see the ![]() icon and can continue adding steps just as you would in the main route.
icon and can continue adding steps just as you would in the main route.
The following EIPs have subflows:
The animation below demonstrates how to access a subflow:

| If you delete the first step of the subflow, i.e., the one that originated the subflow in the main route, all steps in the subflow will be automatically removed. |
Validating the route in the Source Code tab
| The validation functionality is only available in the Source Code tab. |
-
 (Full Validation): checks the structure of your script before deploying the integration flow.
Any errors in the flow structure or in the use of components or EIPs will be identified and listed at the bottom of the page under Errors.
Validation only applies to the
 main.yamlfile script. Scripts in resources files are not validated.
Additionally, the main.yaml file will be automatically checked, and inconsistencies will be displayed when clicking the SAVE button in the top-right corner of the screen.
| You can save an integration with inconsistencies, but you will not be able to deploy it until all errors are resolved. |
Share your suggestions with us!
Click here and then [+ Submit idea]