Creating a Release and Deploying an Integration
| The process of deploying integrations now involves creating a release, which is essentially a specific version of your integration flow. This functionality allows you to control and manage different versions of your integrations. Creating a release is mandatory before deploying an integration. |
After completing the creation of your integration flow, you should:
-
Save the integration flow.
-
Create a release.
-
Deploy the release to a specific environment.
Flow Status
The integration goes through three stages before deployment, which can be viewed next to Flow Status above the canvas:
-
Unsaved: the flow has been modified, but it’s not saved.
-
Saved: the flow has been saved, but does not have a release.
-
Released: the flow has been saved and has a release.
| A release is like a snapshot of the integration flow. It cannot be edited after its creation. If you need to make changes, you must create a new release. |
Creating a release
To create a release of the integration flow, follow the steps below:
-
Click RELEASE in the upper-right corner of the screen.
-
Select the Create Release option (if there are unsaved changes in the integration, this option will be disabled).
-
In the modal window that opens, enter the description in the corresponding field. The release number loads automatically.
-
Click CREATE AND DEPLOY to create the release and be redirected to the deployment screen, or click CREATE to only create the release.
Viewing the release history
To view the release history of the integration flow:
-
Click RELEASE in the upper-right corner of the screen.
-
Select the Release History option.
You will see a list of all created releases, including the following information:
-
The version number of the release with an indication of those that are deployed.
-
The name of the user who created the release.
-
The description of the release.
-
The creation date of the release.
In the "Actions" column, you can click the eye icon to view the details of the release or the trash can icon to delete it.
| You can deploy the same release to both Staging and Production environments simultaneously. |
Viewing and restoring a release
To view a release, click . Then click the eye icon in the "Actions" column of the corresponding release row.
When opening a release, the View Only label appears at the top of the screen. This indicates that you are viewing a specific version of the flow in read-only mode and cannot directly change the release.
You can switch between the Diagram and Source Code tabs to explore the release:
Diagram Tab (read-only mode):
-
Configuration forms of the steps with the defined parameters and values.
-
Existing subflows.
-
Direct-type routes.
-
Resources files linked to the flow version.
-
Flow variables and their configurations in that release.
Source Code Tab (read-only mode):
-
Complete integration script in CAMEL YAML DSL format.
-
Associated resources files and variables.
To restore the release, click RESTORE RELEASE.
After restoration, the flow will have the Unsaved status, allowing you to edit the integration again and create a new release.
| If there are unsaved changes in the current flow, they will be lost when restoring the release. |
Deleting a release
To delete a release, click Release History, then on the trash icon in the "Actions" column.
You can only delete releases that are not deployed.
| Deleting an integration flow with releases will remove all releases associated with that flow. You cannot delete releases from flows that have at least one release with a deployment history. |
Deploying an integration
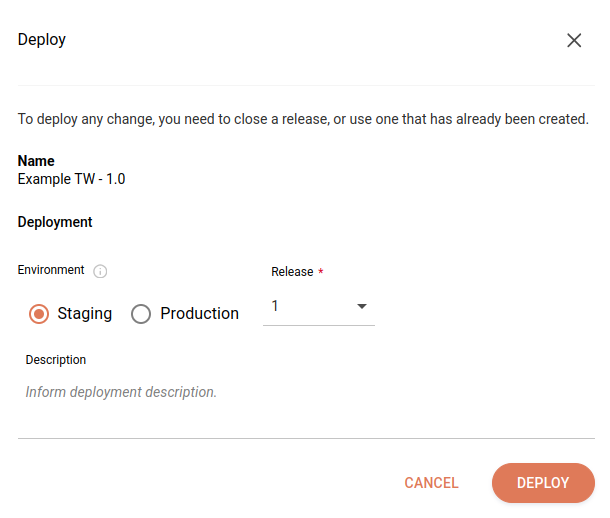
To deploy an integration flow, follow the steps below:
-
Click DEPLOY in the upper-right corner of the screen.
-
Select the deployment environment in the Environment field.
-
Select the release you want to deploy in the Release field.
-
Write a description of the deployment in the Description field. After deployment, the description will be available on the Deployments screen, under the Deployment History item in the Actions column.
-
Click DEPLOY.
| If there are variables in the integration script, their values will be automatically applied according to the selected environment (Staging or Production) during deployment. |

| Check the required permissions to perform each action in Sensedia Integrations. |
Share your suggestions with us!
Click here and then [+ Submit idea]